> ## Documentation Index
> Fetch the complete documentation index at: https://www.spacebring.com/docs/llms.txt
> Use this file to discover all available pages before exploring further.
# Benefits
> Set up a member benefits page to offer exclusive partner discounts, promotions, and perks. Add and manage benefits, benefit categories, and benefit applications, and restrict a benefit to members with exclusive access
Offer discounts and exclusive promotions to your customers with the **Benefits** page.
## Enable Benefits and create categories
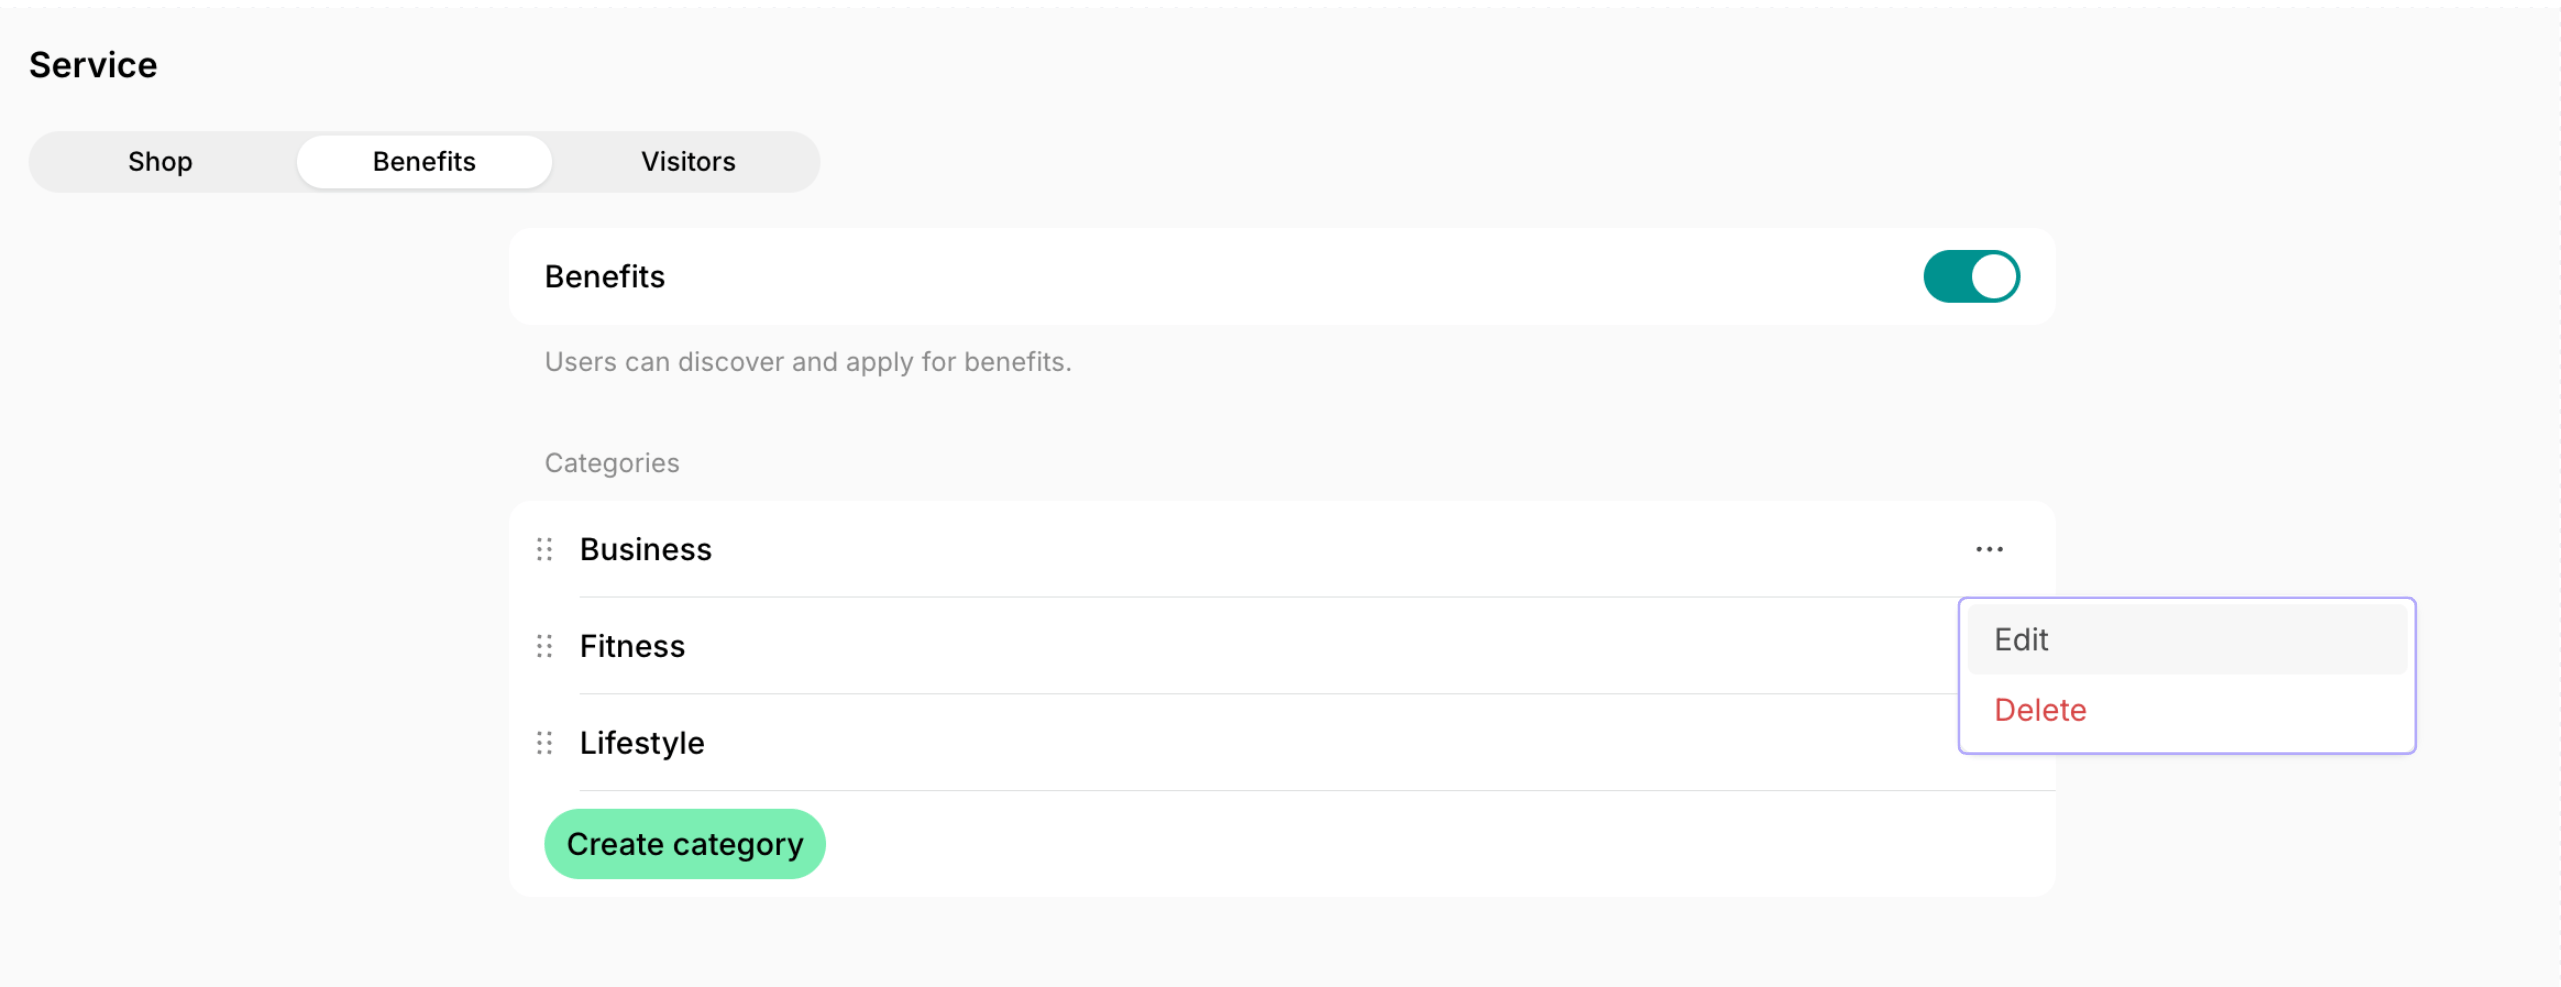
1. Click the menu (…) near the location name on the left-side panel.
2. Go to **Location settings** > **Engagement** > **Benefits**.
3. Enable the “Benefits” switch.
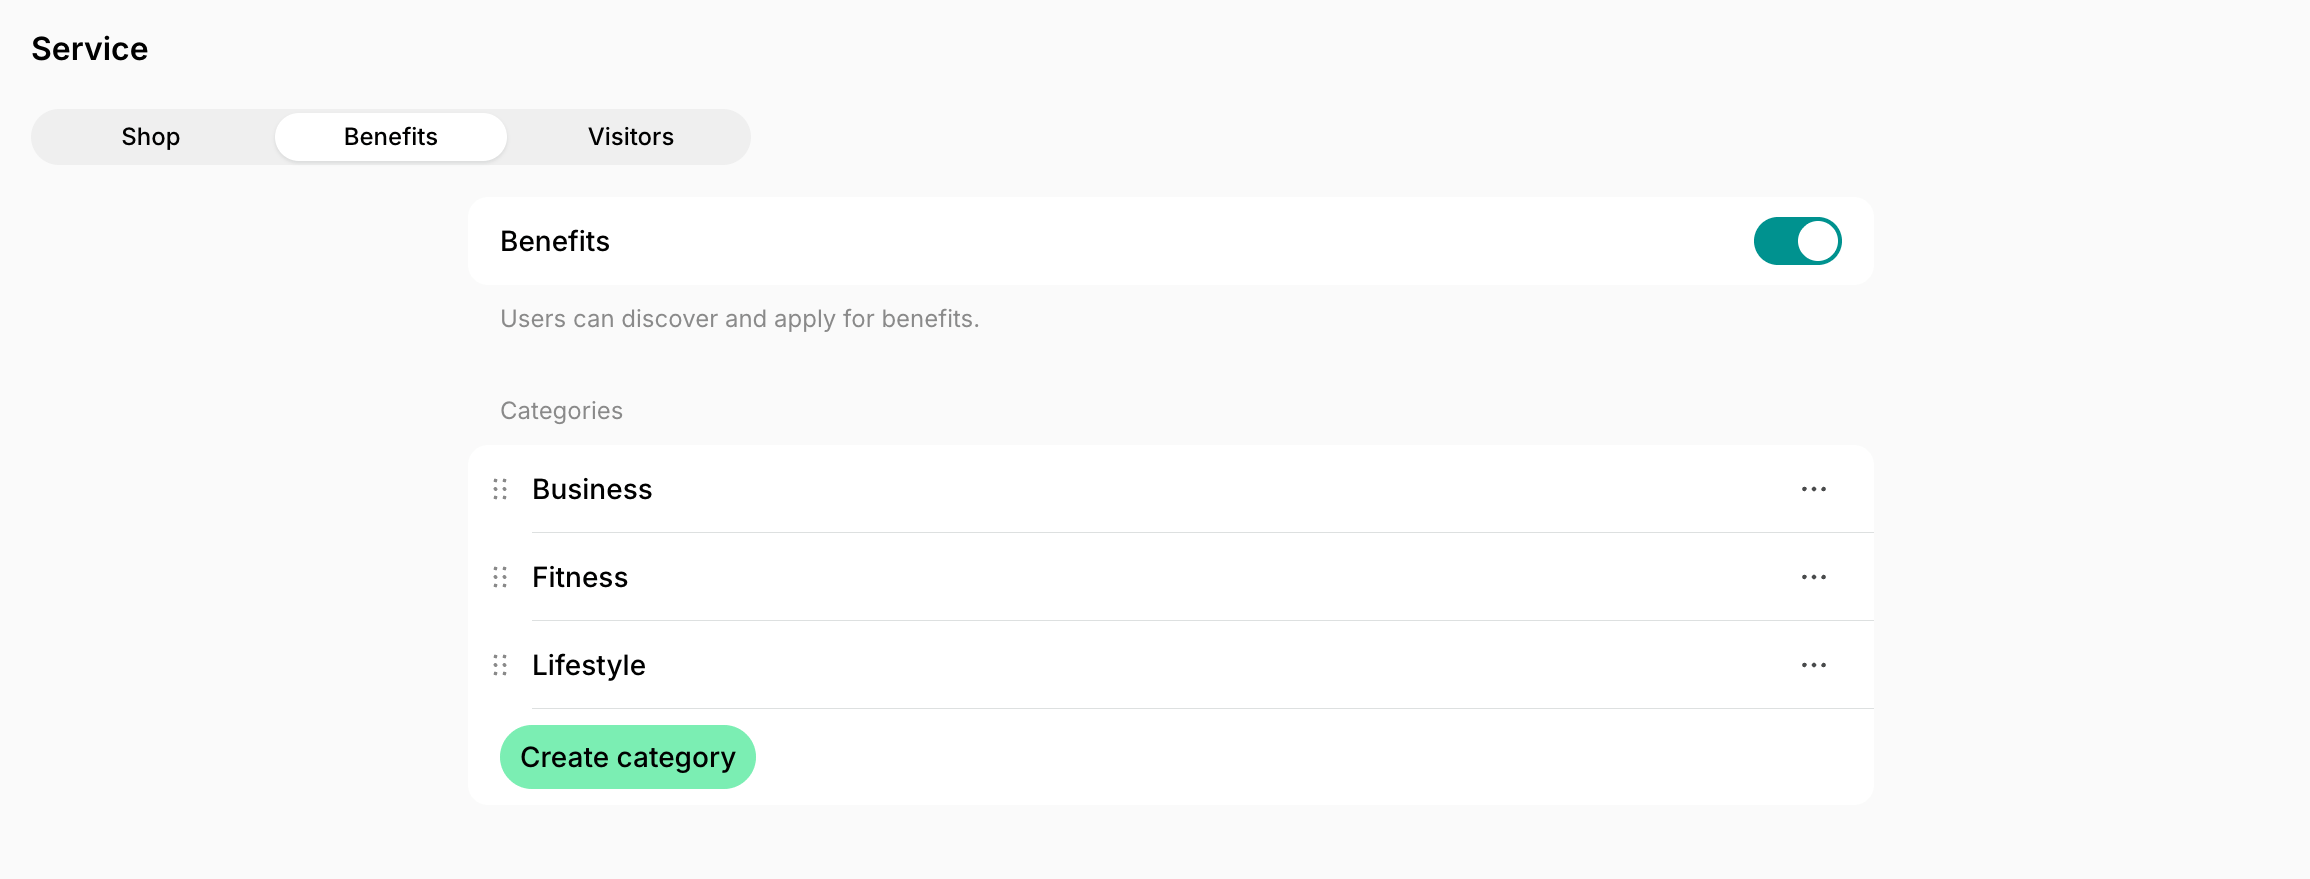
4. Under **Categories**, press **Create category** to group your benefits by type.
5. Enter a title for the category (for example, **Business**, **Fitness**, or **Lifestyle**) and save it.
By default, benefit categories are sorted alphabetically by title. Drag and drop categories to rearrange their order.
## Create a benefit
1. Go to the **Engagement** > **Benefits** page.
2. Press **Add benefit** in the top right corner and configure it:
| Cover photo | One image, 1600 × 800 px (2:1 ratio), up to 5 MB, in JPEG, PNG, or another raster format. |
| - | - |
| Title | The title of the benefit. |
| Subtitle | Summary of the benefit that appears below its title. |
| Description | Details about the benefit for the customers. |
| Category | Select which category the benefit belongs to. |
| Featured | If enabled, the benefit will be prominently pinned at the top of the **Benefits** page. |
| Application | If enabled, your customers will be able to apply for a benefit. |
| Allowance | **Unlimited** lets a customer apply for the benefit as many times as they want. **Once** lets each customer apply only one time. |
| Button label | Customize the call-to-action button by selecting one of the options. |
| Confirmation email | Enable it to send confirmation emails to your customers and [customize the text](/docs/general/customize-emails) of the email. |
| Visibility | Set whether the benefit should be visible to public, network members, location members, members with exclusive access, or only administrators. |
[Bulk create benefits](/docs/ai-agents/create-edit-configure) with the help of Lem AI.
## Restrict a benefit to certain members
Set a benefit's [**Visibility**](/docs/location/visibility) to **Members with exclusive access** to hide it from everyone except the customers you choose. Use this for perks you only want to offer on your higher-tier plans, or for a partner discount with a limited number of places.
The setup works the same way as [exclusive access to resources](/docs/resource-management/resources/exclusive-resource-access):
1. Go to **Engagement** > **Benefits**, open the benefit for editing, and set **Visibility** to **Members with exclusive access**.
2. Grant access to all members on a plan: [edit the plan](/docs/catalog/plans#edit-or-delete-a-plan) or [resource plan](/docs/resource-management/set-up-pricing#resource-plan-settings) and select the benefit in the **Exclusive access** section > **Exclusive benefits** field. Every customer who subscribes to this plan receives access.
3. Grant access to an individual member: [edit the customer's subscription](/docs/billing/subscriptions/edit) > open a subscription item > select the benefit in the **Exclusive access** section > **Exclusive benefits** field.
Customers with exclusive access see the benefit and can apply for it as soon as their subscription item starts. Other customers do not see the benefit and cannot apply for it.
## How benefits work
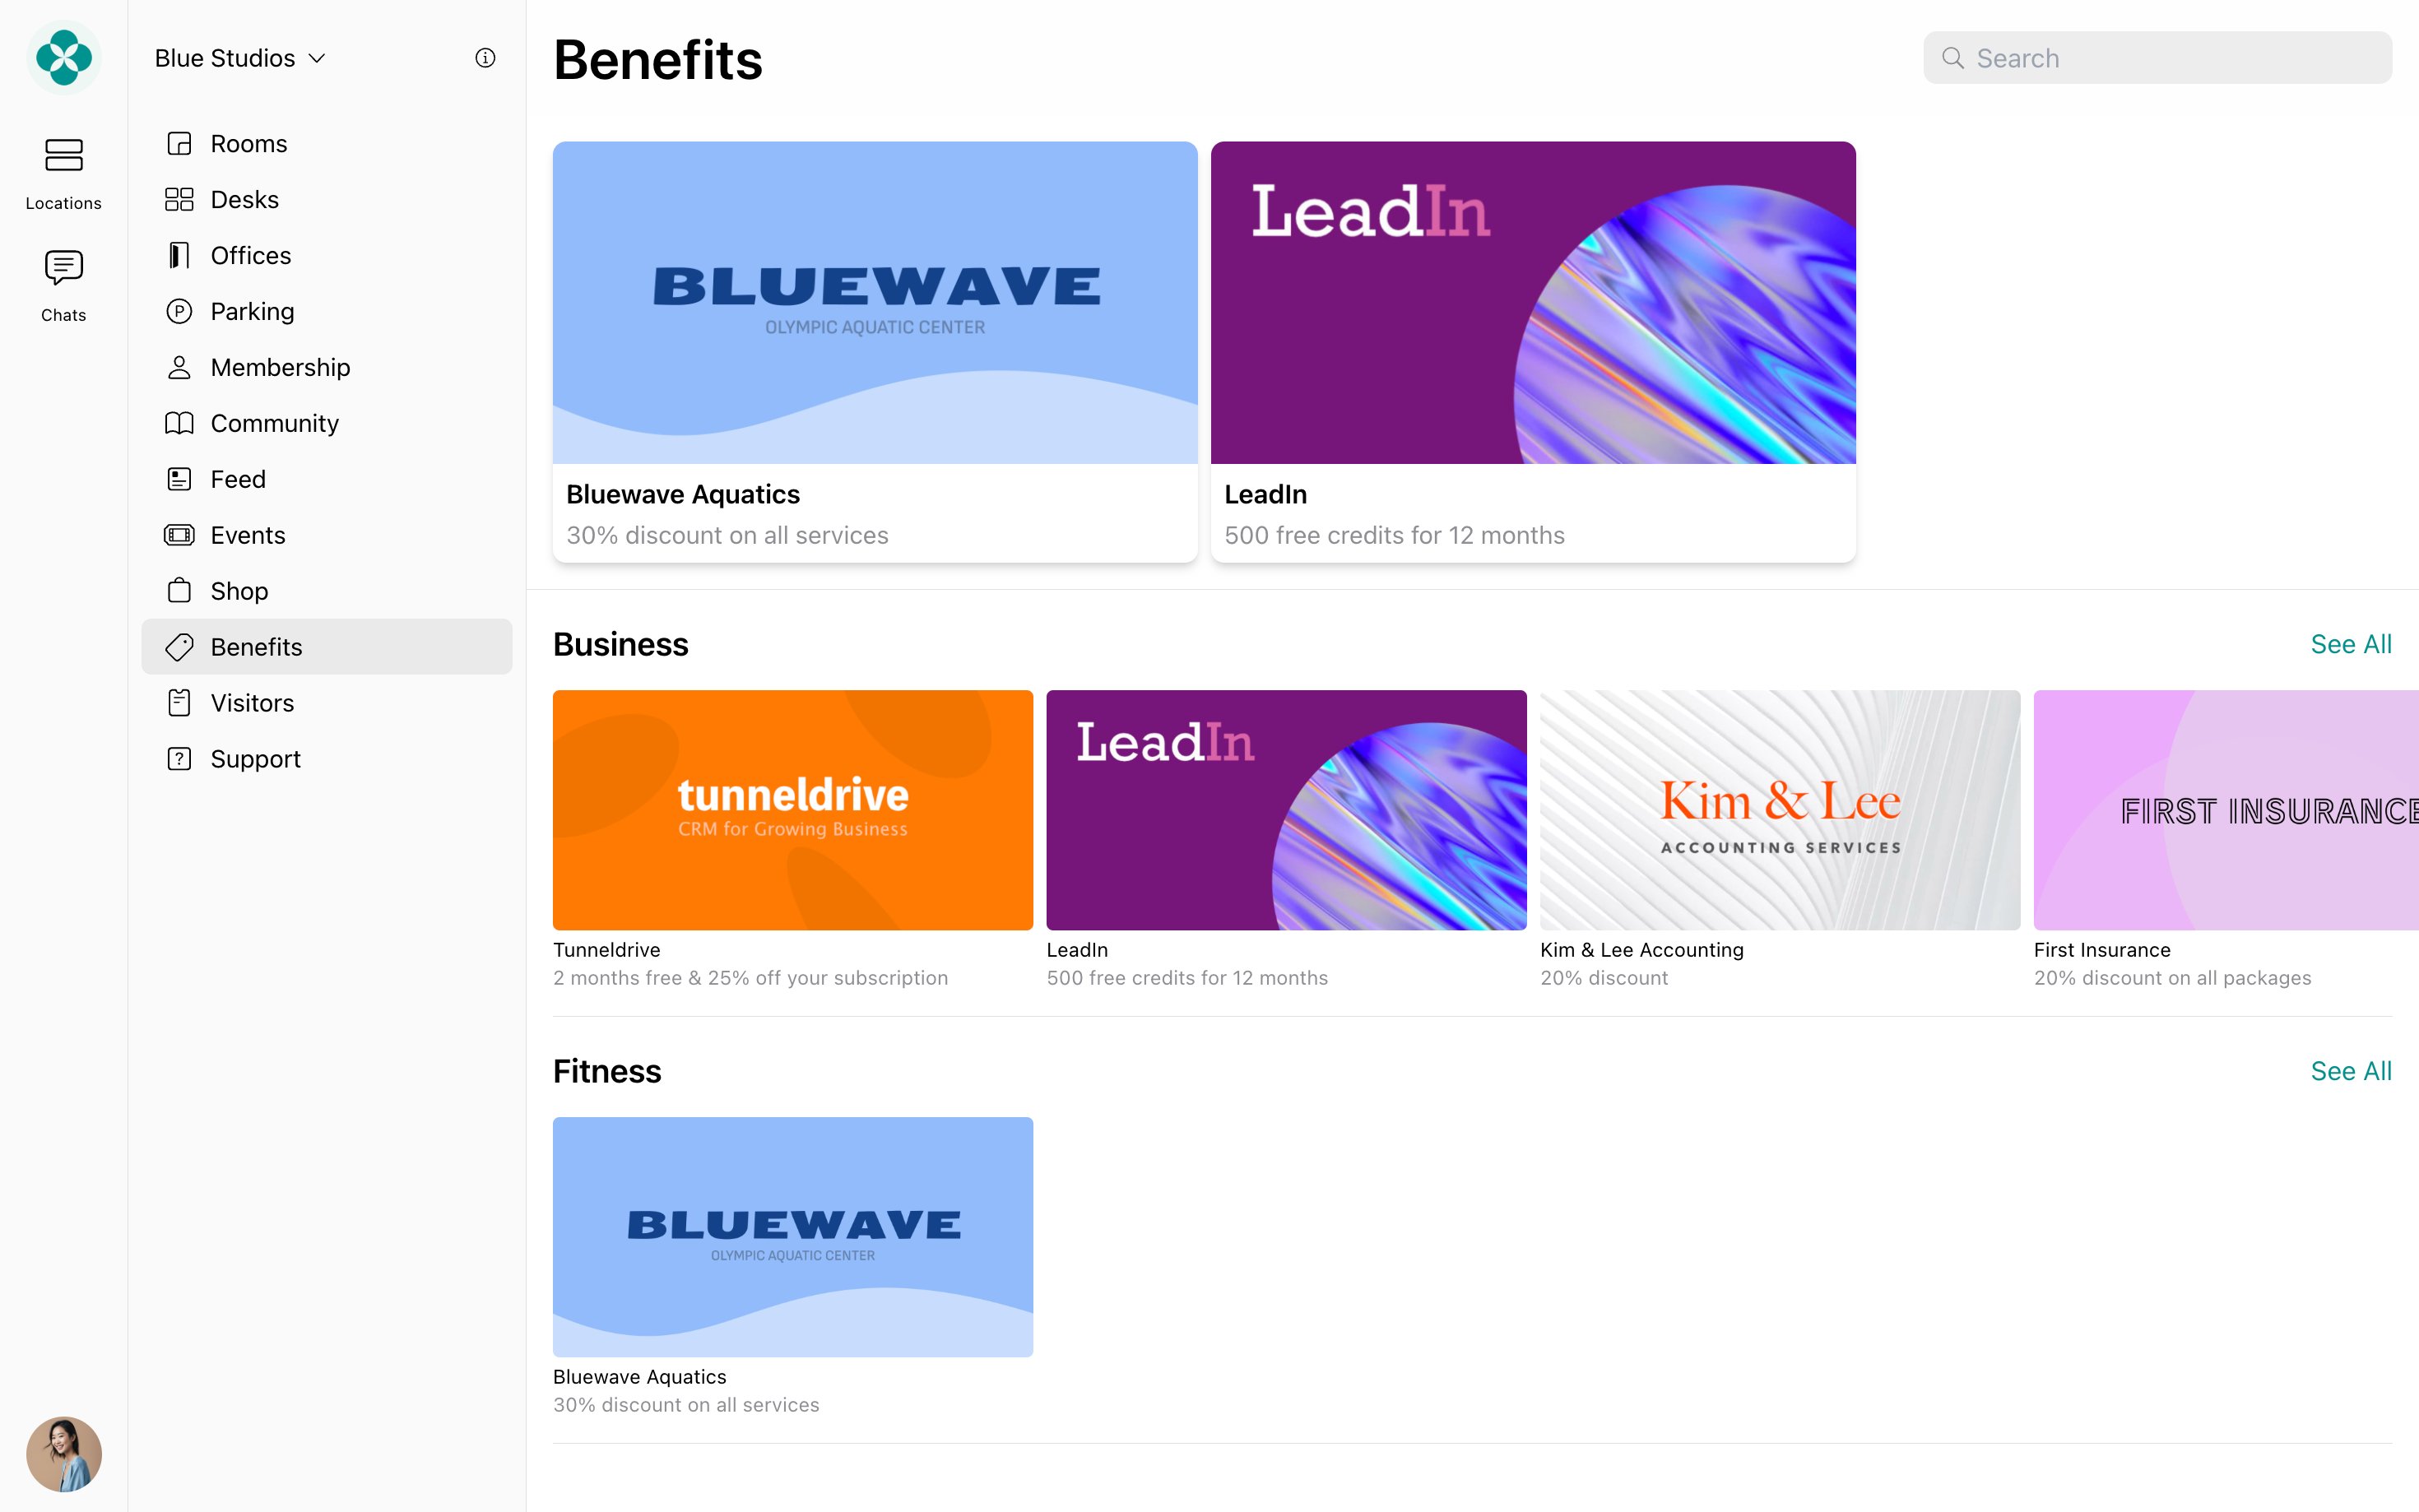
* Customers can explore and apply for benefits on the **Benefits** page. Understand [how users apply for benefits.](/docs/member/benefits)
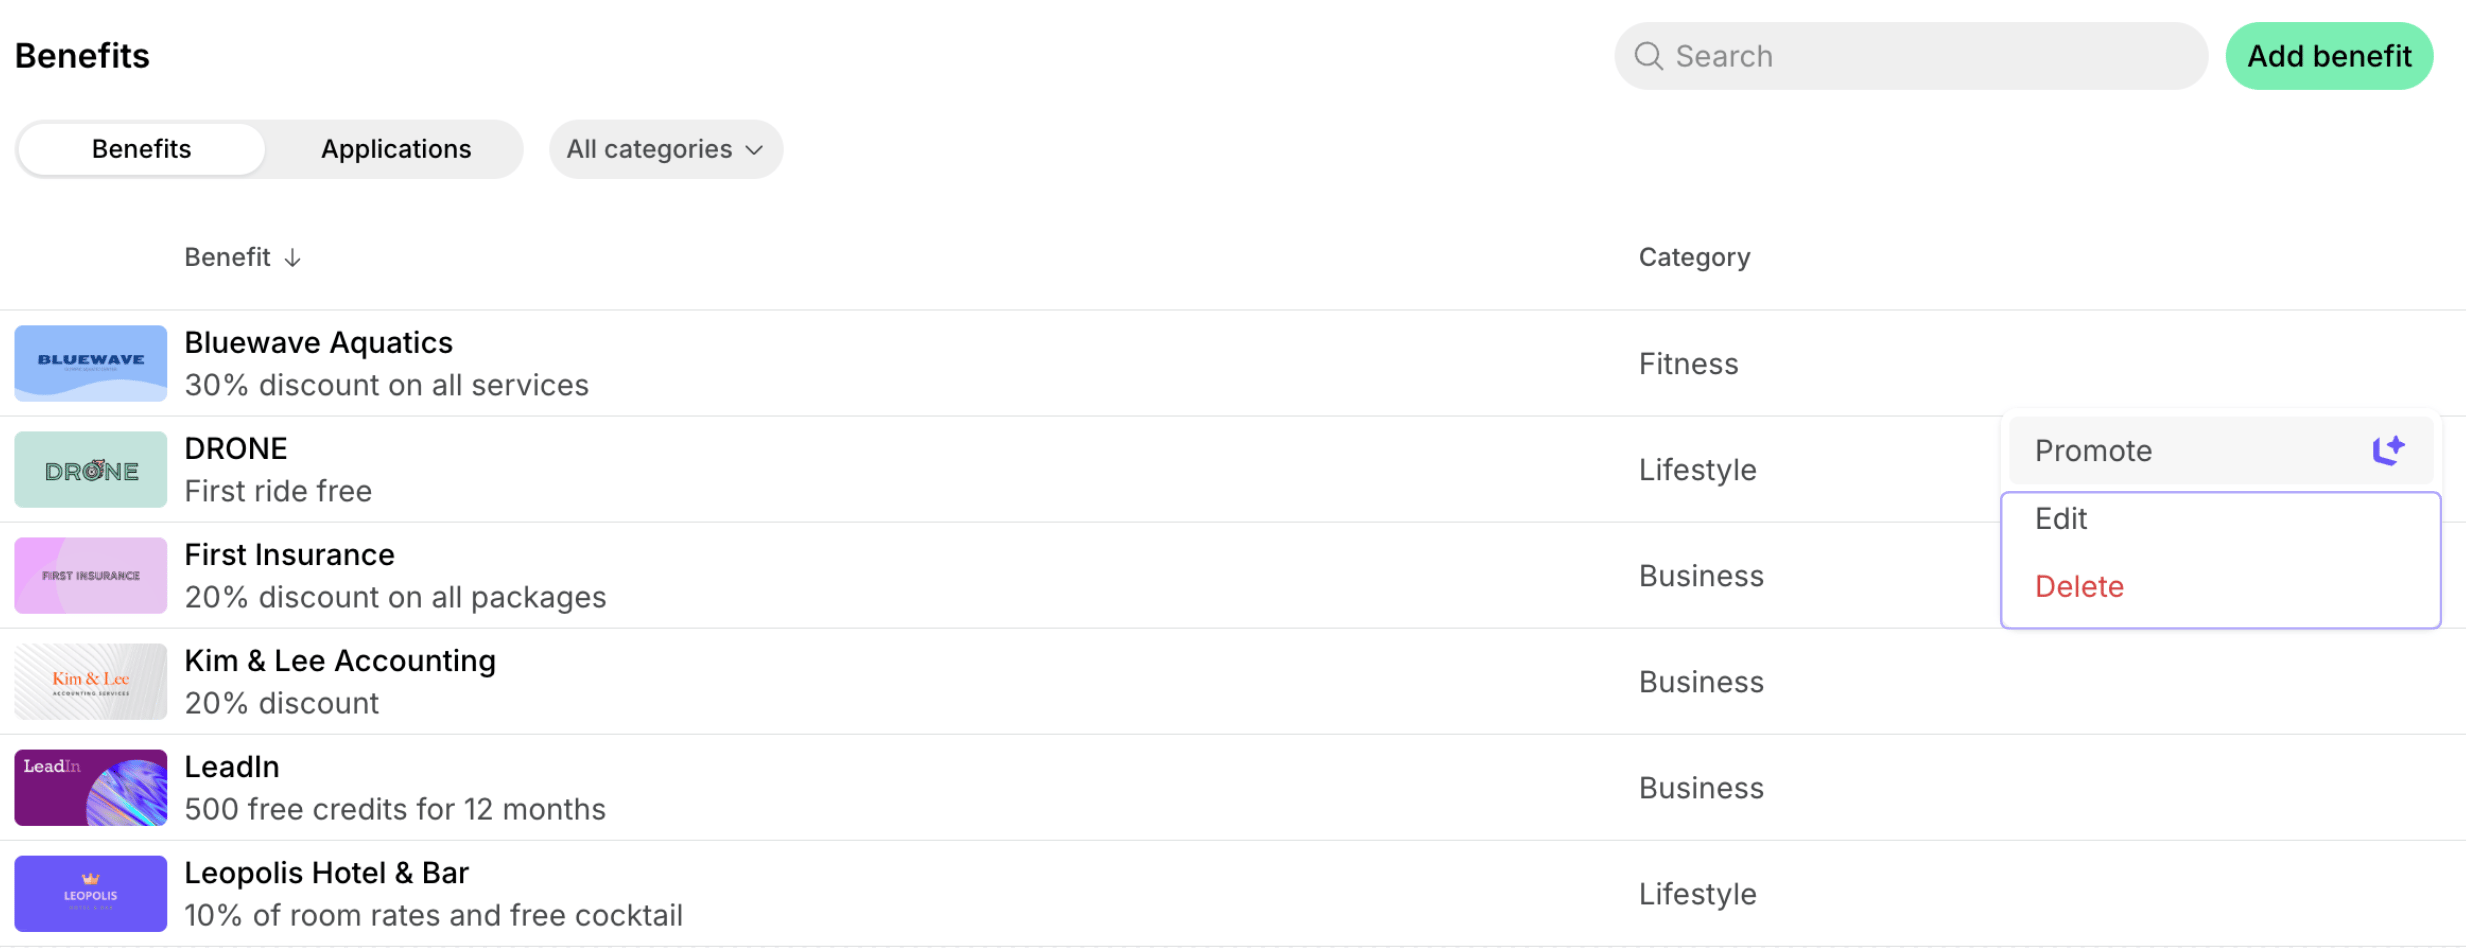
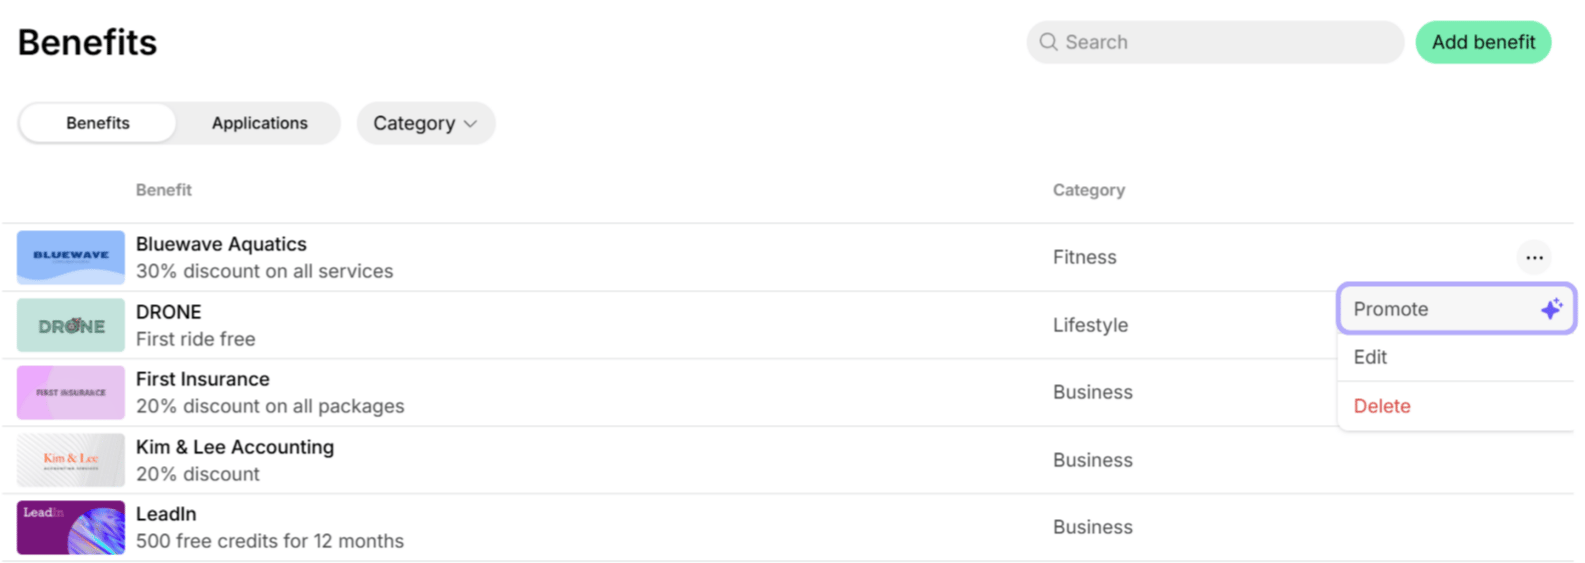
* Use the **Promote** feature to create a feed post about the benefit and attract more customer attention to it. This is a great way to announce a new member benefit or bring attention back to an existing one.
### Export a benefits report
On the **Benefits** page, apply the necessary filters, then click **(...)** in the top right corner > **Export benefits** > **CSV** or **XLSX** to download a report on the filtered benefits.
The report includes each benefit's title, subtitle, description, category, and create date.
## Track benefit applications
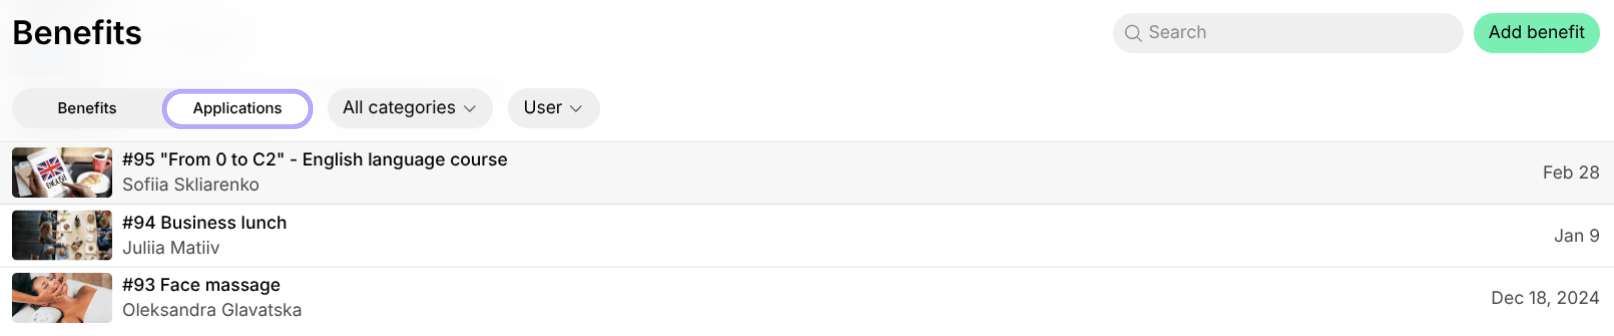
View all benefit applications on the **Engagement** > **Benefits** > **Applications** panel. Applications are sorted from newest to oldest, and each has a sequence number (#1, #2, etc.). For every application, you can see the benefit title, sequence number, date and time, and the applicant's name.
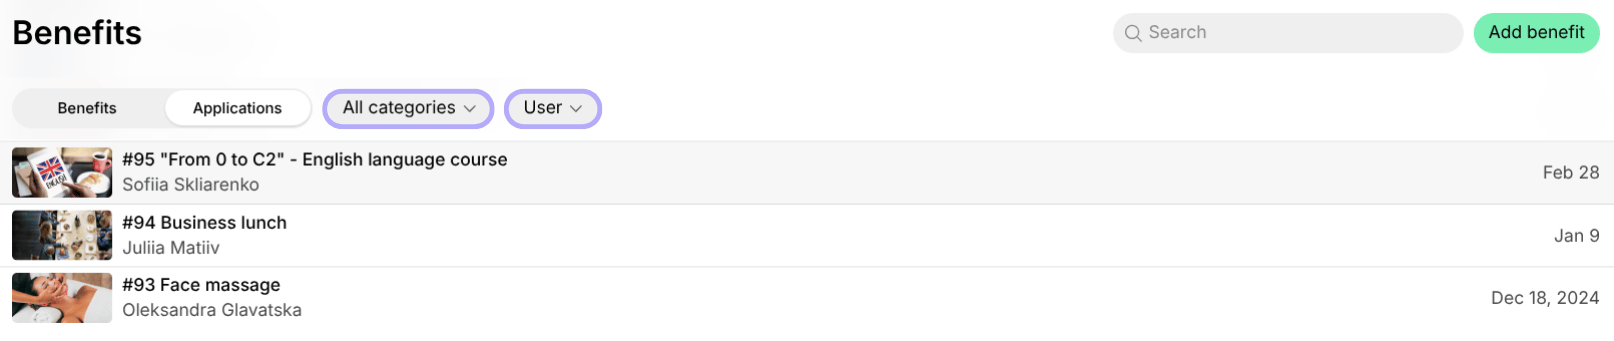
Click **Add filter** and pick a property:
* Filter by **Category** to see applications for benefits in a specific [category](/docs/engagement/benefits).
* Filter by **Benefit** to see applications for a specific benefit.
* Filter by **User** (applicant) to see all applications from a specific customer.
* Filter by **Create date** to see applications submitted in a ready-made period, such as **Today** or **Last 28 days**, or click **Custom** to set an exact date or range.
To follow up on an application, click it > press the applicant > **Chat** to message them directly.
[Configure the notifications](/docs/account/notifications) in the app to instantly receive notifications about new benefit applications.
### Export a benefit applications report
On the **Applications** panel, apply the necessary filters, then click **(...)** in the top right corner > **Export applications** > **CSV** or **XLSX** to download a report on the filtered applications.
The report includes each application's sequence number and create date, the benefit it was submitted for, any comment left, and the applicant's contact details.
## Edit or delete a benefit
1. Go to **Engagement** > **Benefits**.
2. Hover over the benefit > press the menu (…) next to it > **Edit** or **Delete**.
Deleting a benefit is irreversible and can not be undone.
To delete several benefits at once, select their checkboxes, then press **Delete** at the bottom of the page. To quickly select several or all items in a long list, select a checkbox, then hold **Shift** and select another checkbox to select every row between them.
## Edit or delete a benefit category
1. Go to **Location settings** > **Engagement** > **Benefits**.
2. Press the menu (…) next to the necessary category > **Edit** or **Delete**.
Deleting a benefit category is irreversible and can not be undone. All benefits from the selected category will be deleted automatically.
## FAQs
The visibility of your **Benefits** page is directly controlled by the visibility settings of the individual benefits themselves. If the visibility of all your benefits is set to "Administrators," only administrators will see them in Spacebring. It won't be visible to anyone in the member web portal.
To check and update benefit visibility, follow [these steps](/docs/engagement/benefits#edit-or-delete-a-benefit).
This documentation is built and hosted on [Mintlify](https://mintlify.com), a developer documentation platform.
 ## Create a benefit
1. Go to the **Engagement** > **Benefits** page.
2. Press **Add benefit** in the top right corner and configure it:
| Cover photo | One image, 1600 × 800 px (2:1 ratio), up to 5 MB, in JPEG, PNG, or another raster format. |
| - | - |
| Title | The title of the benefit. |
| Subtitle | Summary of the benefit that appears below its title. |
| Description | Details about the benefit for the customers. |
| Category | Select which category the benefit belongs to. |
| Featured | If enabled, the benefit will be prominently pinned at the top of the **Benefits** page. |
| Application | If enabled, your customers will be able to apply for a benefit. |
| Allowance | **Unlimited** lets a customer apply for the benefit as many times as they want. **Once** lets each customer apply only one time. |
| Button label | Customize the call-to-action button by selecting one of the options. |
| Confirmation email | Enable it to send confirmation emails to your customers and [customize the text](/docs/general/customize-emails) of the email. |
| Visibility | Set whether the benefit should be visible to public, network members, location members, members with exclusive access, or only administrators. |
## Create a benefit
1. Go to the **Engagement** > **Benefits** page.
2. Press **Add benefit** in the top right corner and configure it:
| Cover photo | One image, 1600 × 800 px (2:1 ratio), up to 5 MB, in JPEG, PNG, or another raster format. |
| - | - |
| Title | The title of the benefit. |
| Subtitle | Summary of the benefit that appears below its title. |
| Description | Details about the benefit for the customers. |
| Category | Select which category the benefit belongs to. |
| Featured | If enabled, the benefit will be prominently pinned at the top of the **Benefits** page. |
| Application | If enabled, your customers will be able to apply for a benefit. |
| Allowance | **Unlimited** lets a customer apply for the benefit as many times as they want. **Once** lets each customer apply only one time. |
| Button label | Customize the call-to-action button by selecting one of the options. |
| Confirmation email | Enable it to send confirmation emails to your customers and [customize the text](/docs/general/customize-emails) of the email. |
| Visibility | Set whether the benefit should be visible to public, network members, location members, members with exclusive access, or only administrators. |
 * Use the **Promote** feature to create a feed post about the benefit and attract more customer attention to it. This is a great way to announce a new member benefit or bring attention back to an existing one.
 ### Export a benefits report
On the **Benefits** page, apply the necessary filters, then click **(...)** in the top right corner > **Export benefits** > **CSV** or **XLSX** to download a report on the filtered benefits.
### Export a benefits report
On the **Benefits** page, apply the necessary filters, then click **(...)** in the top right corner > **Export benefits** > **CSV** or **XLSX** to download a report on the filtered benefits.
 The report includes each benefit's title, subtitle, description, category, and create date.
## Track benefit applications
View all benefit applications on the **Engagement** > **Benefits** > **Applications** panel. Applications are sorted from newest to oldest, and each has a sequence number (#1, #2, etc.). For every application, you can see the benefit title, sequence number, date and time, and the applicant's name.
The report includes each benefit's title, subtitle, description, category, and create date.
## Track benefit applications
View all benefit applications on the **Engagement** > **Benefits** > **Applications** panel. Applications are sorted from newest to oldest, and each has a sequence number (#1, #2, etc.). For every application, you can see the benefit title, sequence number, date and time, and the applicant's name.
 Click **Add filter** and pick a property:
* Filter by **Category** to see applications for benefits in a specific [category](/docs/engagement/benefits).
* Filter by **Benefit** to see applications for a specific benefit.
* Filter by **User** (applicant) to see all applications from a specific customer.
* Filter by **Create date** to see applications submitted in a ready-made period, such as **Today** or **Last 28 days**, or click **Custom** to set an exact date or range.
Click **Add filter** and pick a property:
* Filter by **Category** to see applications for benefits in a specific [category](/docs/engagement/benefits).
* Filter by **Benefit** to see applications for a specific benefit.
* Filter by **User** (applicant) to see all applications from a specific customer.
* Filter by **Create date** to see applications submitted in a ready-made period, such as **Today** or **Last 28 days**, or click **Custom** to set an exact date or range.
 To follow up on an application, click it > press the applicant > **Chat** to message them directly.
 The report includes each application's sequence number and create date, the benefit it was submitted for, any comment left, and the applicant's contact details.
## Edit or delete a benefit
1. Go to **Engagement** > **Benefits**.
2. Hover over the benefit > press the menu (…) next to it > **Edit** or **Delete**.
The report includes each application's sequence number and create date, the benefit it was submitted for, any comment left, and the applicant's contact details.
## Edit or delete a benefit
1. Go to **Engagement** > **Benefits**.
2. Hover over the benefit > press the menu (…) next to it > **Edit** or **Delete**.