> ## Documentation Index
> Fetch the complete documentation index at: https://www.spacebring.com/docs/llms.txt
> Use this file to discover all available pages before exploring further.
# Organize your plans
> Learn how to set up all your plans, from hot desk plans, flex memberships with day passes, and virtual office plans to dedicated desk and private office rentals
You may offer many different plans: a hot desk plan, a flex membership with 10 days per month, a dedicated desk, a private office, a virtual office. Spacebring differentiates two types of plans:
* General access plans, without a rental of a specific resource
* Plans with a rental of a specific resource, such as a dedicated desk or a private office
## Set up plans without a resource rental
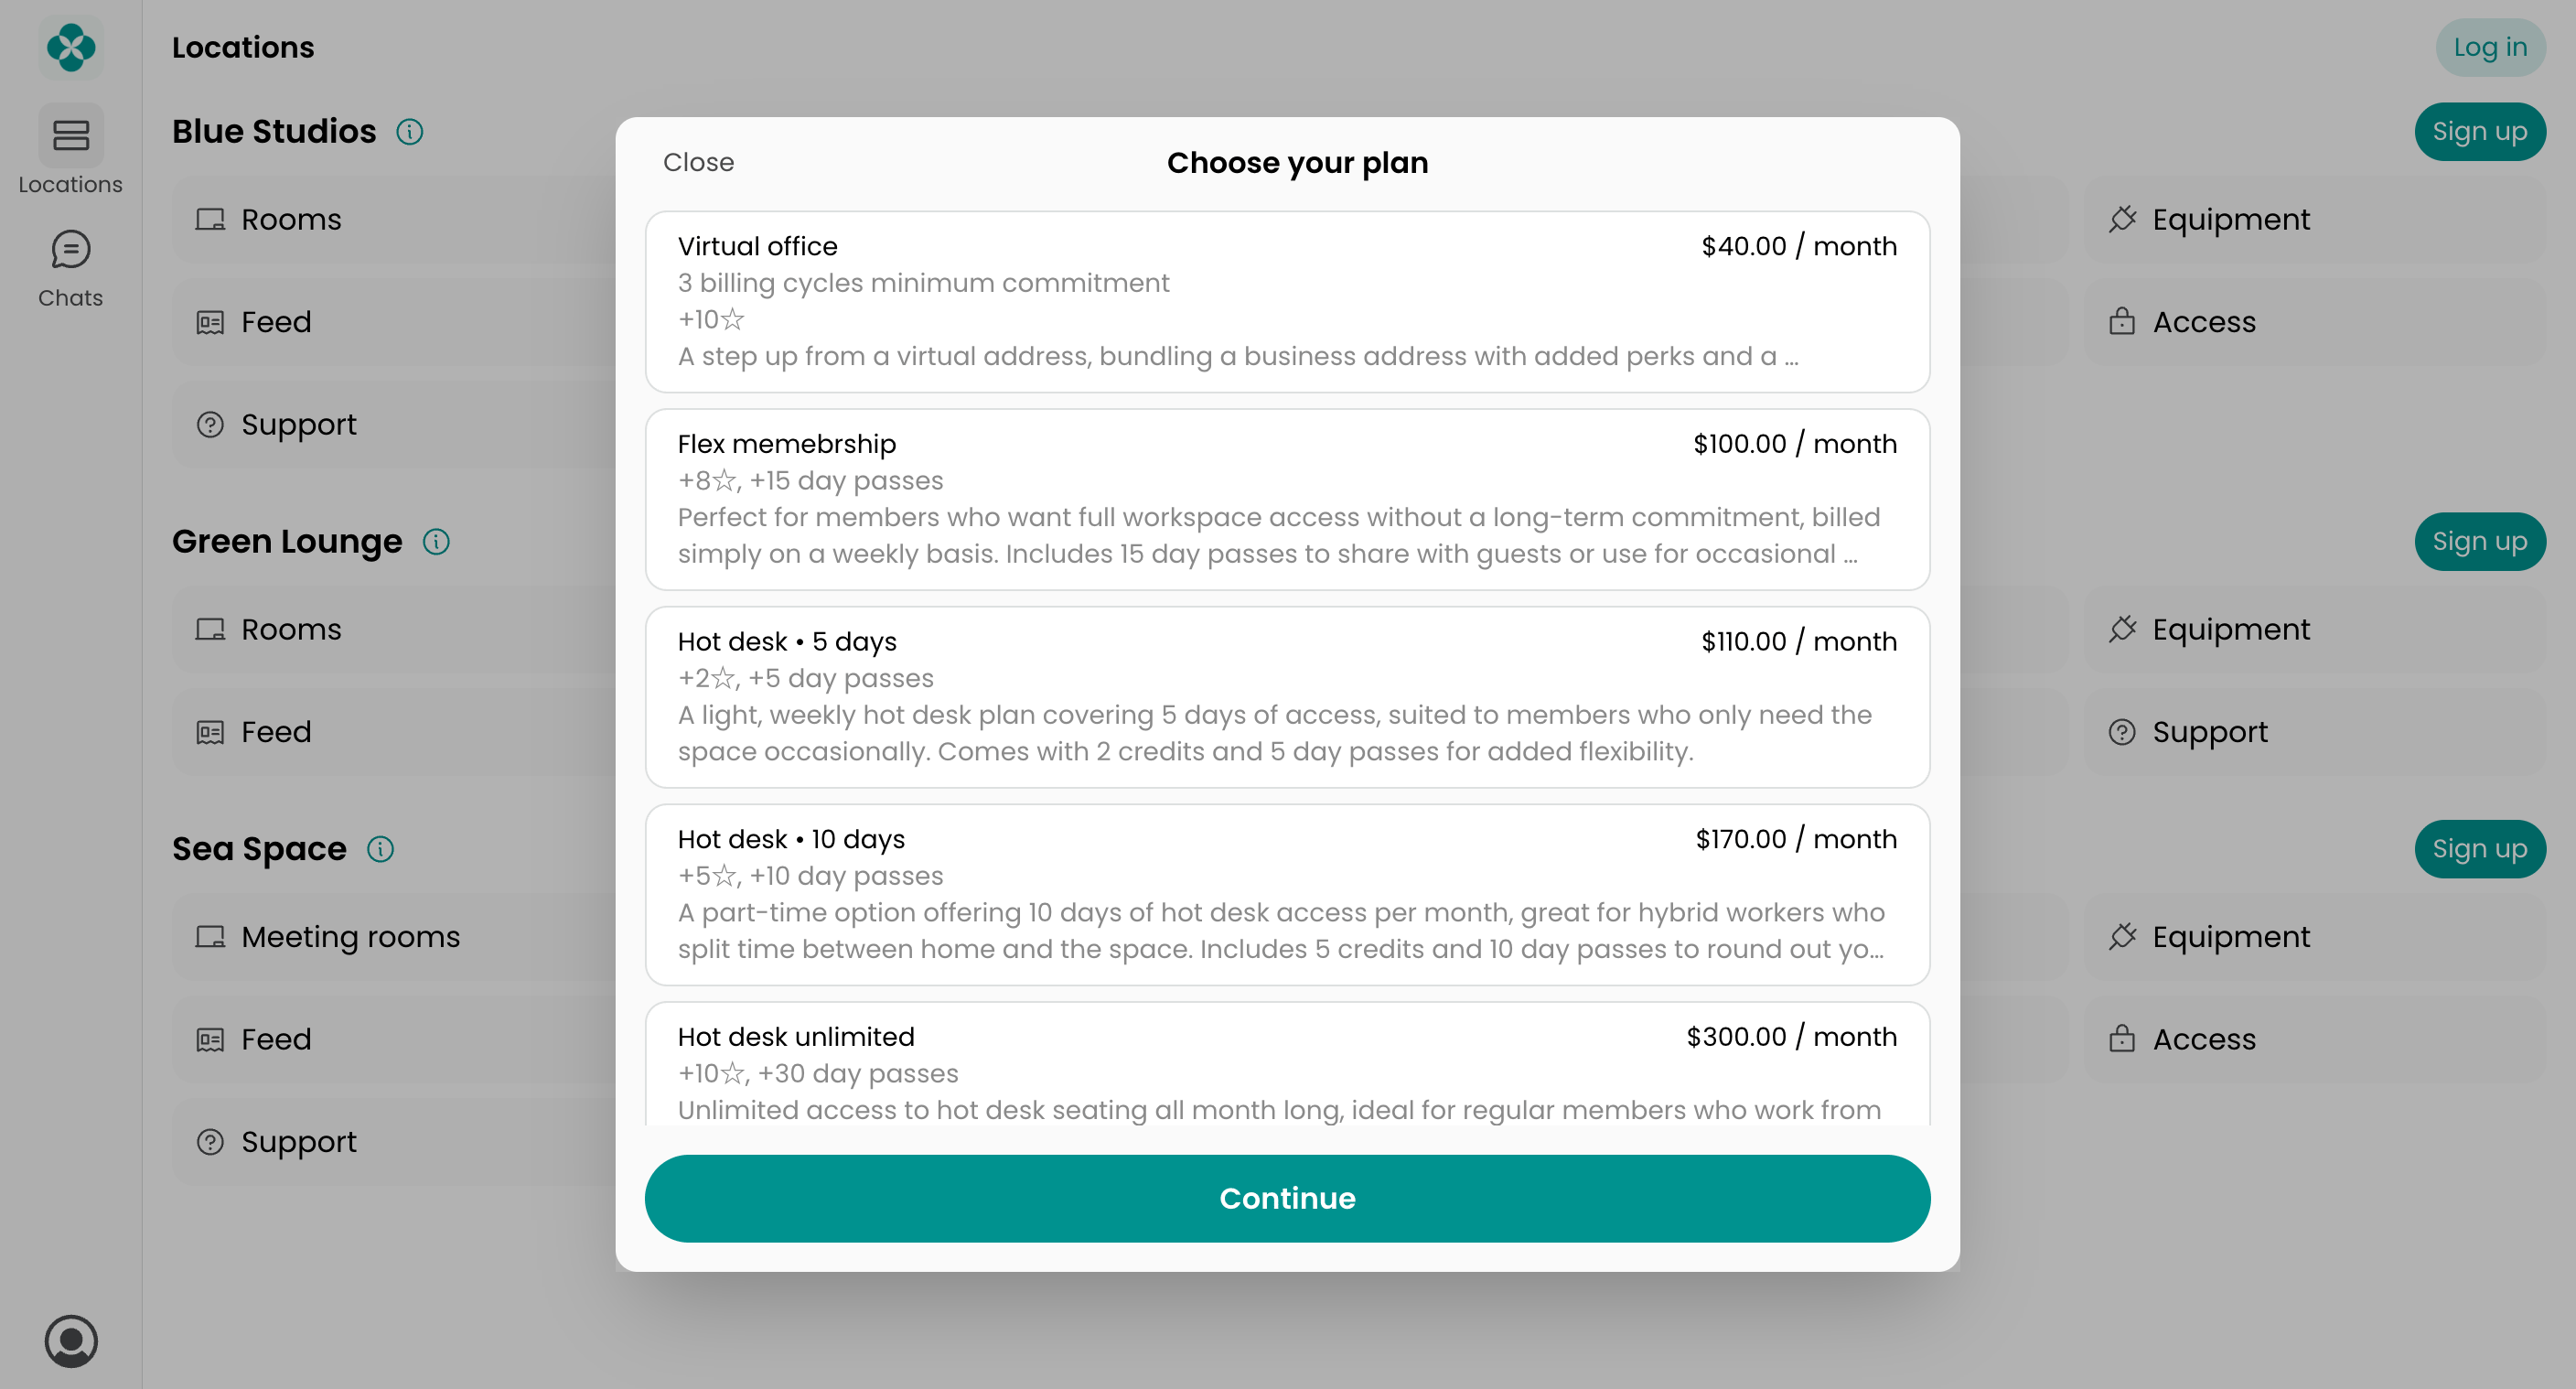
Plans that give customers a membership or general access to your space, but not a rental of a specific room, desk, or office, are configured under **Billing** > **Plans**. For example:
* Hot desk plans for any cycle — a week, a month, a year
* Flex memberships with day passes, for example 10 days per month
* Virtual office and business address plans
1. Go to **Billing** > **Plans**, click **Create plan**, and fill in the [plan settings](/docs/billing/plans#plan-configuration).
2. Under **Sign-up**, choose whether customers can subscribe immediately or can apply for a subscription.
3. Tap **Save**.
Customers click **Sign up** on the main page of the member web portal or mobile app to [see available plans and subscribe](/docs/billing/plans/immediate-sign-ups#how-users-sign-up-for-plans). Members who get day passes or credits then book a seat or a room themselves and pay with their allowance.
 ## Set up plans with a resource rental
These are plans that give the customer their own space, such as a dedicated desk or a private office. They are created inside the resource itself and are called resource plans.
1. Go to **Resources** > [**Rooms**](/docs/resource-management#rooms), [**Desks**](/docs/resource-management#desks), [**Offices**](/docs/resource-management#offices), [**Parking**](/docs/resource-management#parking), or [**Equipment**](/docs/resource-management#equipment).
2. Add a resource, for example a desk or an office, with its capacity — the number of seats, spaces, or items it has.
3. Open it and enable the **Plans** switch.
4. Click **Add tier** and fill in [its settings](/docs/resource-management/set-up-pricing#resource-plan-settings).
5. Under **Sign-up** > **Type**, choose whether customers can rent immediately or can apply to rent.
6. Repeat for every rental option you offer, and for options with a different commitment period or conditions.
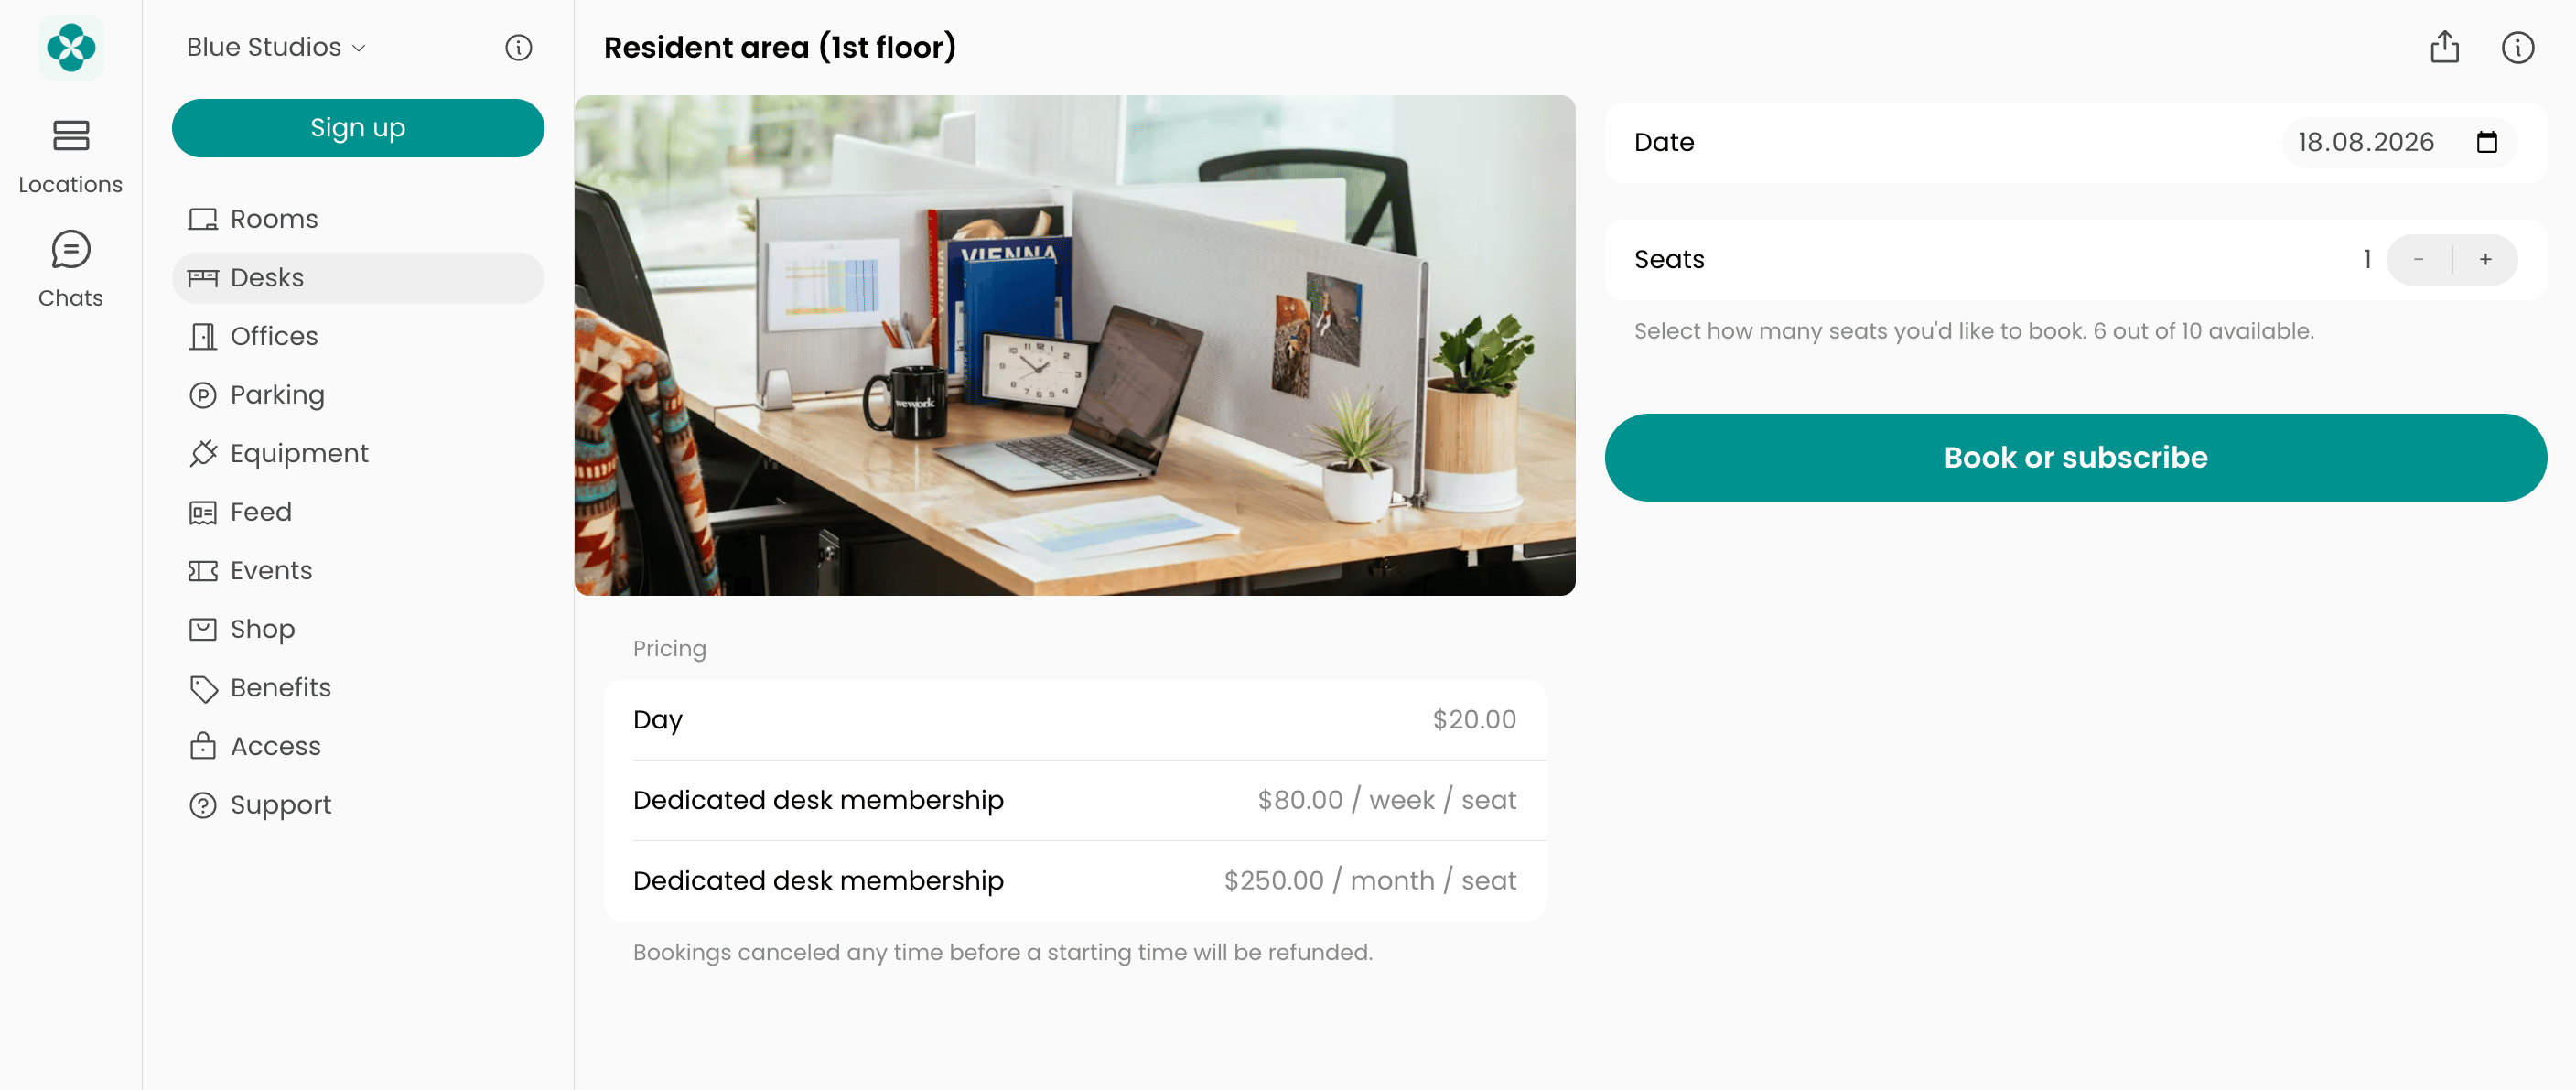
Customers find the resource on its page and [click **Subscribe**](/docs/resource-management/rentals/rental-applications-or-immediate-sign-ups#how-immediate-sign-ups-work). The resource is then assigned to them: a rental of the entire resource makes it unavailable to everyone else, while a rental of one seat reduces the available seat quantity.
## Set up plans with a resource rental
These are plans that give the customer their own space, such as a dedicated desk or a private office. They are created inside the resource itself and are called resource plans.
1. Go to **Resources** > [**Rooms**](/docs/resource-management#rooms), [**Desks**](/docs/resource-management#desks), [**Offices**](/docs/resource-management#offices), [**Parking**](/docs/resource-management#parking), or [**Equipment**](/docs/resource-management#equipment).
2. Add a resource, for example a desk or an office, with its capacity — the number of seats, spaces, or items it has.
3. Open it and enable the **Plans** switch.
4. Click **Add tier** and fill in [its settings](/docs/resource-management/set-up-pricing#resource-plan-settings).
5. Under **Sign-up** > **Type**, choose whether customers can rent immediately or can apply to rent.
6. Repeat for every rental option you offer, and for options with a different commitment period or conditions.
Customers find the resource on its page and [click **Subscribe**](/docs/resource-management/rentals/rental-applications-or-immediate-sign-ups#how-immediate-sign-ups-work). The resource is then assigned to them: a rental of the entire resource makes it unavailable to everyone else, while a rental of one seat reduces the available seat quantity.
 Don't add the same rental as a plan under **Billing** > **Plans**. A plan created there assigns nothing, so a customer who subscribes to it leaves the desk or office available for others to book, and your capacity and occupancy stop matching reality.
Add each desk separately (**Desk 1**, **Desk 2**) if you want customers to rent a specific seat, or as a zone with a seat count to rent any seat in it. [Compare both setup options](/docs/resource-management#desk-setup-options)
## FAQs
Look at what the customer gets. If the plan gives them a specific desk or office that nobody else can use, create it inside that resource. If it gives general or partial access to your space, with no specific desk or office attached, create it under **Billing** > **Plans**.
What differs is what happens when a customer subscribes. A resource plan [assigns](/docs/resource-management/rentals/assignments) the seat or the entire resource to them and updates its availability, so you can see the rental dates, keep others from booking it, and track capacity and occupancy. A plan under **Billing** > **Plans** assigns nothing, so your space stays open to everyone.
You can still create a hot desk plan inside your hot desk resource if you want that tracking. For example, set up a full-time hot desk plan as a resource plan so every subscriber gets one seat assigned and counted in your [occupancy](/docs/analytics/track-occupancy).
These aren't plans. Set them up under **Resources** > **Desks**: add a hot desk resource, enable its **Money** switch, and add a tier for each rate you charge — for example, one rate up to 5 hours and a lower one from 5 hours. A day pass is a daily booking in the same hot desk zone, so it's priced there too.
Rooms, parking lots, and equipment are priced the same way on their own pages. [Set up pricing for bookings](/docs/resource-management/set-up-pricing#set-up-pricing-for-bookings)
Don't add the same rental as a plan under **Billing** > **Plans**. A plan created there assigns nothing, so a customer who subscribes to it leaves the desk or office available for others to book, and your capacity and occupancy stop matching reality.
Add each desk separately (**Desk 1**, **Desk 2**) if you want customers to rent a specific seat, or as a zone with a seat count to rent any seat in it. [Compare both setup options](/docs/resource-management#desk-setup-options)
## FAQs
Look at what the customer gets. If the plan gives them a specific desk or office that nobody else can use, create it inside that resource. If it gives general or partial access to your space, with no specific desk or office attached, create it under **Billing** > **Plans**.
What differs is what happens when a customer subscribes. A resource plan [assigns](/docs/resource-management/rentals/assignments) the seat or the entire resource to them and updates its availability, so you can see the rental dates, keep others from booking it, and track capacity and occupancy. A plan under **Billing** > **Plans** assigns nothing, so your space stays open to everyone.
You can still create a hot desk plan inside your hot desk resource if you want that tracking. For example, set up a full-time hot desk plan as a resource plan so every subscriber gets one seat assigned and counted in your [occupancy](/docs/analytics/track-occupancy).
These aren't plans. Set them up under **Resources** > **Desks**: add a hot desk resource, enable its **Money** switch, and add a tier for each rate you charge — for example, one rate up to 5 hours and a lower one from 5 hours. A day pass is a daily booking in the same hot desk zone, so it's priced there too.
Rooms, parking lots, and equipment are priced the same way on their own pages. [Set up pricing for bookings](/docs/resource-management/set-up-pricing#set-up-pricing-for-bookings)