Add your Skype rooms, phone booths, meeting rooms, conference rooms, or event spaces to the Rooms page. This gives customers a convenient calendar view to check availability and make bookings.Documentation Index
Fetch the complete documentation index at: https://www.spacebring.com/docs/llms.txt
Use this file to discover all available pages before exploring further.
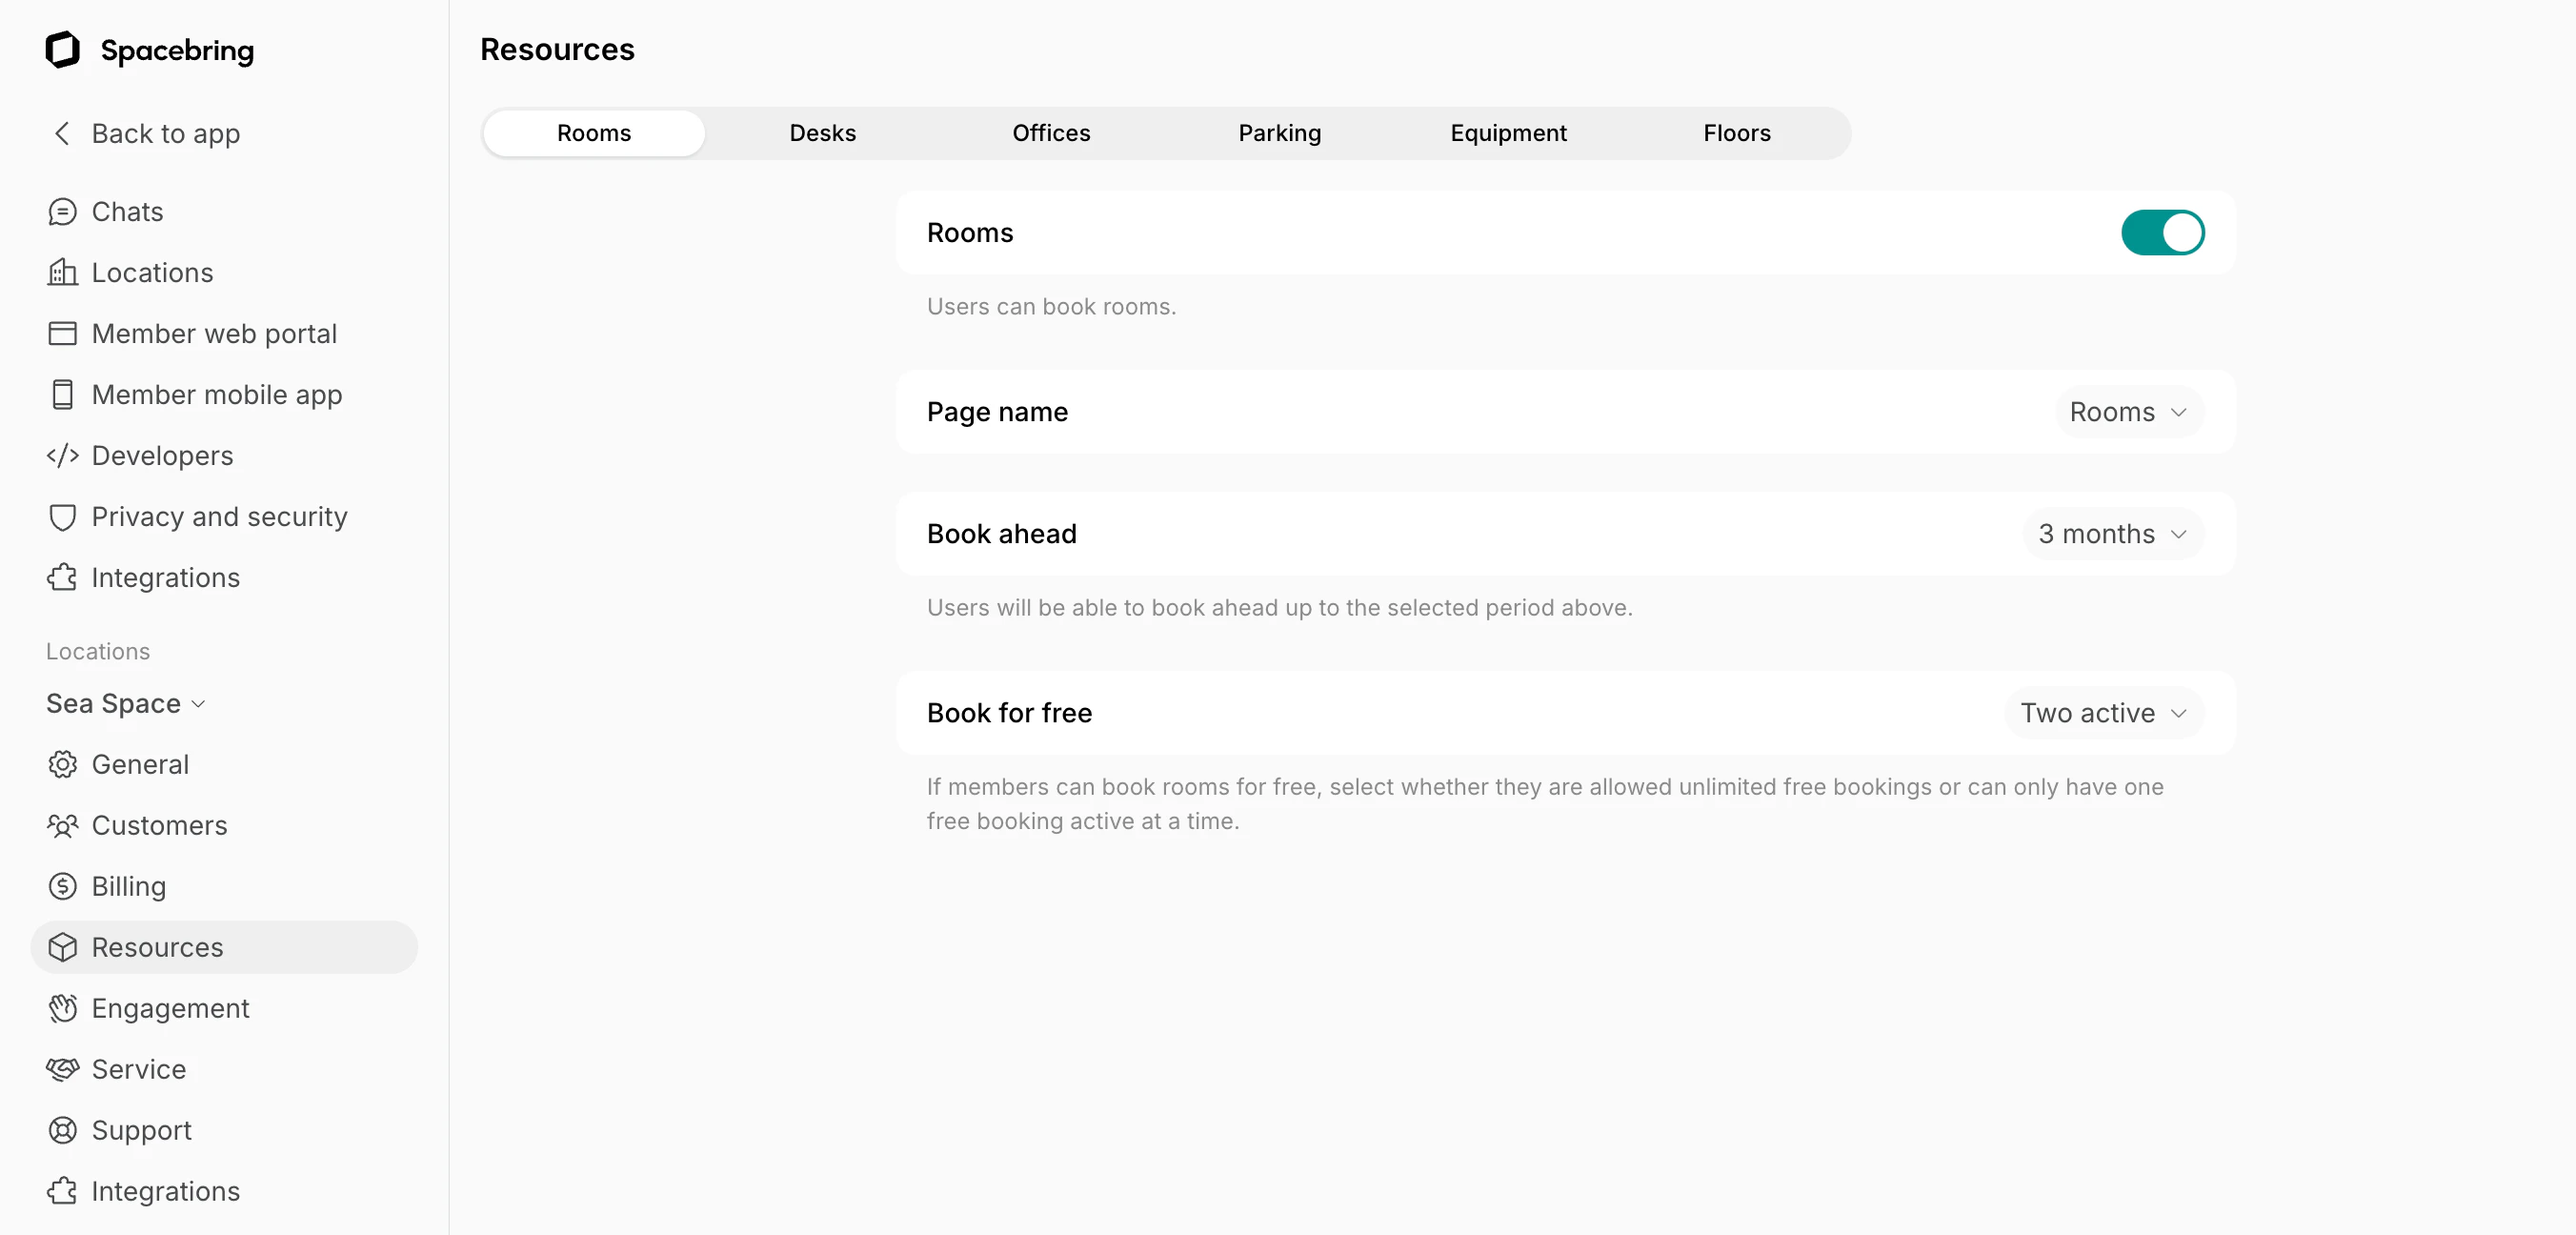
Enable Rooms
To start using the Rooms module:- In the left-side panel, click the menu (…) next to your location name
- Go to Location settings > Resources > Rooms and toggle the “Rooms” switch on.
- Page name — choose the best fit.
- Book ahead — set how far in advance users can book rooms.
- Book for free — limit how many free bookings a user can have scheduled at the same time, if you have free rooms.
- One active
- Two active
- Three active
- Unlimited
Add rooms
- Go to the Resources > Rooms page.
- Click
Add roomtop right.
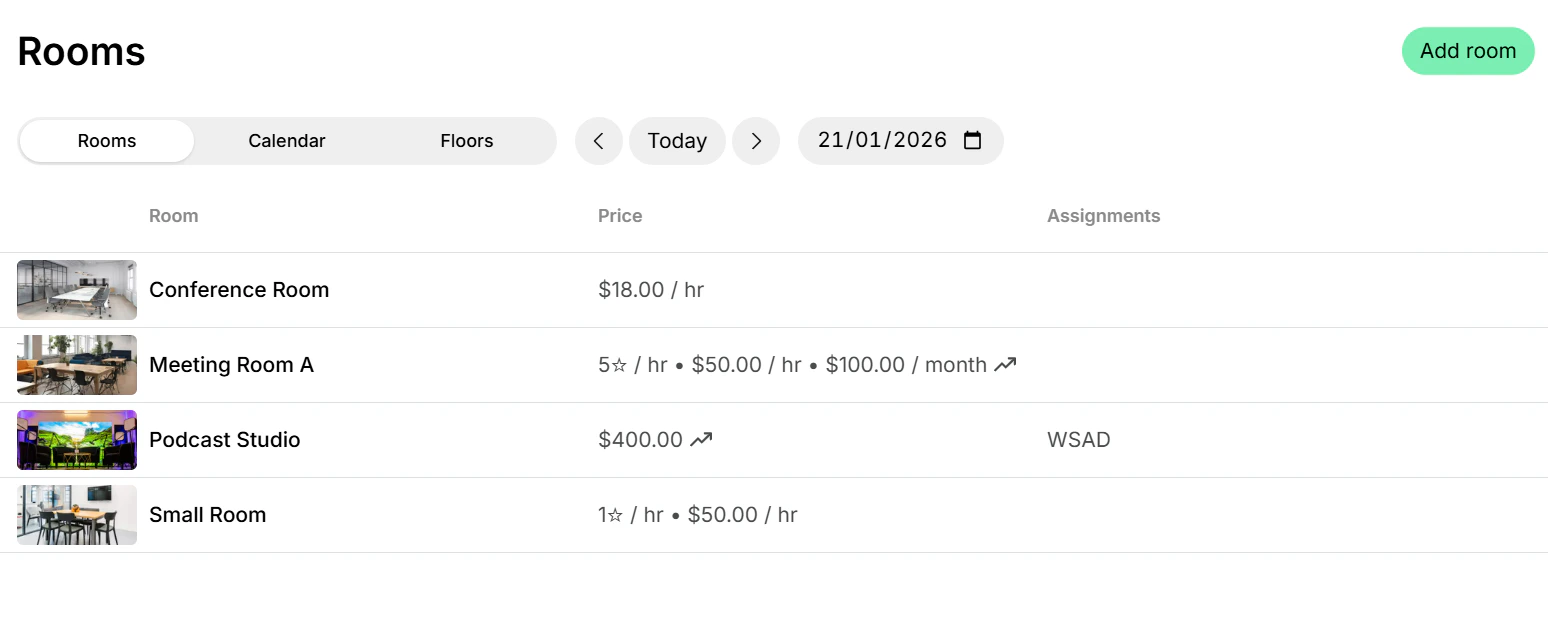
- Fill in the room details.
Room configuration
How administrators track room bookings
You can track room bookings in a few ways:- On the Resources > Rooms page, choose “Calendar” at the top to view bookings for all rooms. Filter by date to see bookings for today or a specific day.
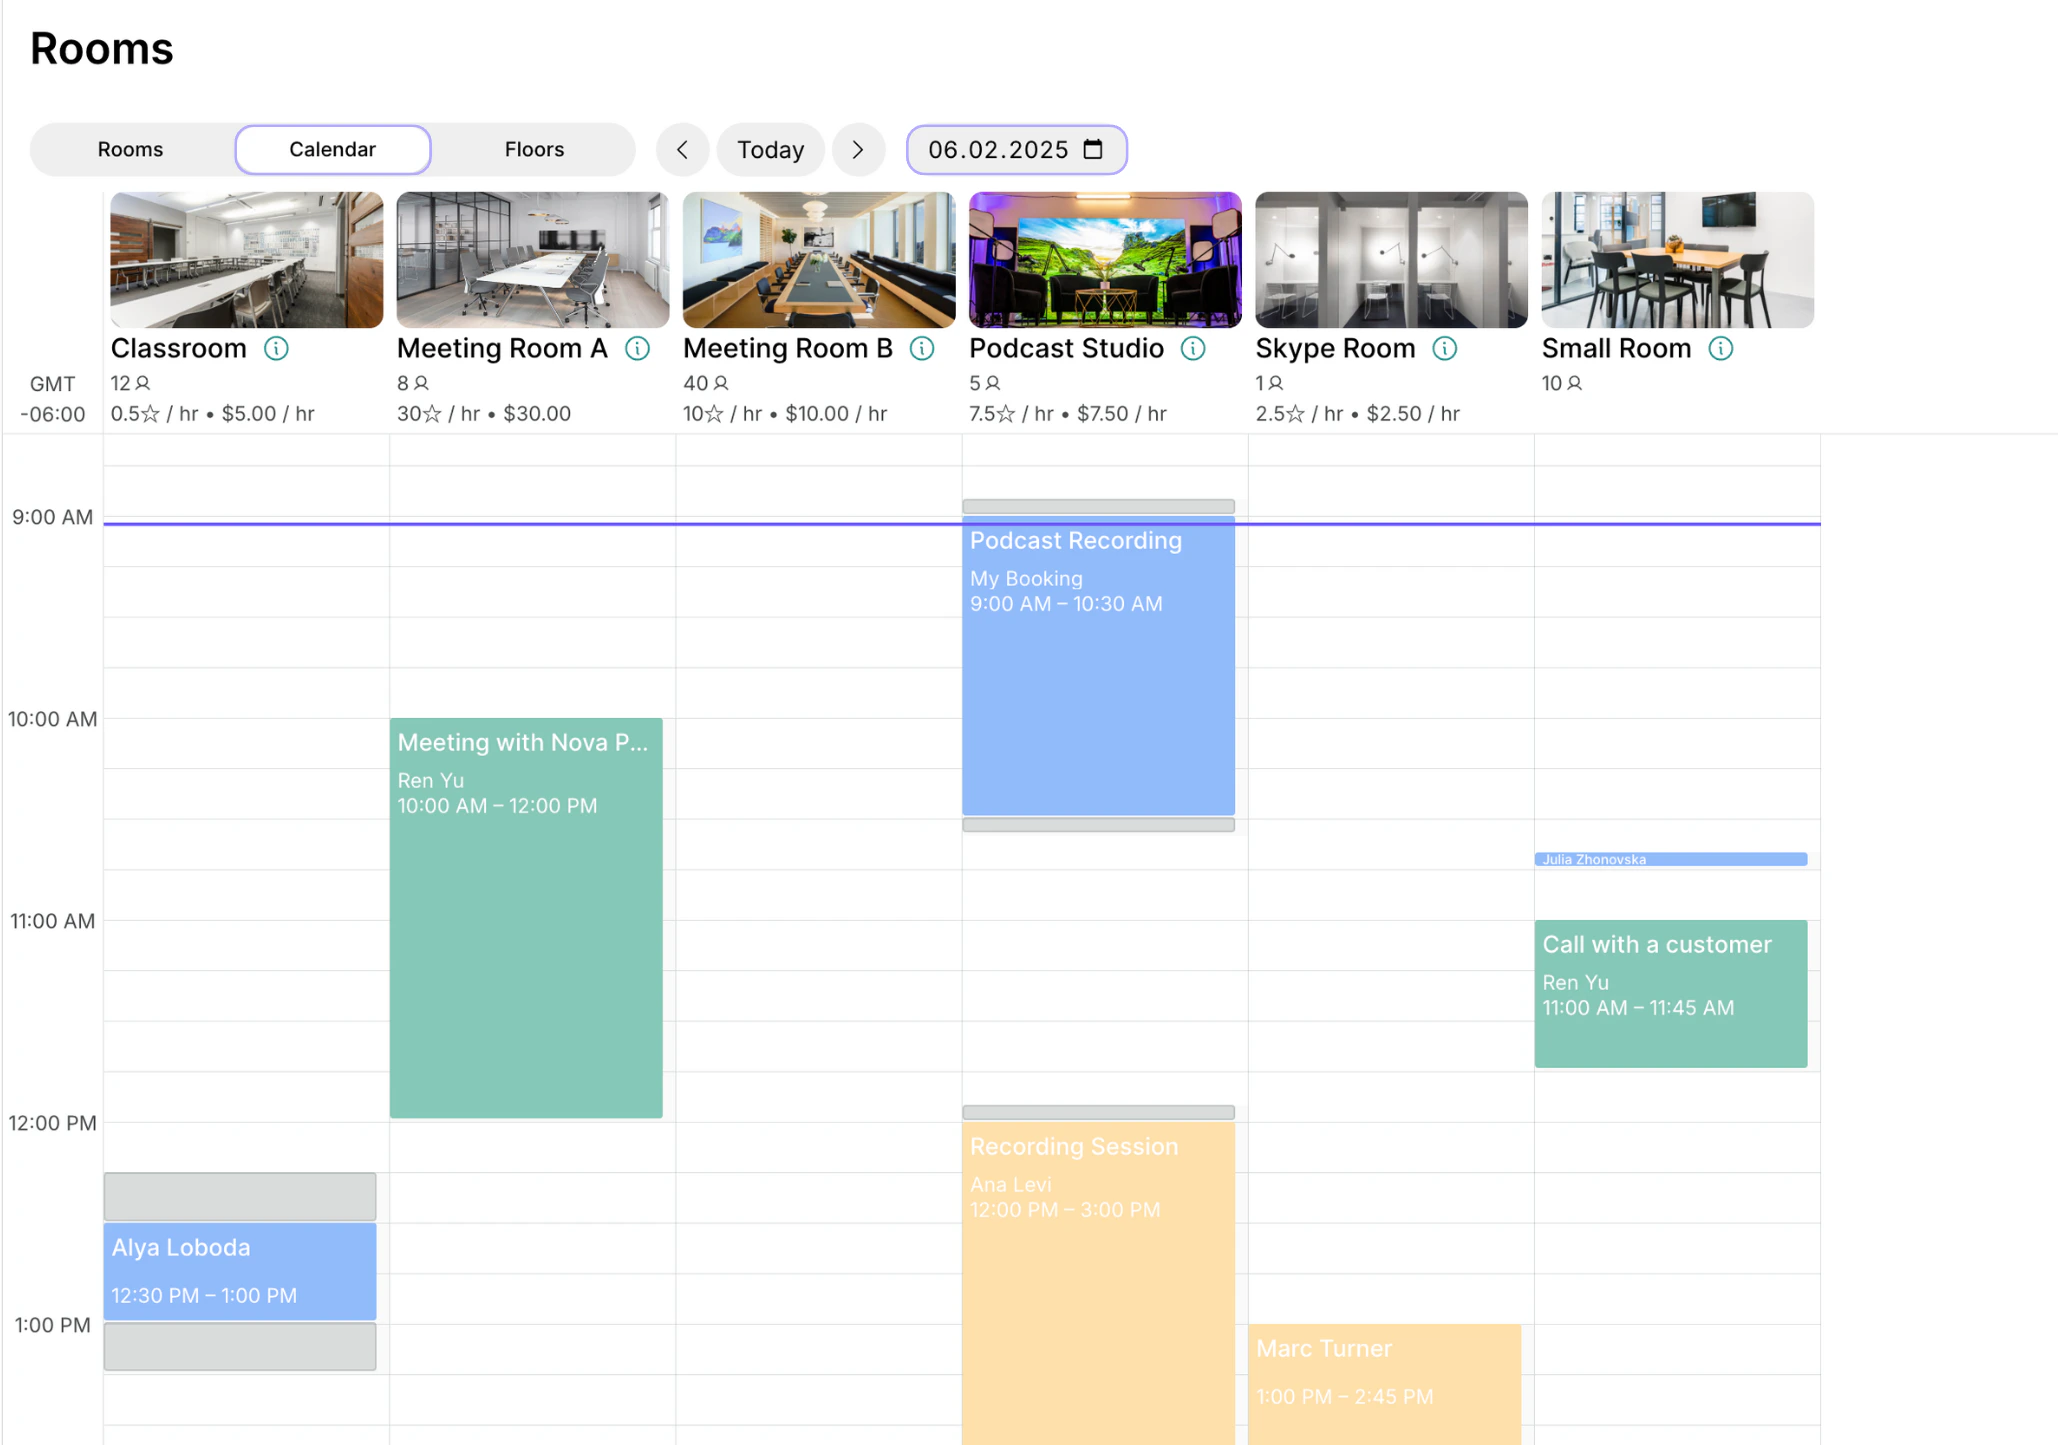
- Blue - the booking of an administrator.
- Green - the booking of a member.
- Yellow - the booking of a nonmember.
- Track all new bookings created or canceled on the Notifications page. Manage admin notifications
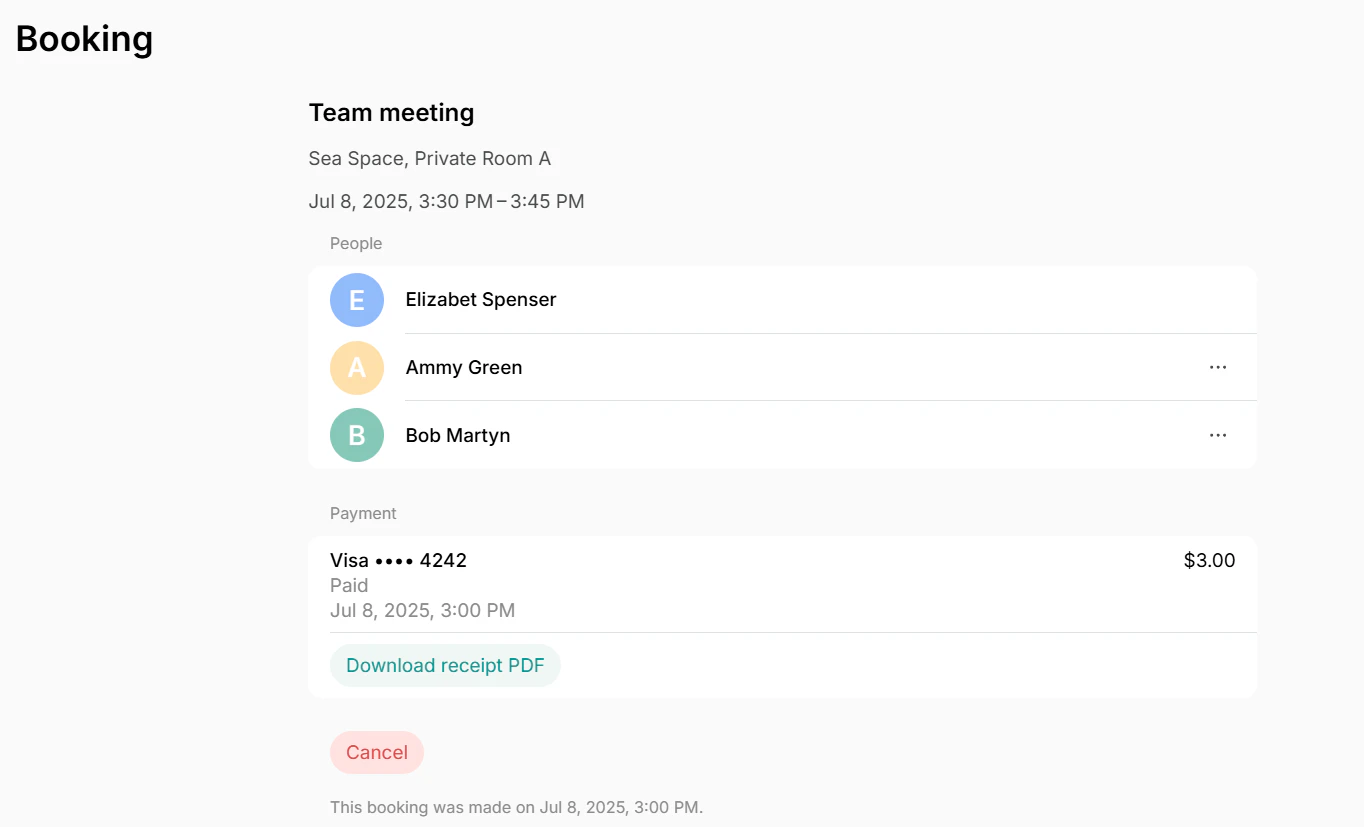
- To check a specific or all the bookings of a certain customer, go to the Customers page > open a user profile > Bookings section on the right panel.
- Ask a customer to show you their booking from their Account > Bookings page.
Tips
- If you offer equipment rentals for meetings, events, or presentations—such as chairs, monitors, or whiteboards—list them on the Equipment page. Consider adding links to equipment in room descriptions to inform customers of available options and encourage upsells in addition to bookings.
What should I add to the Rooms?
What should I add to the Rooms?
The Rooms page serves for your meeting and conference rooms, phone booths, and Skype rooms. If you have any photo or podcast studios, offer them on the Rooms page too.
How can I block off all rooms from bookings for several days?
How can I block off all rooms from bookings for several days?
If you are having an event in the space or holidays are coming, mark the corresponding dates as closed in your location schedule so that all resources are unavailable for bookings by your customers on those dates.To block only rooms while keeping other resources available, mark the corresponding dates as closed in each room’s custom schedule. Configure the schedule
How to define the room booking schedule for members and nonmembers?
How to define the room booking schedule for members and nonmembers?
You can either configure a location-wide schedule that applies to all resources or configure a custom schedule for a specific room if it needs different availability. Configure the schedule
Why can’t a customer see a certain room?
Why can’t a customer see a certain room?
The customer might not see a room for the following reasons:
- The customer’s role may not meet the room’s visibility requirements. For example, if the room is visible only to “Location members” but the customer is a nonmember, it won’t appear for them. Check both the room’s visibility settings and the customer’s role.
- The room may be assigned to a specific customer, making it visible and bookable only for them. On the Rooms page, see if a member or company name appears next to the room. To remove the assignment, edit that customer’s subscription.
- The customer may have logged in with a different email. If they are a member and should see the room, check the email tied to their member profile on the Customers page.