

- Sign contracts with tenants
- Automate rental payments
- Auto-update resource availability — helping you track occupancy and plan sales.
Prerequisites
- In the settings of each resource available for long-term rentals, enable the Plans switch and configure tiers.
- In each tier, set the sign-up Type:
- Request — if you need to verify tenants, sign contracts, or perform other checks before confirming a rental.
- Immediate — if you want to let customers sign up for office rental and pay immediately without verification.
- If choosing Request, enable the Support page and set it to Public visibility. Applications arrive and are processed as support tickets.
- Integrate the necessary pages into your marketing site so potential tenants can browse and apply or sign up instantly.
How applications for resources work
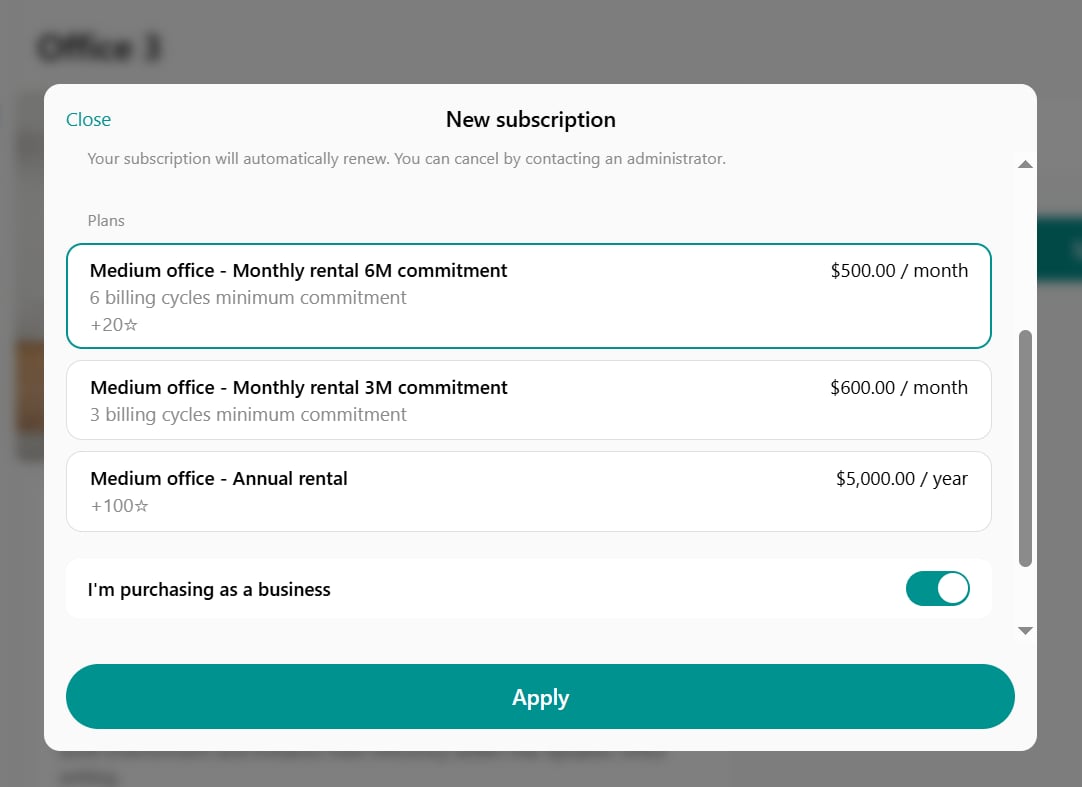
If a resource has the Request sign-up type:- Customers browse available resources on the Rooms, Desks, Offices, Parking, and Equipment pages.
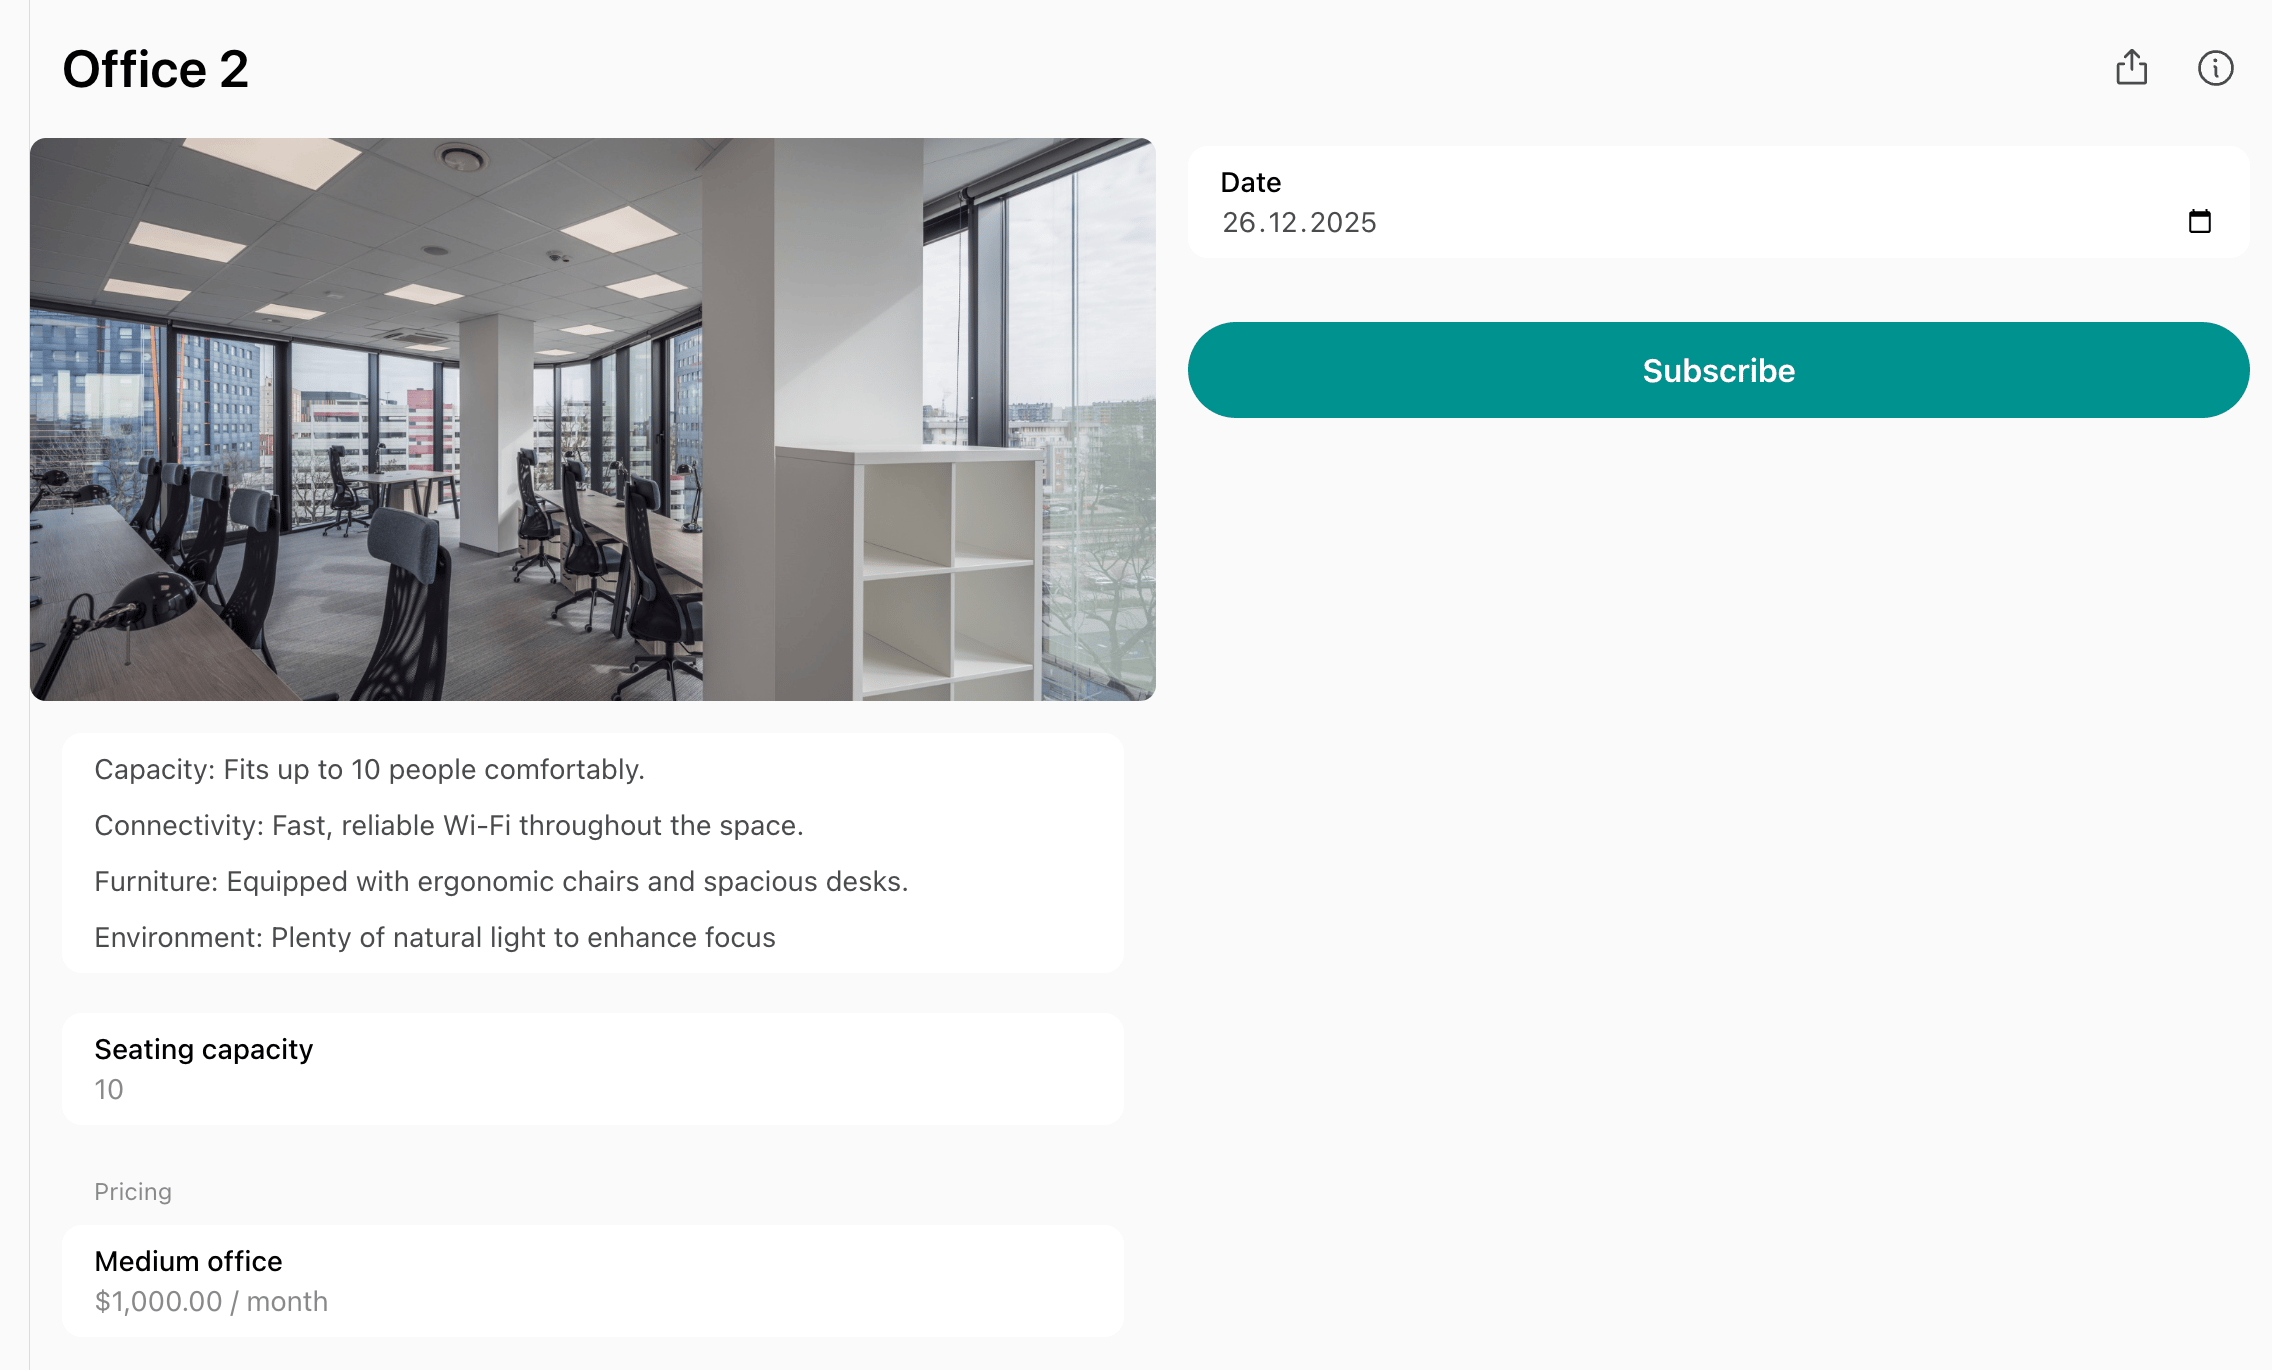
- Open a resource they’re interested in and click Subscribe, or Book or subscribe when the resource also has an hourly or daily price.
- Choose the Start date, the Renewal switch, and the tier. A resource that can be rented in parts also offers the Entire resource switch and a Seats or Quantity field. To rent as a business rather than as an individual member, they turn on I’m purchasing as a company.
- Describe what they need in the Comment field, then click Apply.
- Each application appears as a new ticket in Support > Tickets, with their comment in it.
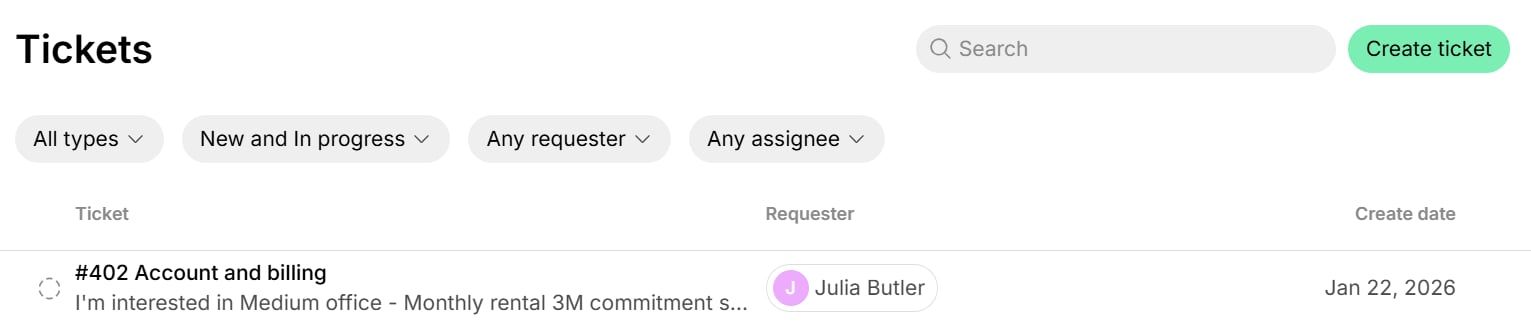
- Administrators manage the request through the support ticket:
- Communicate with the applicant via ticket comments
- Answer questions, share additional photos
- Arrange a tour
- If rental is confirmed:
- Click the user’s name in the ticket and press Invite as member to add them.
- If the tenant is a company, create a company > add this user and other company members, or ask the user to invite their colleagues.
- Issue a contract if necessary. If you enable the Create subscription from contract switch, a subscription will be created automatically. If a contract isn’t required, simply create a subscription for the customer.
- The customer will automatically receive and pay invoices for the rental.
- The entire resource (e.g., an entire office) or a selected number of seats (e.g., a dedicated desk) is assigned to the customer.
How immediate sign-ups work
If a resource has the Immediate sign-up type:- Customers browse available resources on the Rooms, Desks, Offices, Parking, and Equipment pages, and click Subscribe, or Book or subscribe when the resource also has an hourly or daily price.
- Complete the sign-up and make the first rental payment.
- Administrators receive a notification about each new sign-up.
- A subscription is automatically created for the customer.
- The customer will receive and pay invoices for rental.
- The entire resource (e.g., an entire office) or a selected number of seats (e.g., a dedicated desk) is assigned to the customer.
FAQs
How can I reserve a resource for a customer for a week or longer period of time?
How can I reserve a resource for a customer for a week or longer period of time?
Create a subscription for the customer with the required dates and add this resource as a product. This will automatically assign the resource to the customer for the selected time period and update its availability.
How do customers pay for rentals?
How do customers pay for rentals?
Customers pay for rentals through a recurring subscription with automatically issued invoices.
How do I allow interested customers to apply for already occupied offices?
How do I allow interested customers to apply for already occupied offices?
A rented office stays visible to all customers on the Offices page with the Fully assigned label. Interested customers get a Join waitlist button on it.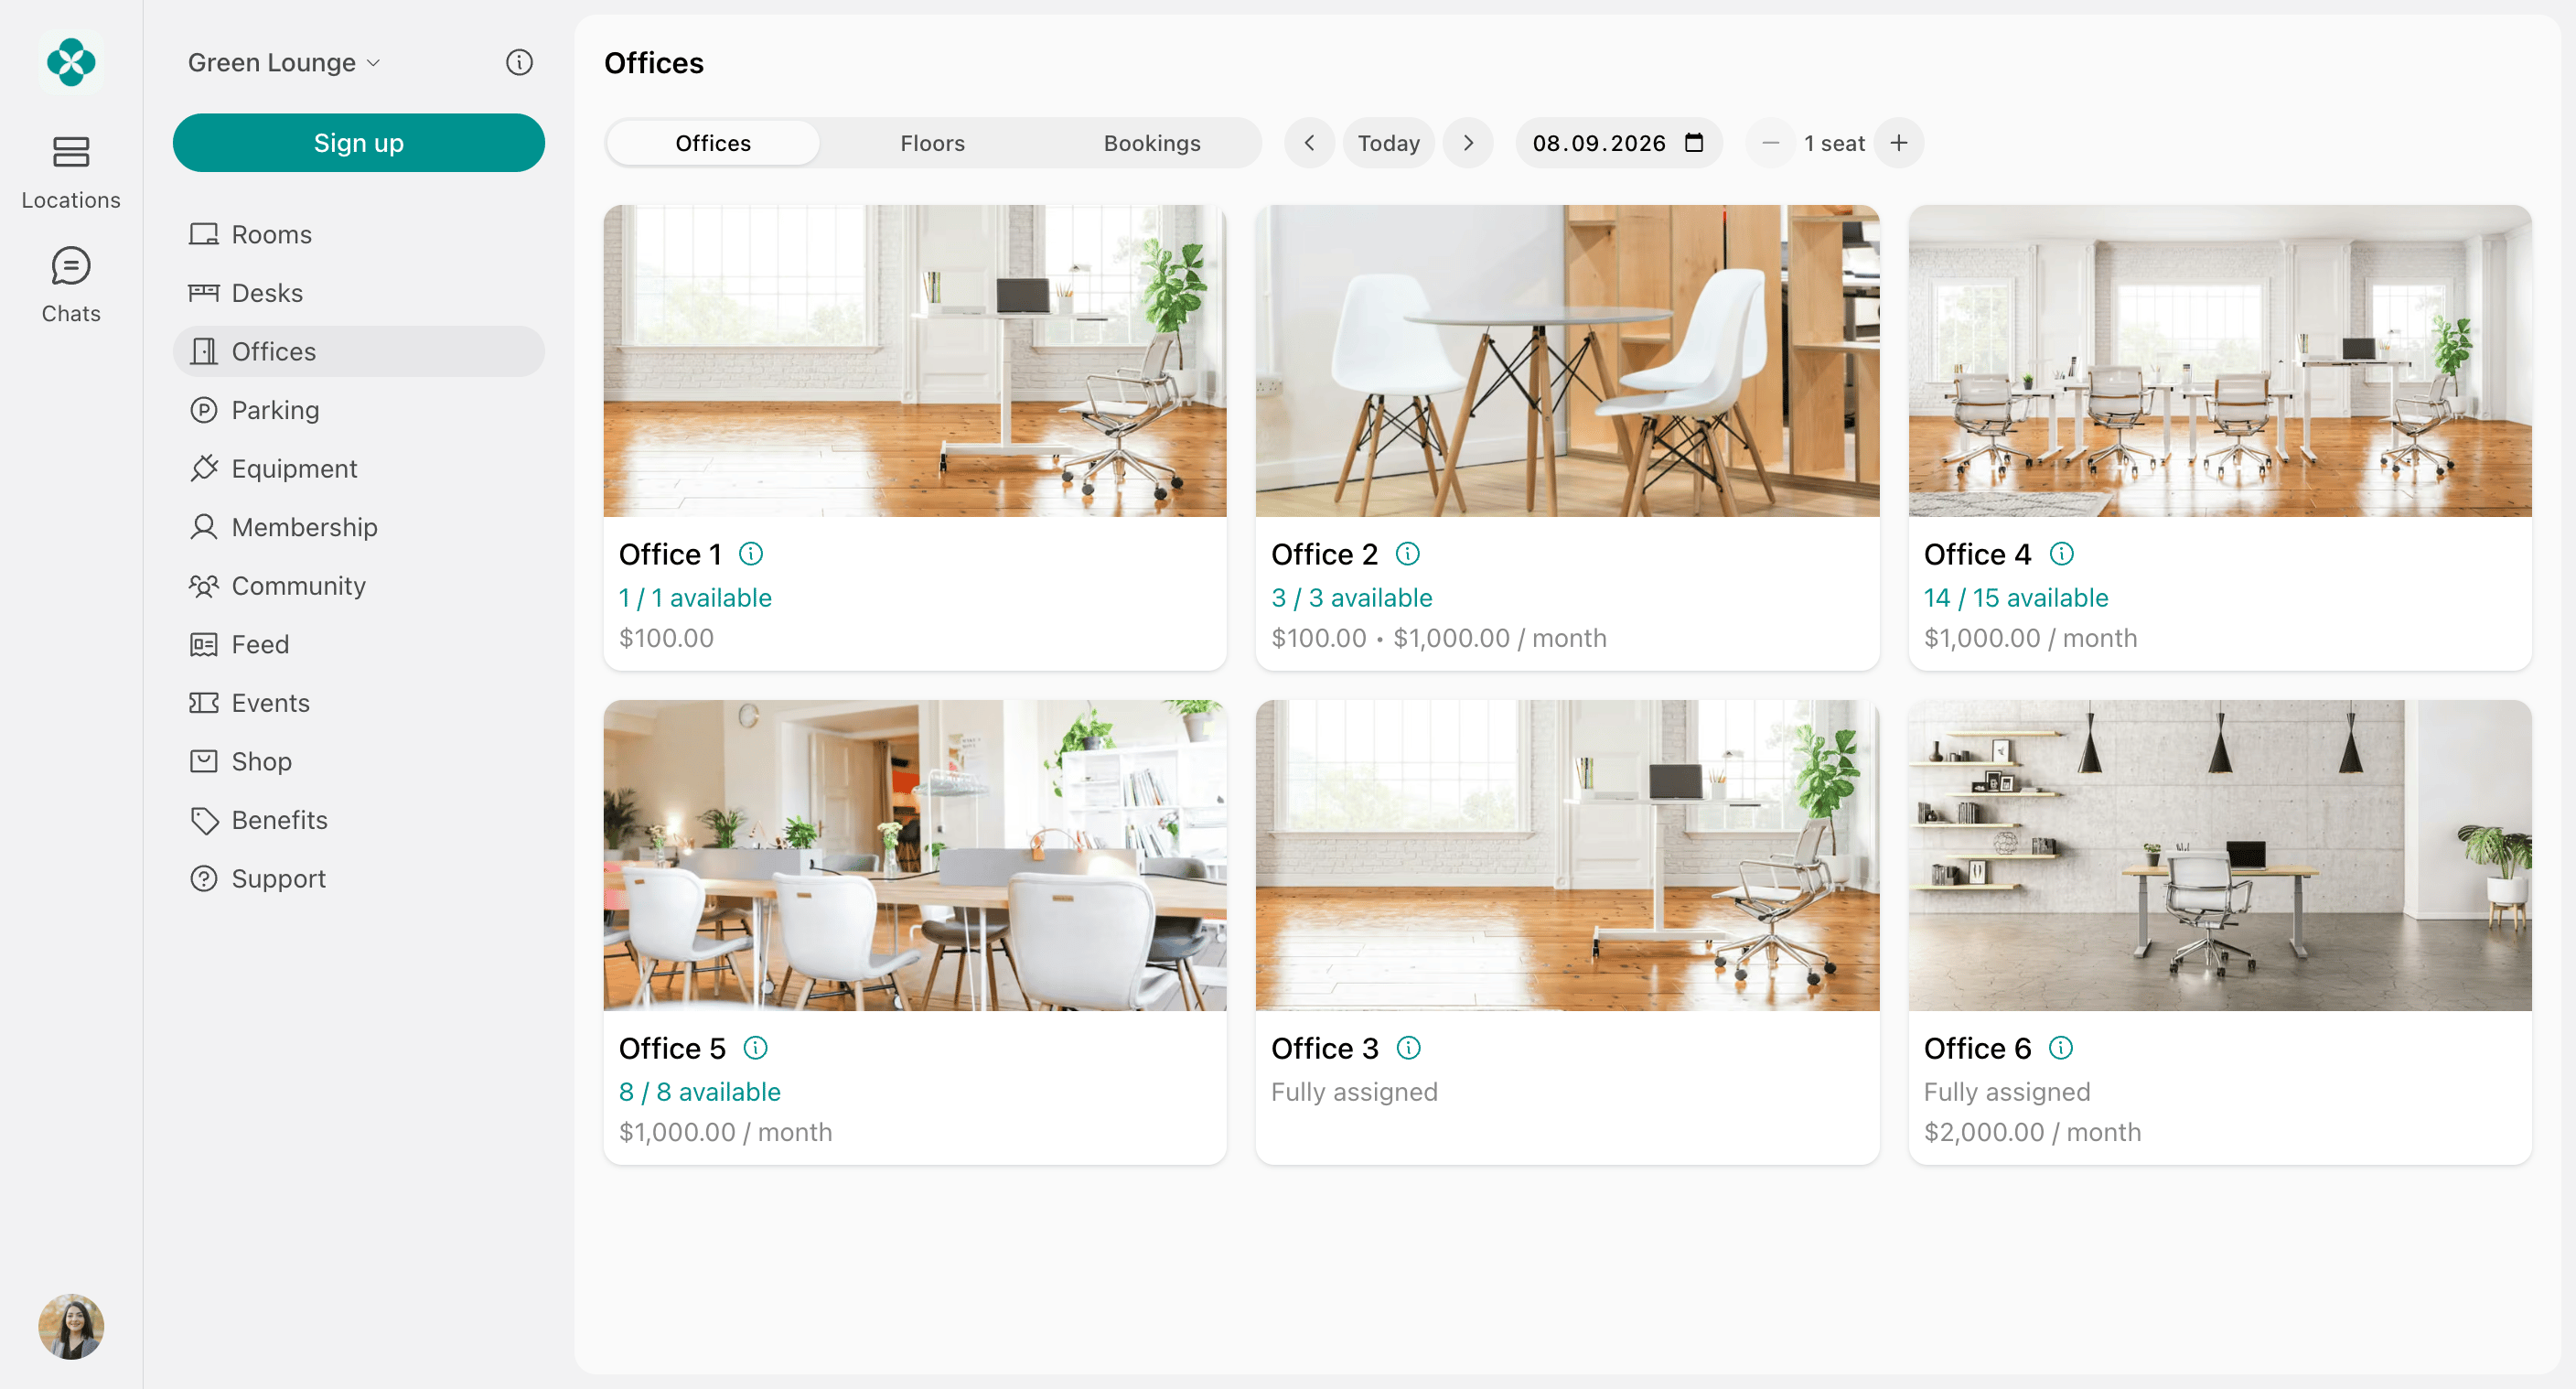
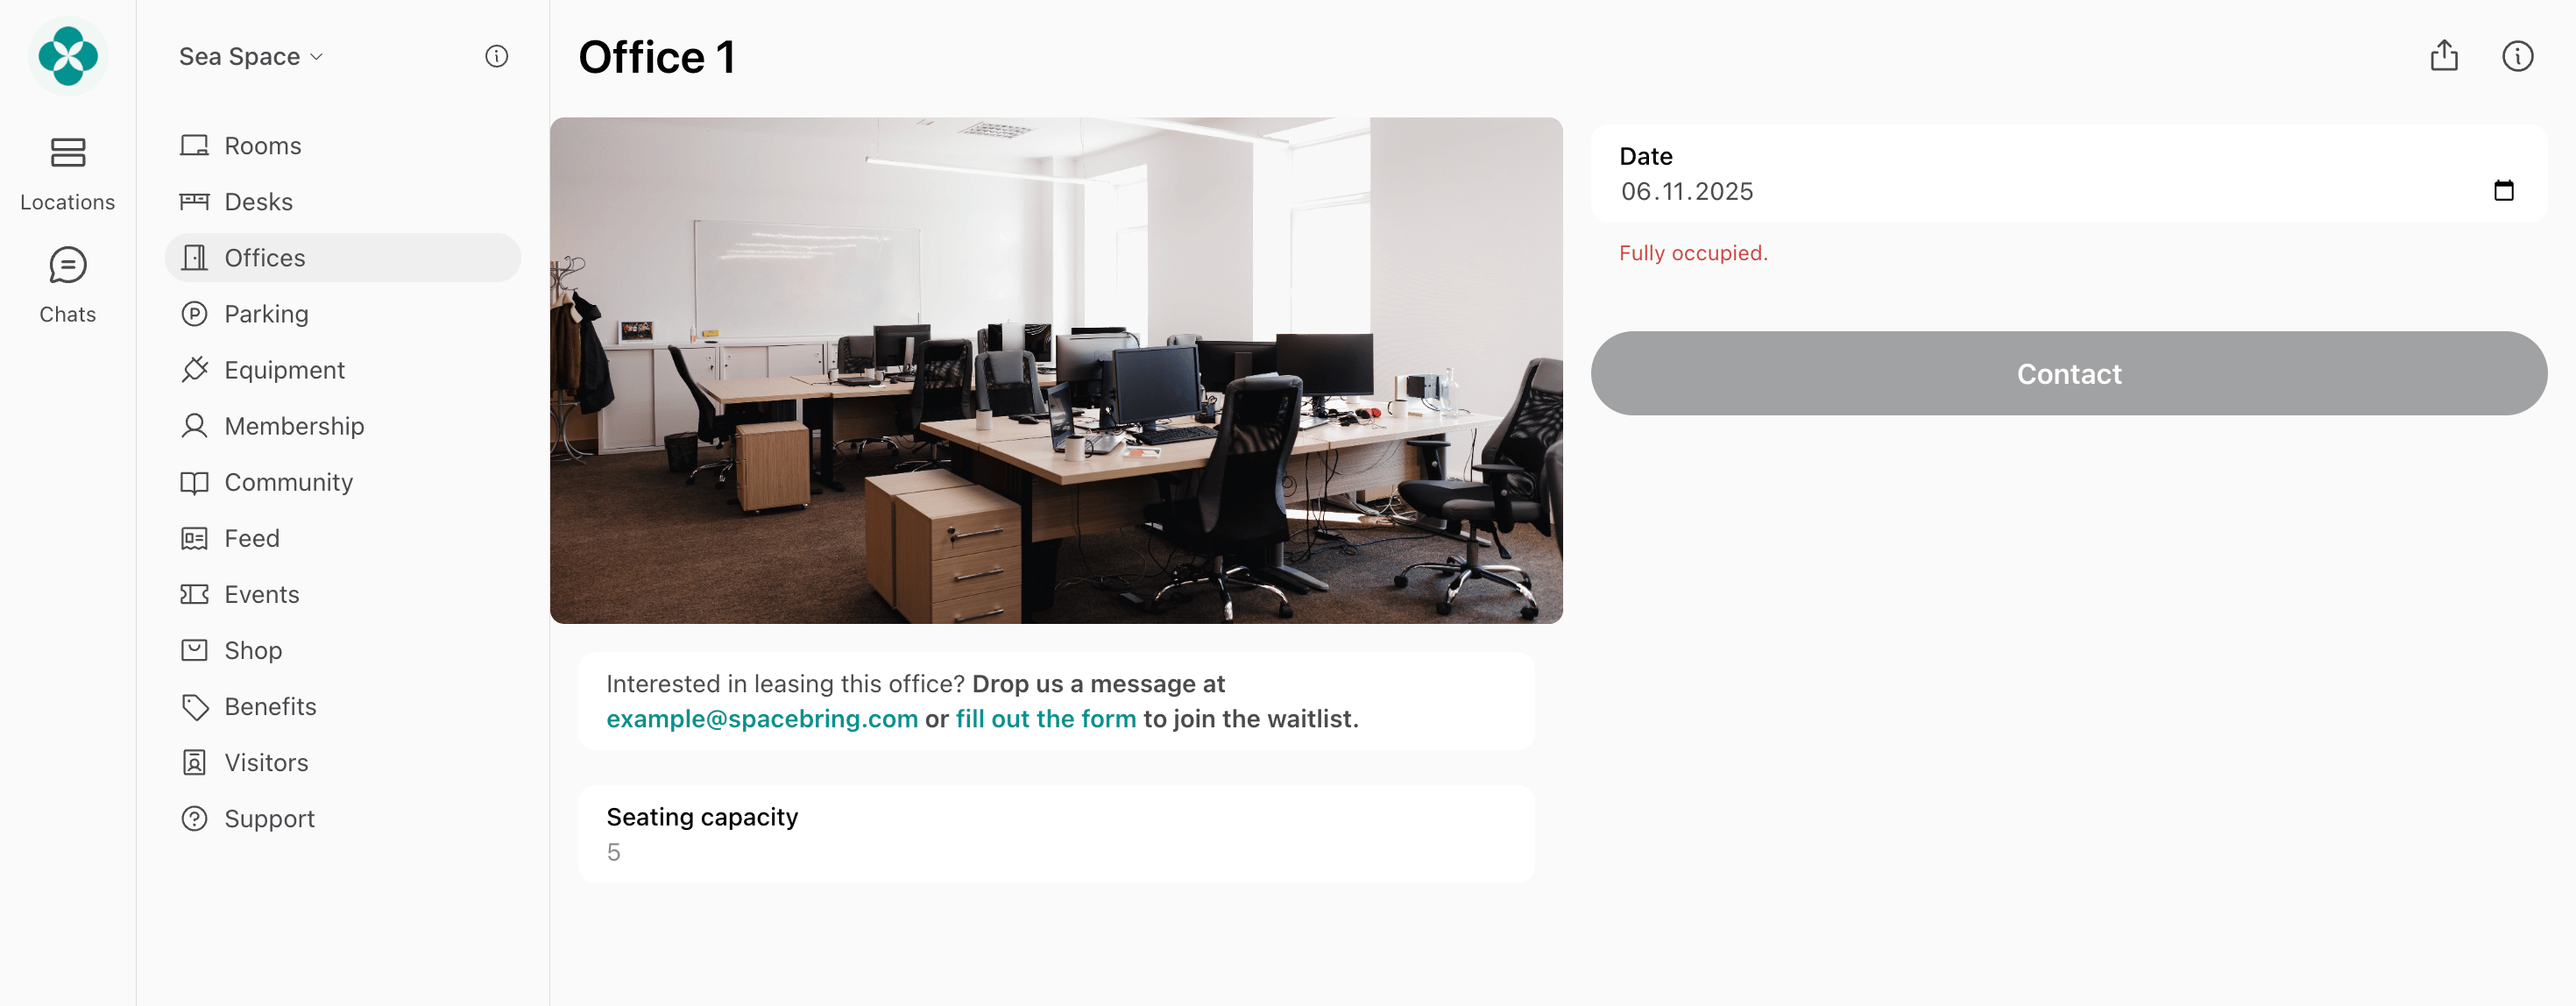
- The customer clicks Join waitlist and describes what they need.
- Their request arrives as a new ticket in Support > Tickets, where you answer them and offer the office when it frees up.