

Create a booking
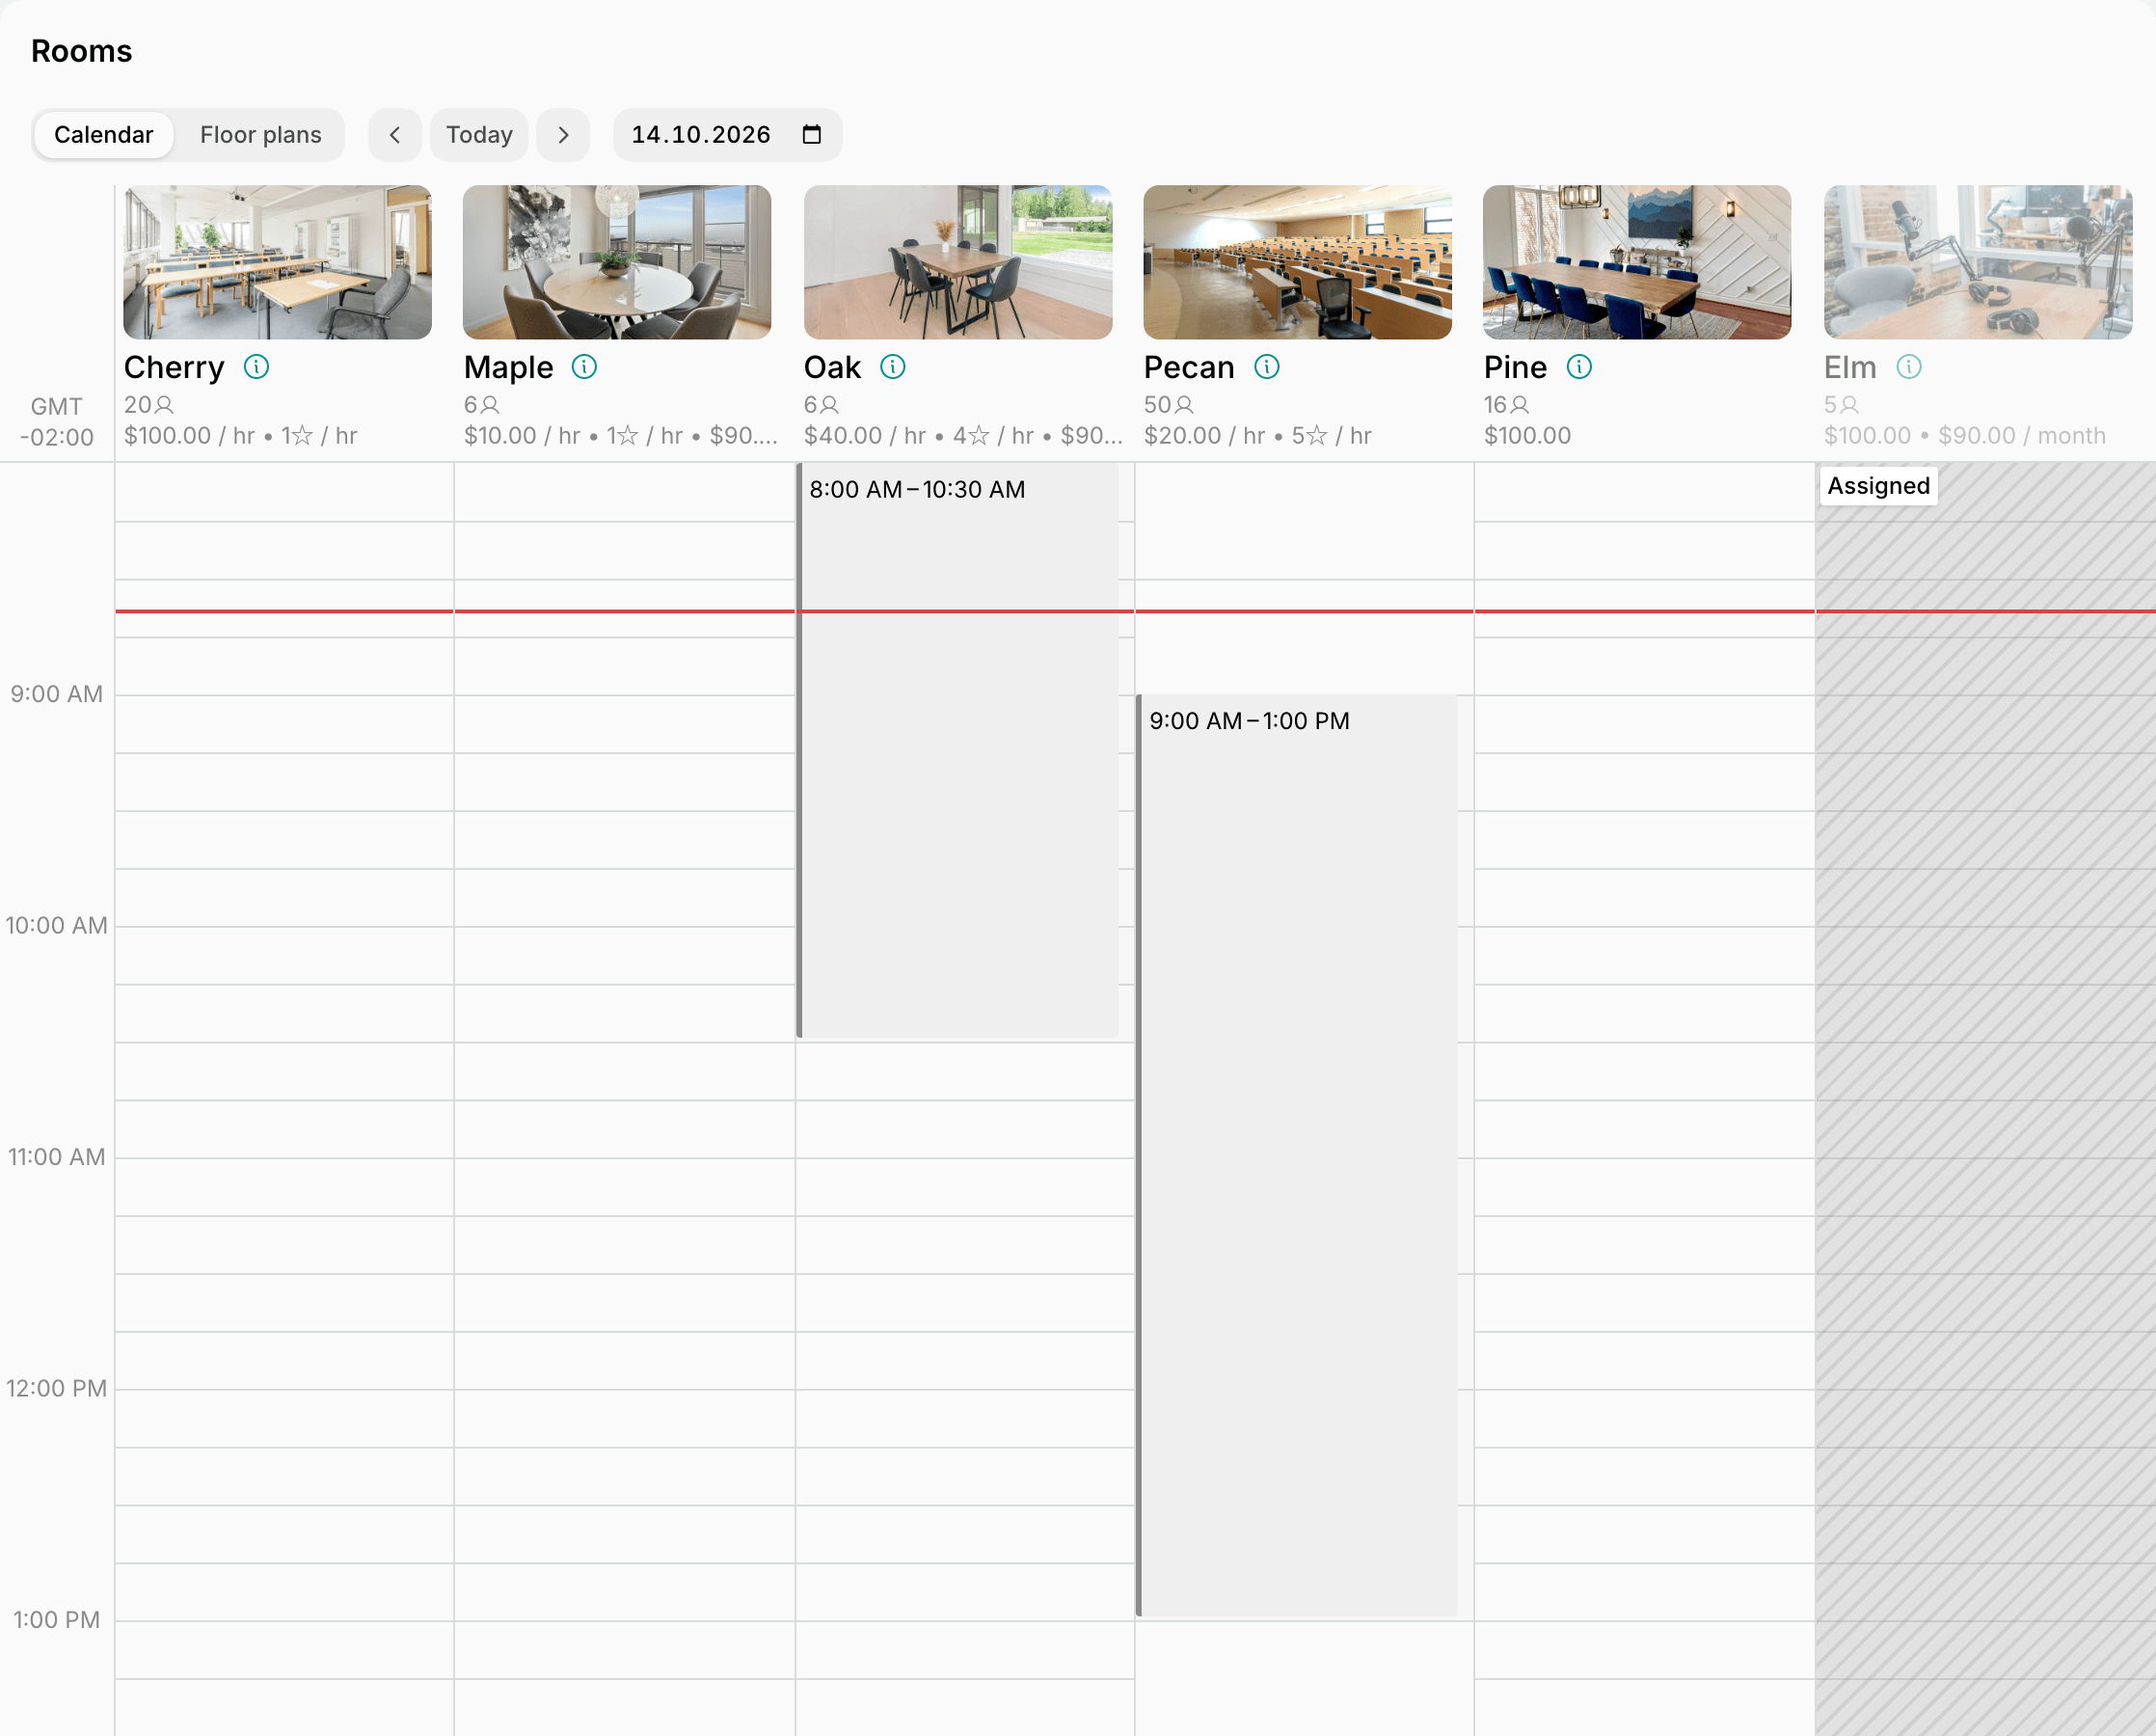
To start a booking, users go to the location’s Home page, open the resource type they need — Rooms, Desks, Offices, Parking, or Equipment — and pick the resource. For rooms, they pick the date and the timeslot in the rooms’ calendar. A room booked by the day, with Min duration and Max duration both set to 1 day, shows each day as a single cell in the calendar, which users click to book the whole day.To view the description and properties of a specific resource, users click the ⓘ button next to its name. For rooms, clicking the title or photo opens the room’s weekly booking calendar.
- Title — the name of the booking, for rooms only. Users control who sees it on the Account page.
- Date and Time — booking is possible according to the resource’s booking rules, such as minimum and maximum time. The Start and End fields each carry their own date, so a booking can run into the next day when the schedule stays open past midnight.
- Seats for desks, or Quantity for equipment — the number of seats or units needed. Rooms are booked as a whole. Users can book only one parking space at a time. An office is booked as a whole too, unless the user or their company rents it — then they pick the number of seats they need in it.
- Repeat — choose one of the suggested recurrence patterns, or select Custom to set your own recurrence pattern.
- End repeat — choose:
- On date — to set a specific final booking date, or
- Never — to set an open-ended recurrence.
- For Custom recurrences, users can also choose After number of occurrences to schedule a specific number of recurring bookings.
Users can create recurring bookings only when the booking is free for them — a completely free resource, or one assigned to them or their company. If the booking is paid, administrators can create a recurring booking for the customer and charge them separately.
- Booker — the user the booking is made for. Only administrators and company managers see this field, and company managers can only book for their company members.
- Invitees — people who attend the booking alongside the booker, for rooms only. Members can pick invitees among their fellow company members, and among other members of the location if the Community page is visible to members. To invite someone from outside the location, select New invitee (in the mobile app, the add person button at the top of the Invitees list), enter their name and email, and select Add. They attend as a guest and don’t become a member of the location.
- Memo — a private note visible only to the booker and administrators.
- Promo code or coupon — redeems a discount if the user qualifies for one.
- Payment — the payment method the user pays with. The total is calculated from the price tiers set for that resource, minus any discount from the user’s subscription, promo code, or coupon.
- Legal business name, Address, and Tax ID — these fields appear depending on the Require billing details setting.

Users and administrators can book any available current or future slot, but only administrators can log past bookings through the admin web portal.
When a user books for somebody else or adds invitees, they choose whether to notify them about the booking. A company manager booking for a company member pays with the company’s payment methods only — company credits, company day passes for desks, the company invoice, or a card saved for the company. The member’s own payment methods stay private to them.

View bookings
- Users see all their bookings on the Account > Bookings page.

- They also find them on the resource’s own page: in the calendar on the Rooms page, or on the Bookings tab of the Desks, Offices, Parking, and Equipment pages.

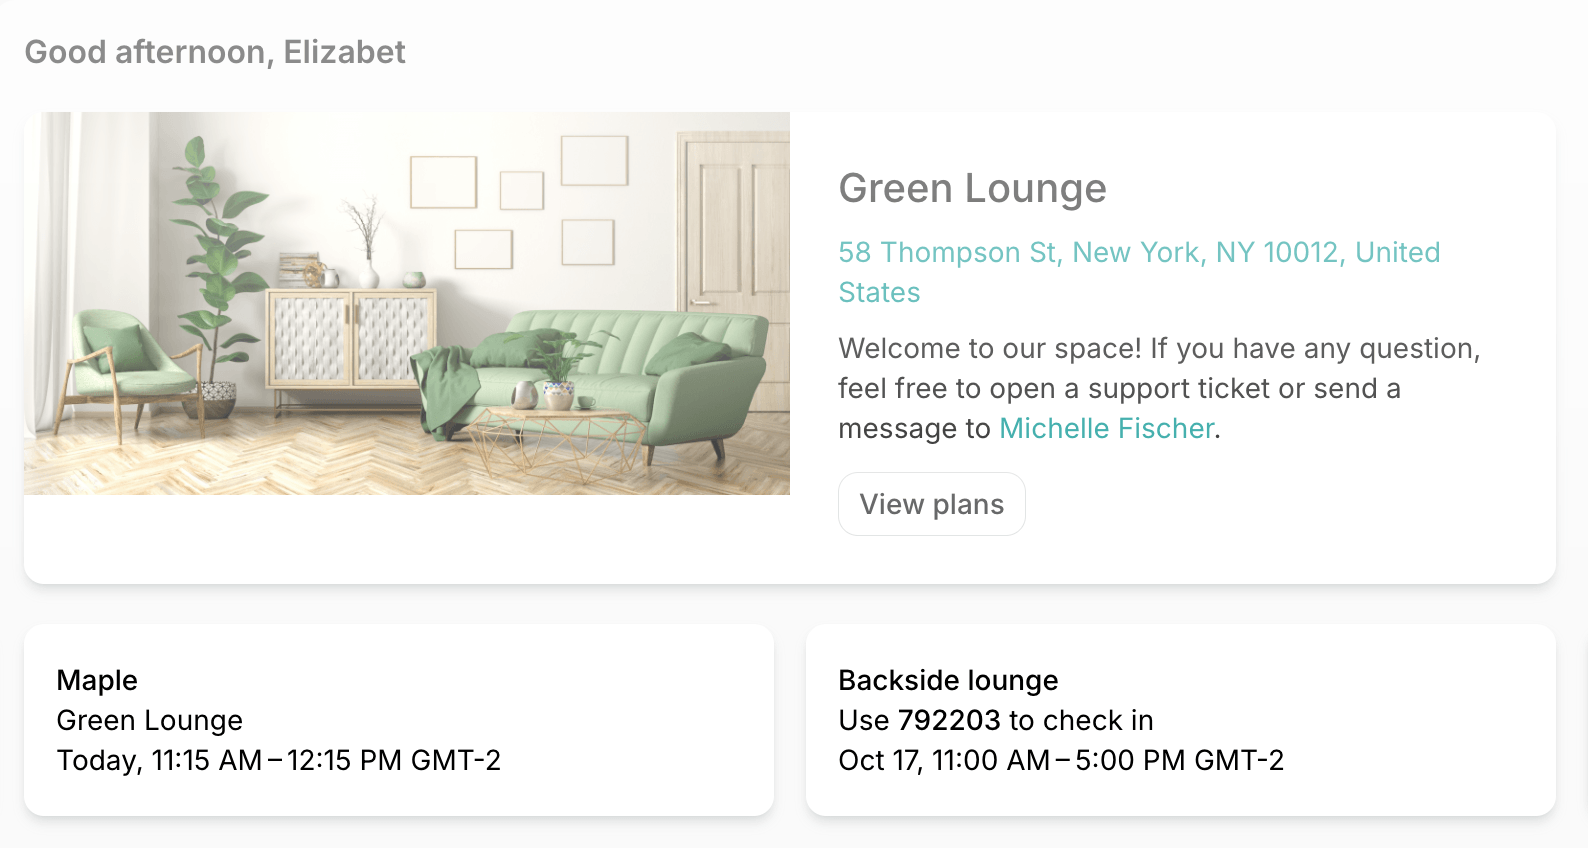
- Upcoming bookings appear as a reminder on a widget on the location’s Home page.
- Users receive reminder notifications before the booking starts and ends.
- Invitees see the booking on the widget and get notifications when it is created and when it is about to end.
Manage a booking
To manage a booking, users follow these steps:- Open the booking > press Edit to make changes.
- Press Cancel to cancel the booking.
- Press Add to calendar to add the booking to their Google Calendar or Microsoft 365 Outlook.

- Whether the user gets an automatic refund when they cancel depends on the resource’s rescheduling policy. The same rescheduling policy governs editing: users can move the start time only before the policy’s cutoff, and never once the booking has started.
- A booking paid by card can be extended but not shortened, and moved only to a resource with the same or a higher price. The extra is paid as a separate transaction.
Drag a booking in the calendar
In the member web portal and mobile app, users can move their own room booking to another time or room by dragging it in the rooms’ calendar:- Go to Home > Rooms to see all rooms for the day, or open a room to see its week.
- Drag the booking to its new time, room, or day. To change only when it ends, drag its bottom edge.
- On a phone or tablet, press and hold the booking until it lifts, then drag it. Hold it near an edge of the calendar to scroll to a time or room out of view.
- Drop the booking. The move is saved right away, and a message confirms it, with any extra charge or refund.
- If the move makes a paid booking cost more, a confirmation shows the extra. Users press Pay to confirm it, or Cancel to leave the booking where it was.
- For a recurring booking, choose whether to move This occurrence or This and future bookings.
- If the booking has invitees, choose whether to notify them.
- Users can drag only bookings they made themselves, and only until the rescheduling policy’s cutoff.
- A booking paid by card or externally can’t be dragged. Users change it with Edit instead.
- The booking turns red over a slot it can’t take and shows why: Occupied over another booking, Buffer time in the free time a room keeps around its bookings, or Unavailable over closed hours, within the minimum notice, or at a length the room doesn’t allow.
FAQs
Can a user book multiple dates with one payment?
Can a user book multiple dates with one payment?
Users can’t select several dates and book them with one payment. To collect one payment for several bookings, enable Pay with invoice for the relevant service in the customer’s profile. The user then books each date with the Invoice payment method, and the charges land on one invoice instead of separate immediate payments. You, as an administrator, can also make the bookings for them with the Invoice payment method and issue one invoice for all of them.
Why are some booking titles/bookers' names not visible?
Why are some booking titles/bookers' names not visible?
The visibility of users’ names and booking titles depends on each user’s privacy settings. The highest visibility level is Administrators, so administrators can always see users’ names and titles on bookings. Meanwhile, members and nonmembers cannot see each other’s personal data on the bookings unless bookers select the relevant personal data visibility in their account privacy settings (e.g., “Company members,” “Location members,” etc.).
In what order do resources appear for customers?
In what order do resources appear for customers?
Resources assigned to the customer always appear first. After that:
- Rooms are sorted alphabetically by title and, when titles match, by creation date from oldest to newest.
- Desks are sorted by available seats, then by desks with the selected number of seats or more, and the rest alphabetically by title and by creation date from oldest to newest.
- Offices are sorted by offices with available seats, then by offices with the selected number of seats or more, and the rest alphabetically by title and by creation date from oldest to newest.
- Parking spaces are sorted by available spaces, and the rest alphabetically by title and by creation date from oldest to newest.
- Equipment is sorted by available items, and the rest alphabetically by title and by creation date from oldest to newest.