

Create a booking
- Open the relevant resource page — Rooms, Desks, Offices, Parking, or Equipment.
- Start creating a booking.
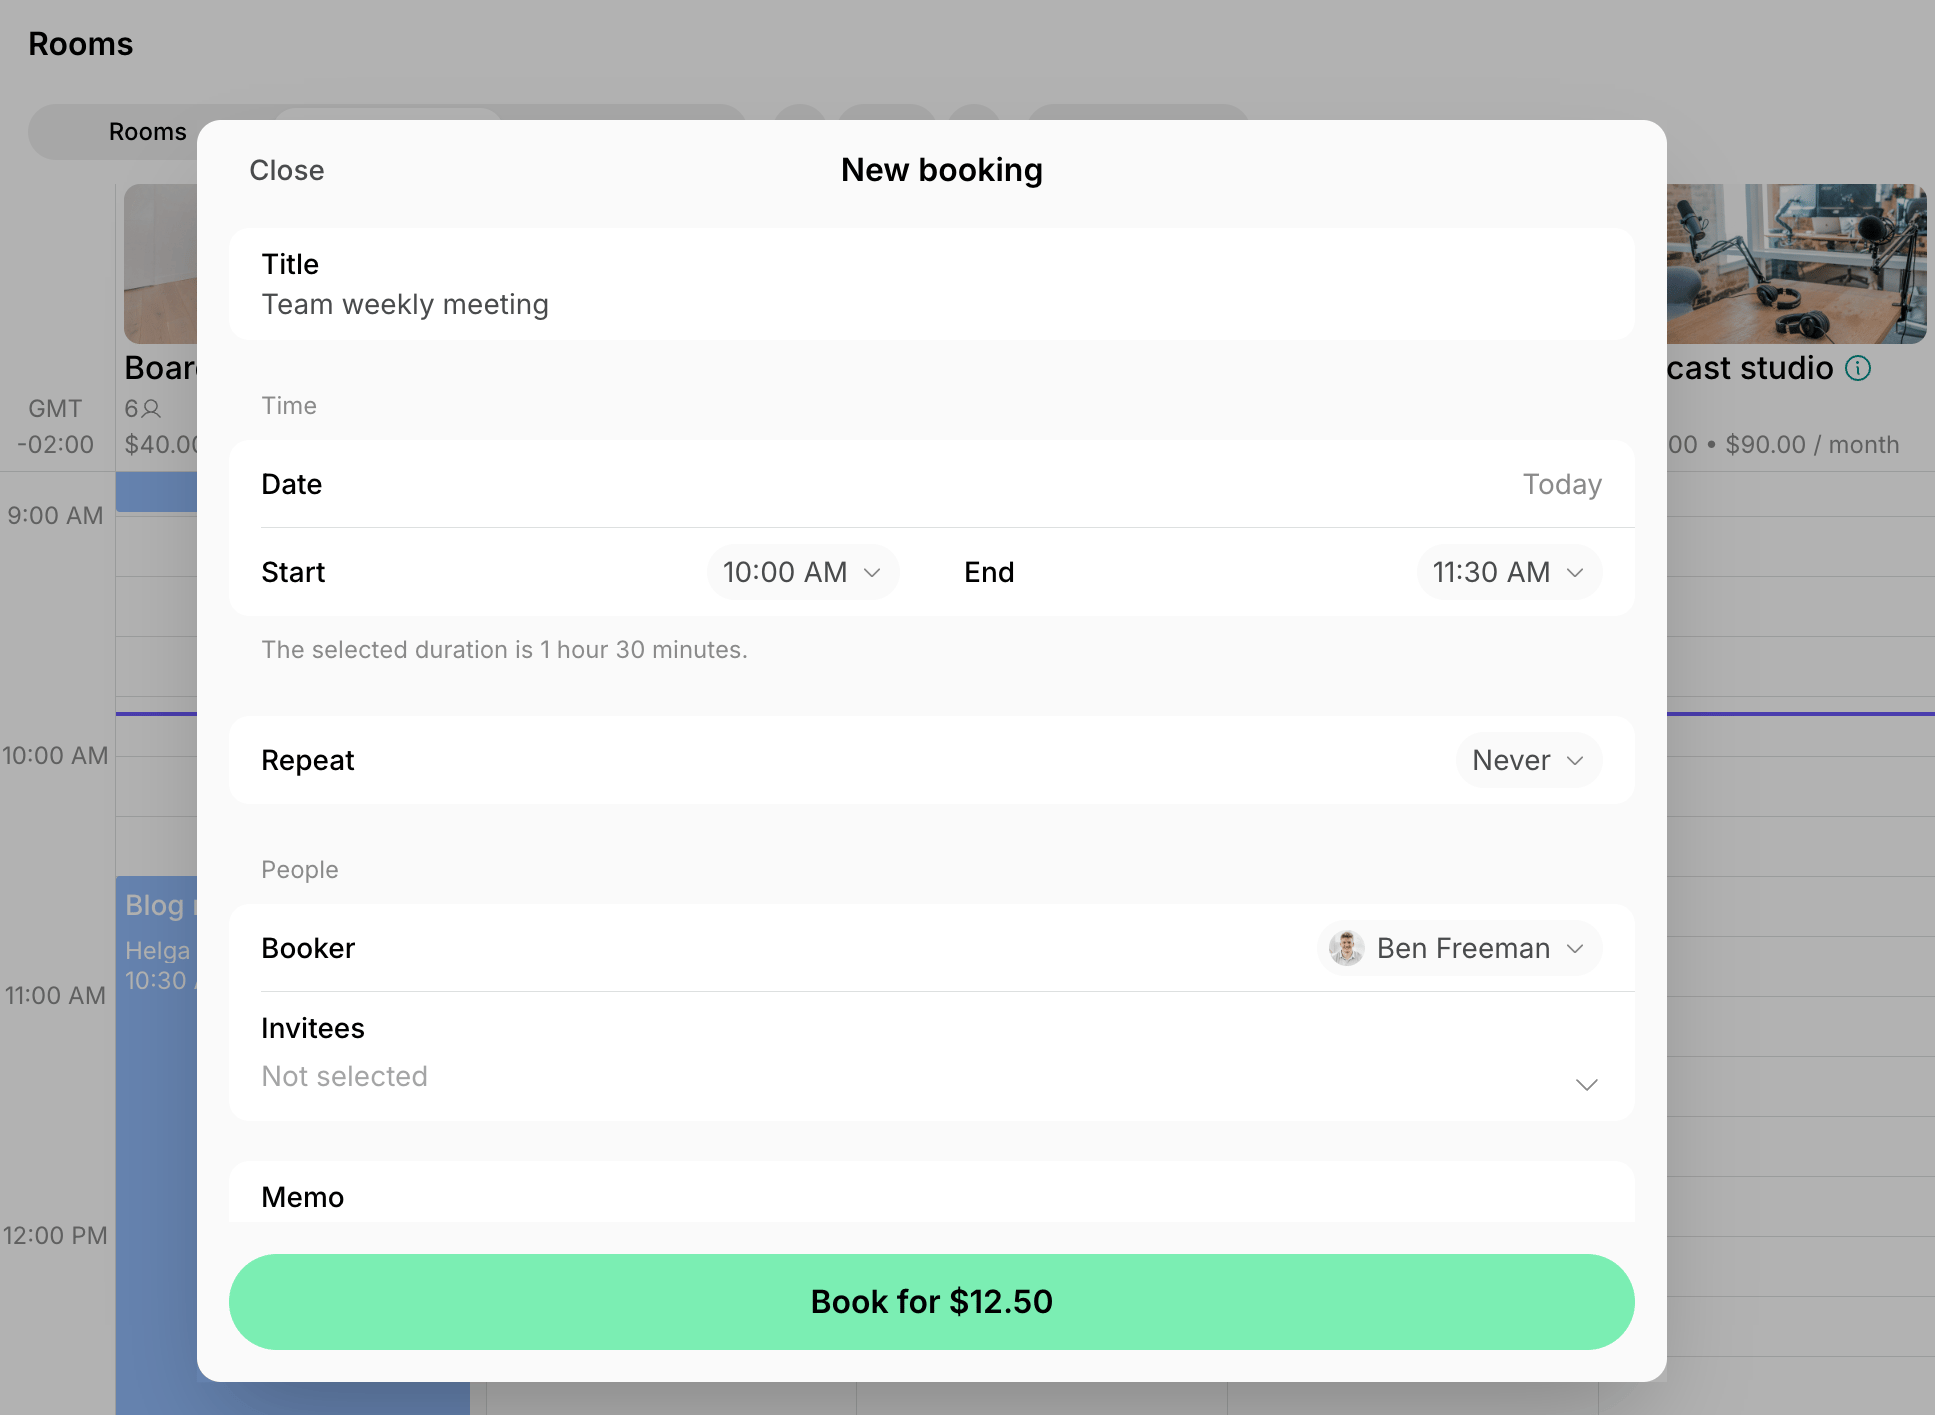
- Choose the booking date, time, and number of seats. Optionally, add a title, memo, or apply a coupon discount.
- Choose the customer in the Booker field.
- Choose the payment method to charge the customer for the booking:
- Free — the booking costs nothing, and no money, credits, or day passes are deducted.
- External — the customer pays outside Spacebring. Set the status to Paid if you already received the money, and Spacebring confirms the booking and generates an invoice for it in the Paid status. Set it to Pending to hold the booking until the customer pays.
- Personal credits or Company credits — deduct the price from the customer’s or their company’s credit balance.
- Personal day passes or Company day passes — deduct the booking from the customer’s or their company’s day pass balance. Available for hot desks only.
- Personal invoice or Company invoice — bill the booking to the customer or their company. It is added to the corresponding subscription invoice when Add to subscription invoices is enabled for that subscription. For everyone else, including a nonmember you book for once, it stays a pending invoice item in the customer’s profile for you to issue it.
- The customer’s saved card — charge the card right away. Spacebring generates an invoice and a receipt for the booking immediately.
- If you book for another customer or add invitees, choose whether to notify them about the booking.
Administrators can also record bookings for past dates.
Create a recurring booking
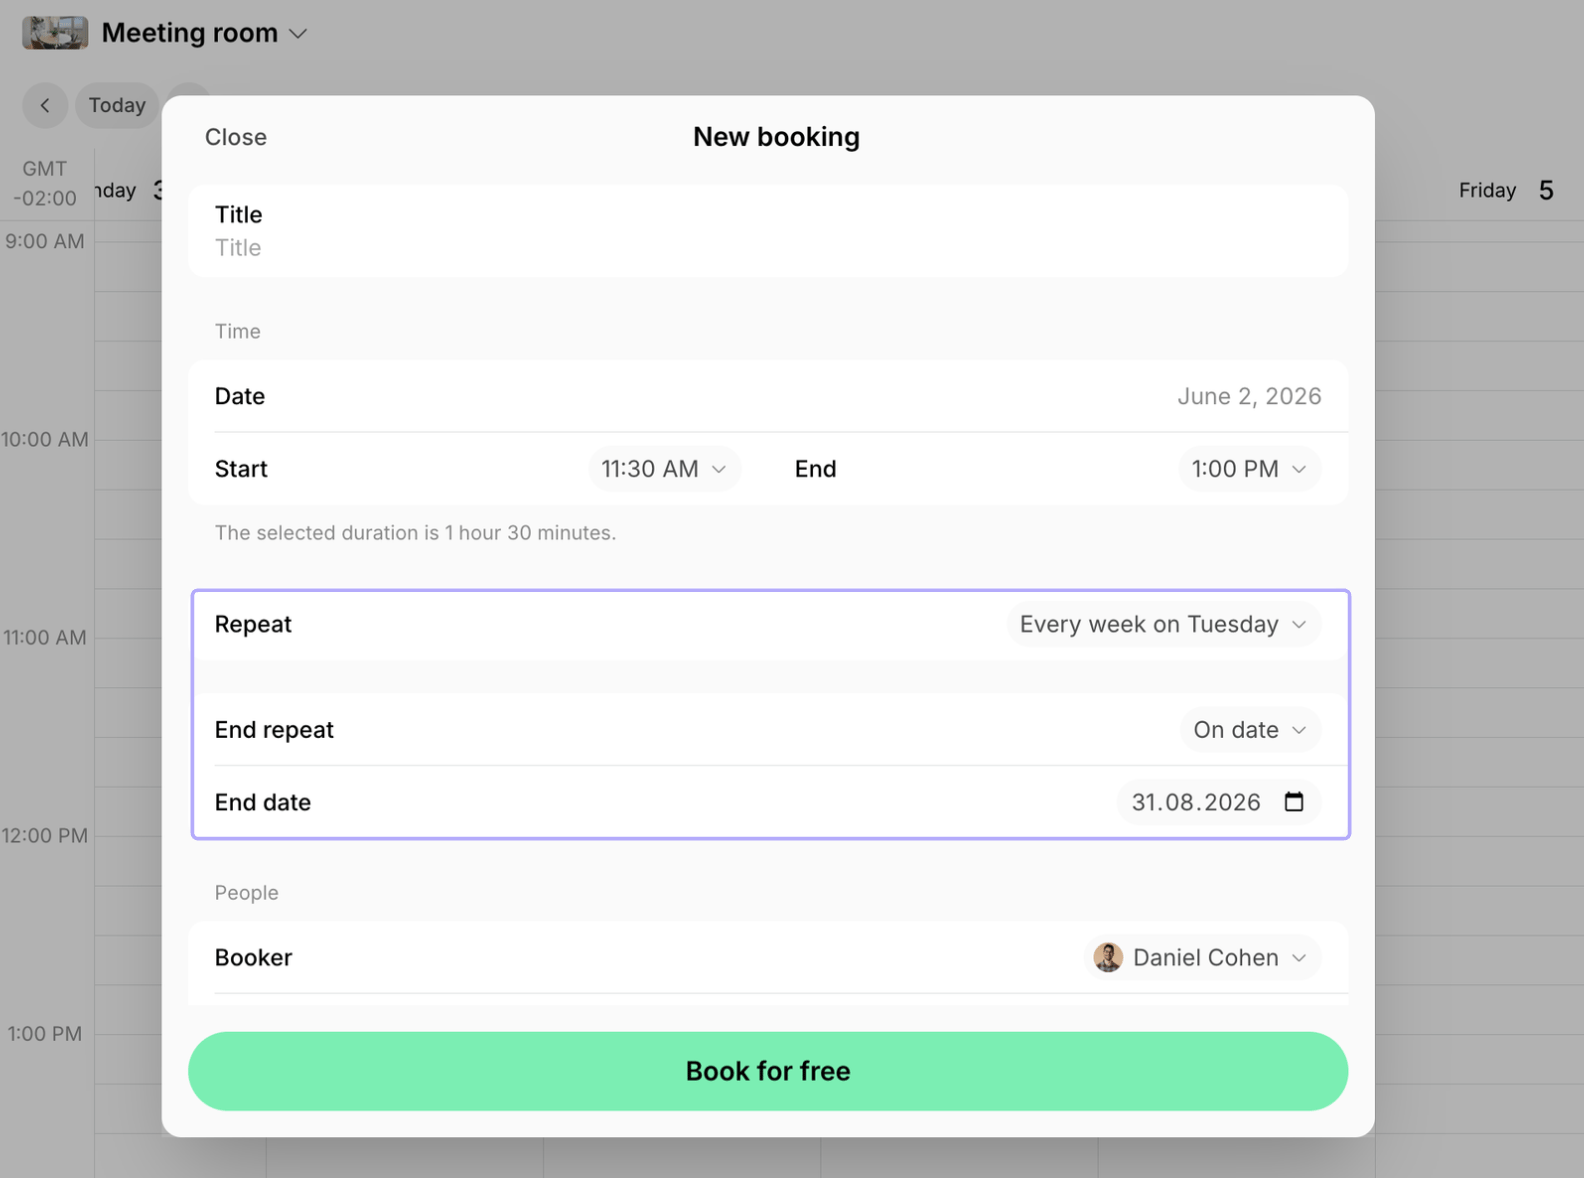
When a customer needs to book the same resource on a recurring schedule — for example, every Friday from 3:00 PM to 6:00 PM — you can create a recurring booking for them:- Start creating a booking.
- Under the Repeat settings, choose one of the suggested recurrence patterns, or select Custom to set your own recurrence pattern.
- In the End repeat field, choose:
- On date — to set a specific final booking date, or
- Never — to set an open-ended recurrence.
- For Custom recurrences, you can also choose After number of occurrences to schedule a specific number of recurring bookings.
- Choose the customer for whom you’re booking in the Booker field.
Users can also create recurring bookings themselves, but only when the booking is free for them — a completely free resource, or one assigned to them or their company.
Edit a booking
To edit a booking, users and administrators follow these steps:- Open the relevant booking from the Resources, Bookings, or customer profile page.
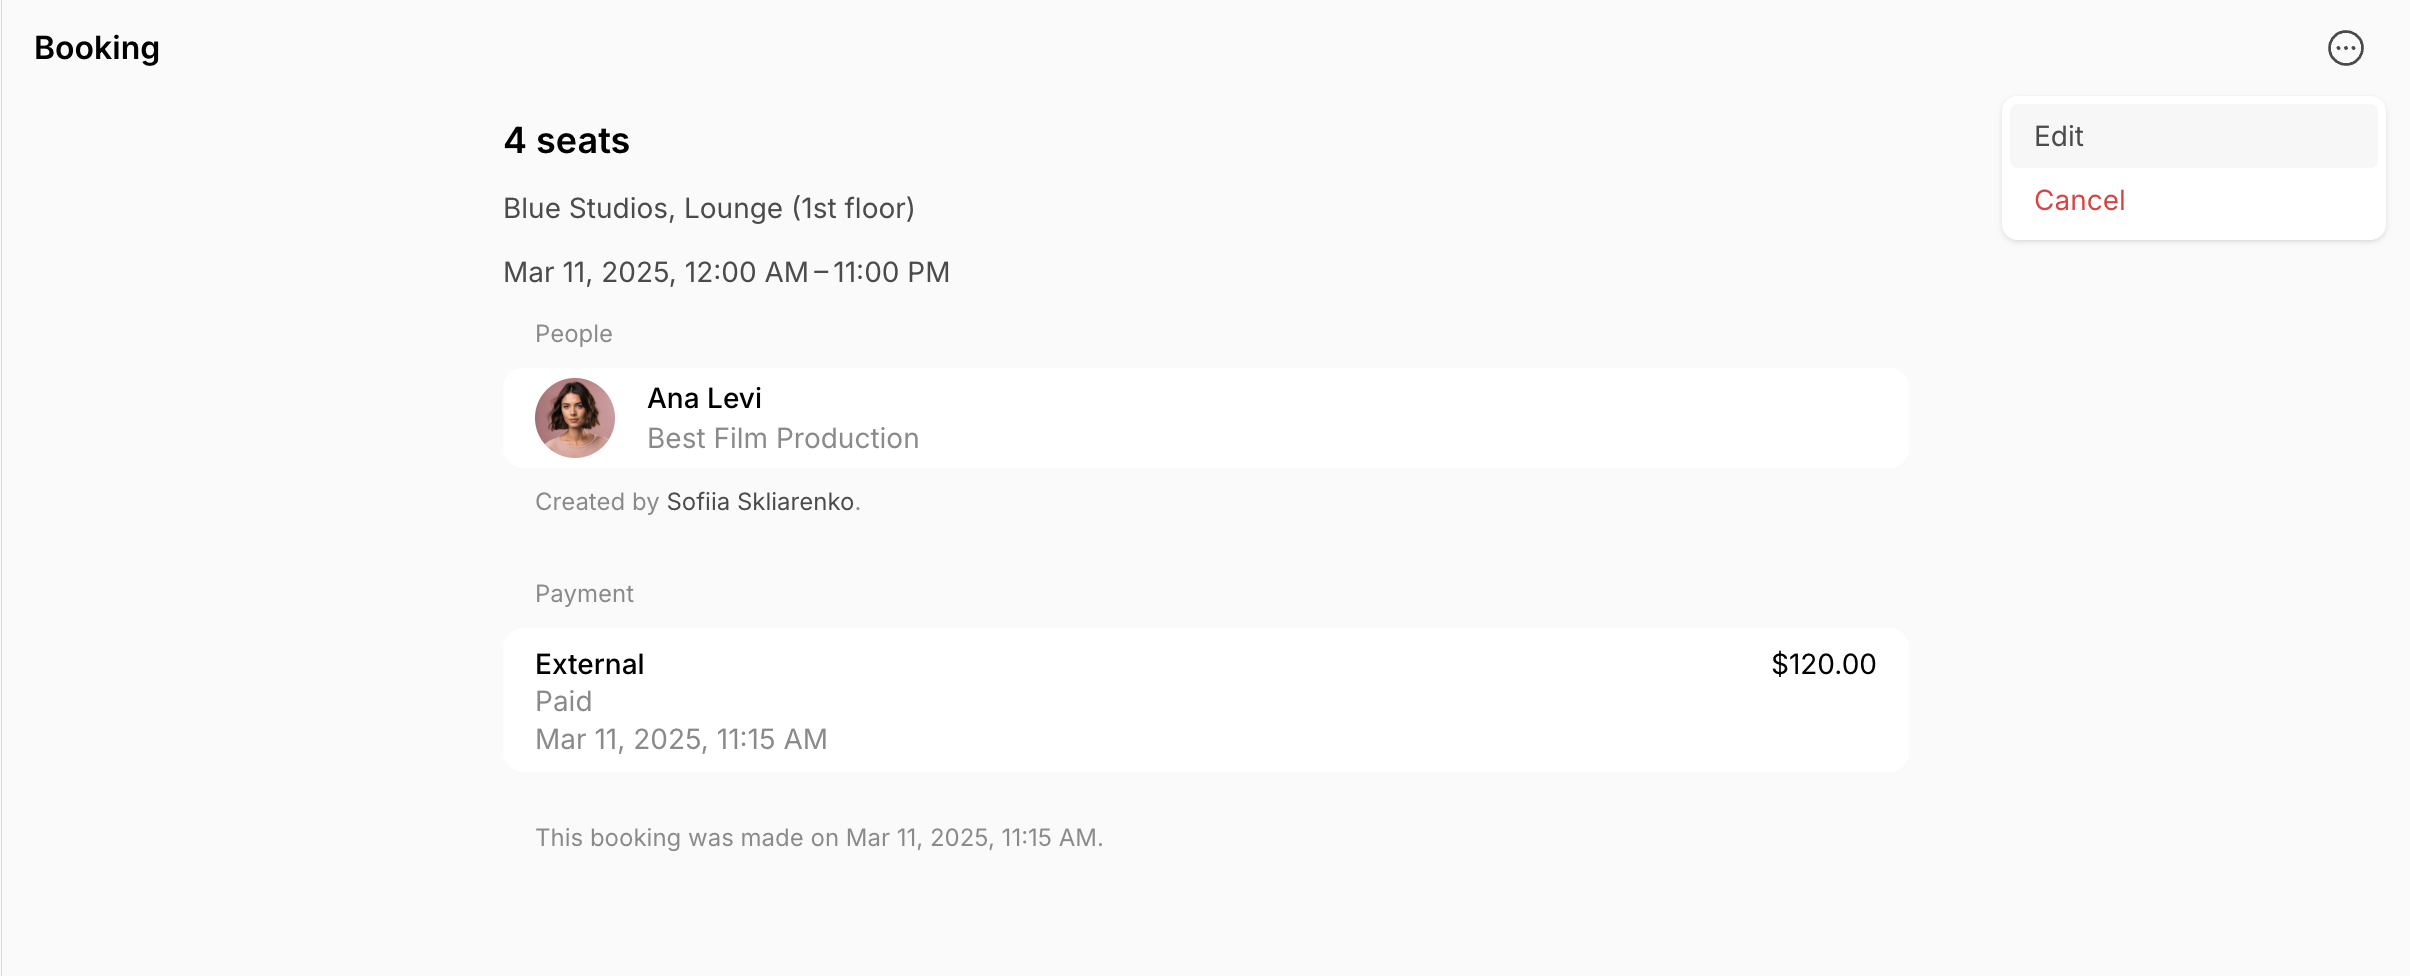
- Click (…) in the top right corner > Edit.
- Make your changes and save. If the booking was made for another customer or has invitees, choose whether to notify them about the change.
How users edit bookings
How administrators edit bookings
General editing rules
- If an administrator created a booking for a user, the user cannot edit it, regardless of the payment method.
- The rescheduling policy limits users only — an administrator’s edit that lowers the price refunds the difference automatically, at any time.
- Both users and administrators can edit the booking title, memo, and invitees at any time — before, during, or after the booking.
- When editing or canceling a recurring booking, users and administrators choose to apply the change to This occurrence only, or to This and future bookings.
- Changing the Repeat or End repeat settings applies to the booking being edited and every later one, so the This occurrence choice is not offered for it.
- A free booking on an assigned resource can only be edited while the assignment still covers its dates.
- A booking imported from Google Calendar can’t be edited, refunded, or canceled in Spacebring. Change it in Google Calendar instead.
Move a booking
- You can move a booking only to another resource of the same type (e.g. a parking lot booking to another parking lot) or to a similar room or desk subtype (e.g. a hot desk booking to a dedicated desk booking). Office and recurring bookings can’t be moved.
- The target resource must be in the same location, accept the booking’s payment method, and support any coupon applied to the booking.
- Bookings made with invoice can only move to another resource until the invoice is issued.
Track bookings
There are several ways to track bookings:- Enable admin notifications to receive alerts whenever a new booking is created or canceled.
- Go to the Resources > Bookings page to view a comprehensive list of all resource bookings in one place.
- The page opens on today’s bookings. Filter by Date to see another ready-made period, such as Tomorrow or Next 7 days, or click Custom to set an exact date or range. The filter matches every booking the period touches, including one that runs straight through it.
- Filter by Status to see tentative, confirmed, or canceled bookings.
- Filter by Resource type to see bookings for a specific type of resource, such as rooms, desks, offices, parking, or equipment.
- Filter by Resource to see all bookings for that individual resource only.
- Filter by Customer to view all bookings of a specific member, nonmember, or company.
Booking statuses
- To track bookings for specific resource types, go to their dedicated pages. From there, you can filter by date to see bookings for today or any specific day:
- Rooms: Go to Resources > Rooms > Calendar and choose the Day or Week period
- Desks: Go to Resources > Desks > Bookings
- Offices: Go to Resources > Offices > Bookings
- Parking: Go to Resources > Parking > Bookings
- Equipment: Go to Resources > Equipment > Timeline.
Booking colors
When viewing room bookings on a calendar, you can identify the user type and booking status by the booking colors and style:- Blue - the booking of an administrator.
- Green - the booking of a member.
- Yellow - the booking of a nonmember.
- Outlined booking with transparent background - booking in tentative status.

- Click any booking to check more details about it.
- Check under the People section to see who made the booking — the customer themselves, an administrator on their behalf, or another member of their company on their behalf.

Export a bookings report
On the Resources > Bookings page, apply the necessary filters, then click (…) in the top right corner > Export as CSV or Export as XLSX to download a report on the filtered bookings. The report includes each booking’s status, resource type and title, its start, end, and create dates, quantity, and memo, its payment type, price, currency, and payment status, the booker’s name and company, and the name of whoever created the booking on their behalf.Cancel a booking
To cancel a booking, users and administrators follow these steps:- Open the relevant booking from the Resources, Bookings, or customer profile page.
- Click (…) in the top right corner > Cancel.
- When a user cancels, the refund depends on the resource’s rescheduling policy and the payment method used, as in the table below.
- When an administrator cancels, Spacebring asks whether to refund the booking, regardless of the rescheduling policy.
Troubleshoot booking errors
When a customer reports an error while creating or editing a booking, the message almost always points at the location schedule or a resource setting rather than at the booking itself.The booking period is invalid
The booking period is invalid
The location schedule changed after the booking was created, and the booking no longer fits it — for example, the booking ends at 11 PM but the location now closes at 10 PM. Extend the Until time in the schedule that applies to that customer — the Default schedule for members, the Public schedule for nonmembers — then ask them to edit the booking again.
Select a correct date. This day is not available
Select a correct date. This day is not available
The chosen date is marked as a closed day or falls outside the schedule’s workdays. If the day should be bookable, remove it from the Closed days of the schedule that applies to that customer, then ask them to try again.
You already have an active free booking
You already have an active free booking
The customer already holds as many simultaneous free bookings as the room’s Book for free setting allows. This error appears only on rooms that are free of charge. Raise the limit to let customers hold several free bookings at once.
No payment methods are available
No payment methods are available
The customer has no way to pay for the booking. Check that a payment gateway is connected to the location and, for Stripe, that Bookings is selected in the Payments section of its settings.
- The Default and Public location schedules match the hours you actually offer to members and to nonmembers.
- Book ahead and Book for free on the Location settings > Rooms page.
- Each resource’s Availability increment, Min & Max duration, Buffer time, Custom schedule, and rescheduling policy.
- If a resource is bookable by members only, the Support page is publicly visible so nonmembers can apply for a booking instead.
FAQs
Who canceled a booking — the customer or an administrator?
Who canceled a booking — the customer or an administrator?
Open the canceled booking from the Resources > Bookings page or from the customer’s profile > Bookings, and it shows who canceled it. The cancellation notification in your Inbox names them too, if you have Resources notifications enabled.
How can I check a recurring booking's schedule?
How can I check a recurring booking's schedule?
Opening a booking shows its recurrence details if it is part of a recurring series: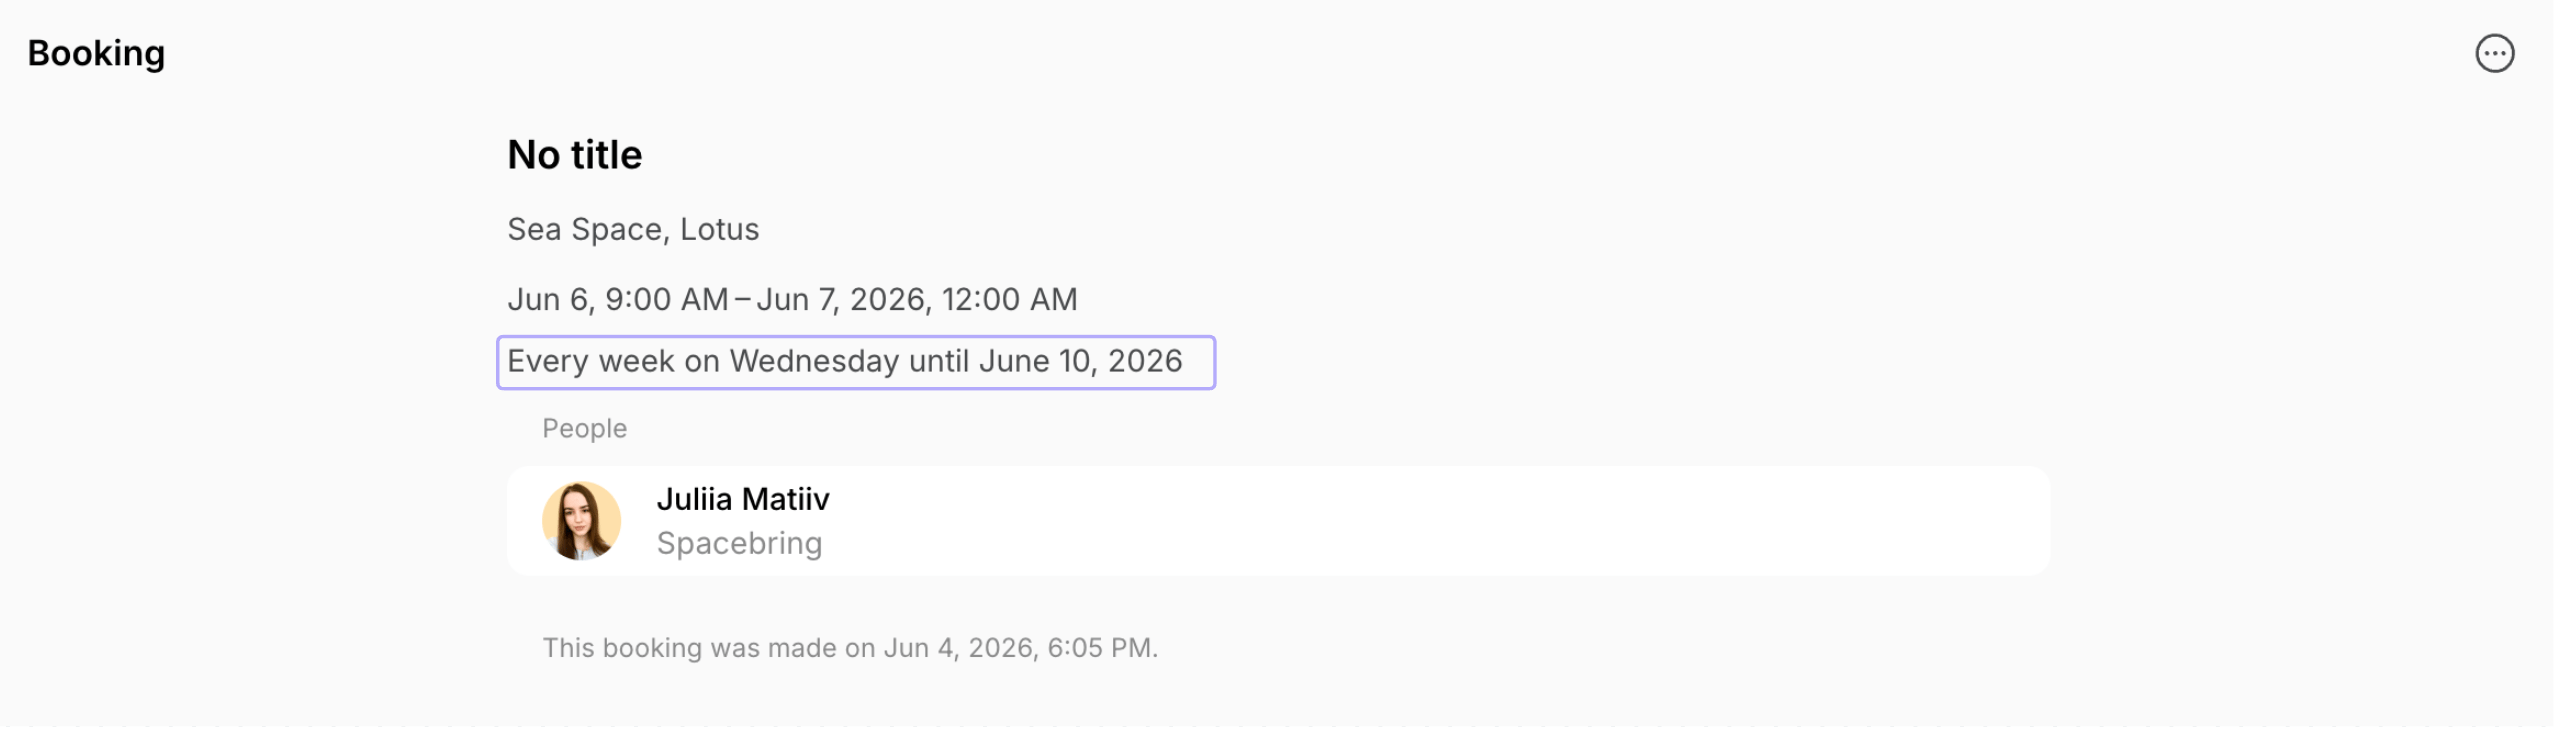
Can I book an office?
Can I book an office?
Yes. An office works like any other resource: it can be booked short-term, rented long-term, or both. What a customer can do with it depends on whether the office is assigned to them for the dates in question.While nobody rents the office, customers book it themselves in the member web portal:
- Hourly or daily, according to the office’s Availability increment, Min duration, and Max duration. To offer full days only, set both durations to 1 day.
- Members and nonmembers alike, according to the office’s Visibility and Booking permissions.
- With any payment method the office accepts. Day passes are not available for offices — they work for hot desks only.
- As a whole office, so all its seats have to be free for the chosen period. A period where part of the office is already booked or assigned is not offered to them.
My customer can't book a desk with day passes
My customer can't book a desk with day passes
This desk must be not a Hot desk type or the Day passes switch is turned off in its settings. To allow booking it with day passes:
- Go to Resources > Desks.
- Start editing this specific desk.
- Verify it is set to the Hot desk type. Only hot desks can be booked with day passes.
- Verify it has the Day passes switch enabled.
Why do I get "Another booking already exists at the same time" when scheduling a recurring booking?
Why do I get "Another booking already exists at the same time" when scheduling a recurring booking?
This error means that on one or more dates in the recurring series, there is already a booking scheduled for that resource at that time. To identify the conflicting booking, filter the Resources > Bookings page by the specific resource. This will show all existing bookings for that resource so you can find which one overlaps with your recurring series.
How can I calculate the rooms' occupancy in % during work hours?
How can I calculate the rooms' occupancy in % during work hours?
The Analytics > Occupancy page shows the occupancy rate for rooms and other resource types as of today. Use the Occupancy pageTo calculate occupancy during your work hours instead:
- Filter the Bookings page by rooms and the period you need, then export a bookings report.
- Open it in Google Sheets or Excel, calculate each booking’s duration from the Start date and End date columns, and sum them. This gives you the total booked hours.
- Determine the total available hours for your rooms: number of rooms × work hours per day × working days in the period.
- Divide the total booked hours by the total available hours and multiply by 100.