

Prerequisites
- Sign up for the Floor plans add-on from Network settings > Billing.
- Calculate the total area of your floors, in square meters or square feet.
- Prepare a floor plan: keep it in a standard straight (vertical or horizontal) orientation, not at an angle, and clearly label each resource that should be bookable separately, with its boundaries outlined.
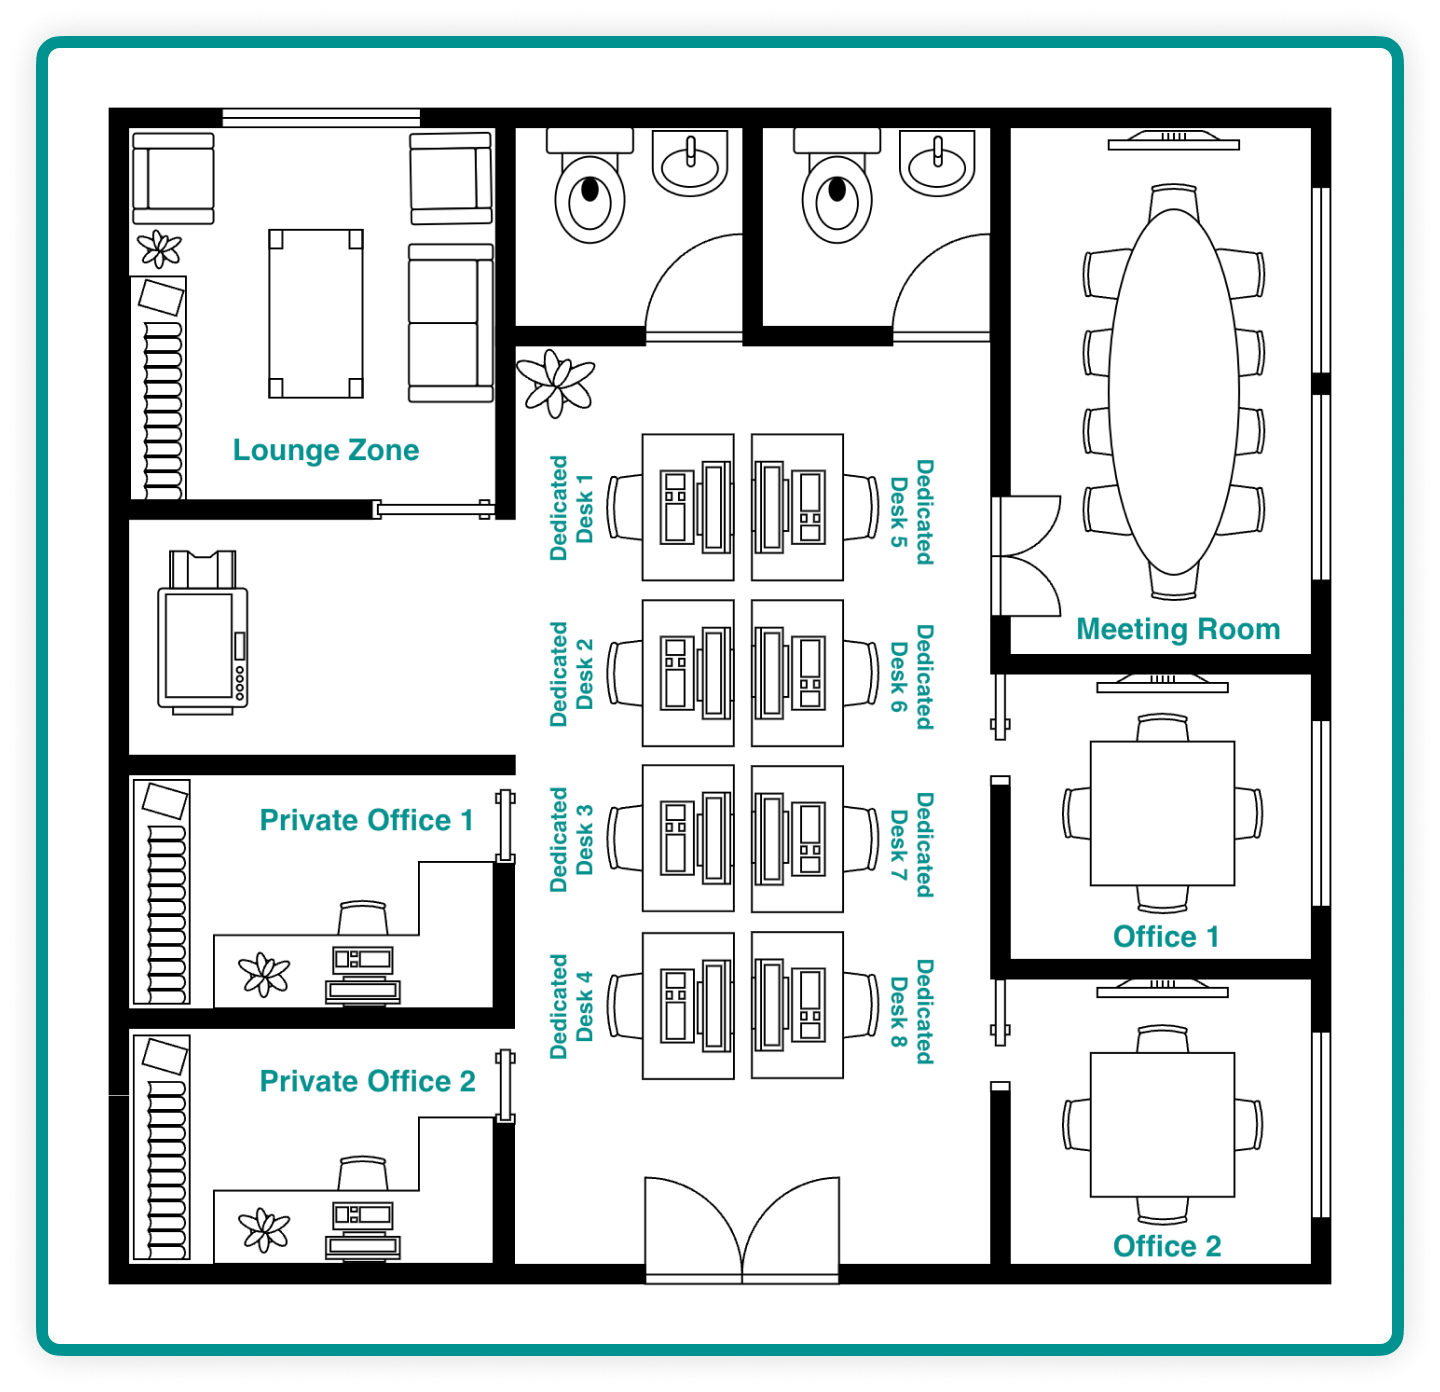
There are two ways to set up desks—as individual seats or by zones—to match your needs.
Order floor plans
The owner needs to follow these steps:- On the left-side panel, next to your location name, click the (…) menu > Location settings.
- Go to Resources page > Floors tab.
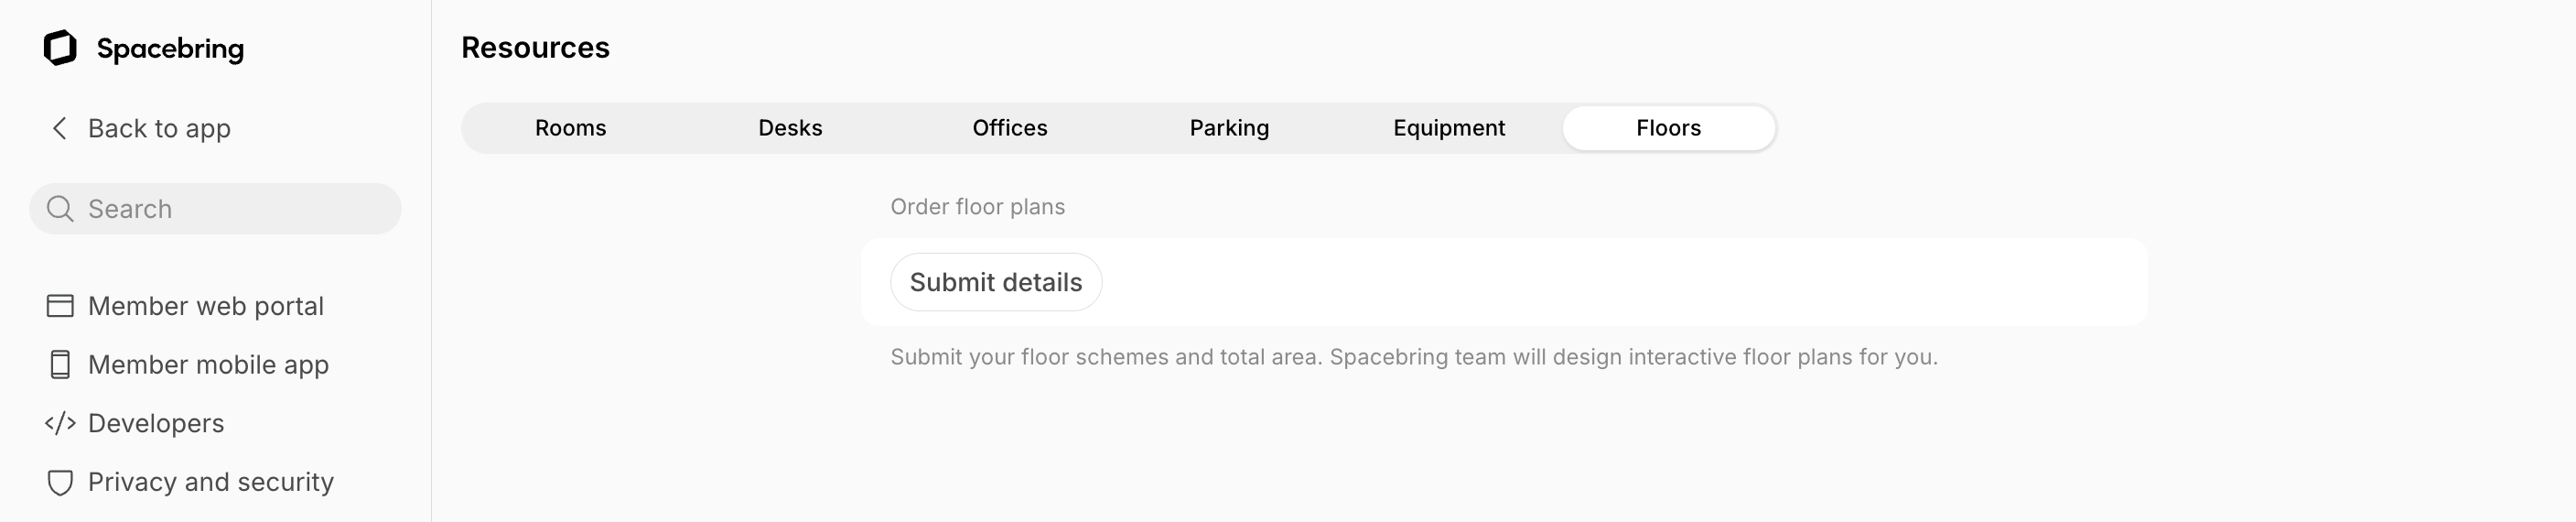
- In the Order floor plans section, click Submit details and fill out the form:
- Total floors: the number of floors to order plans for.
- Total area: the combined area of your floors, in square meters or square feet.
- Files: upload the scheme of each floor as an image or PDF file.
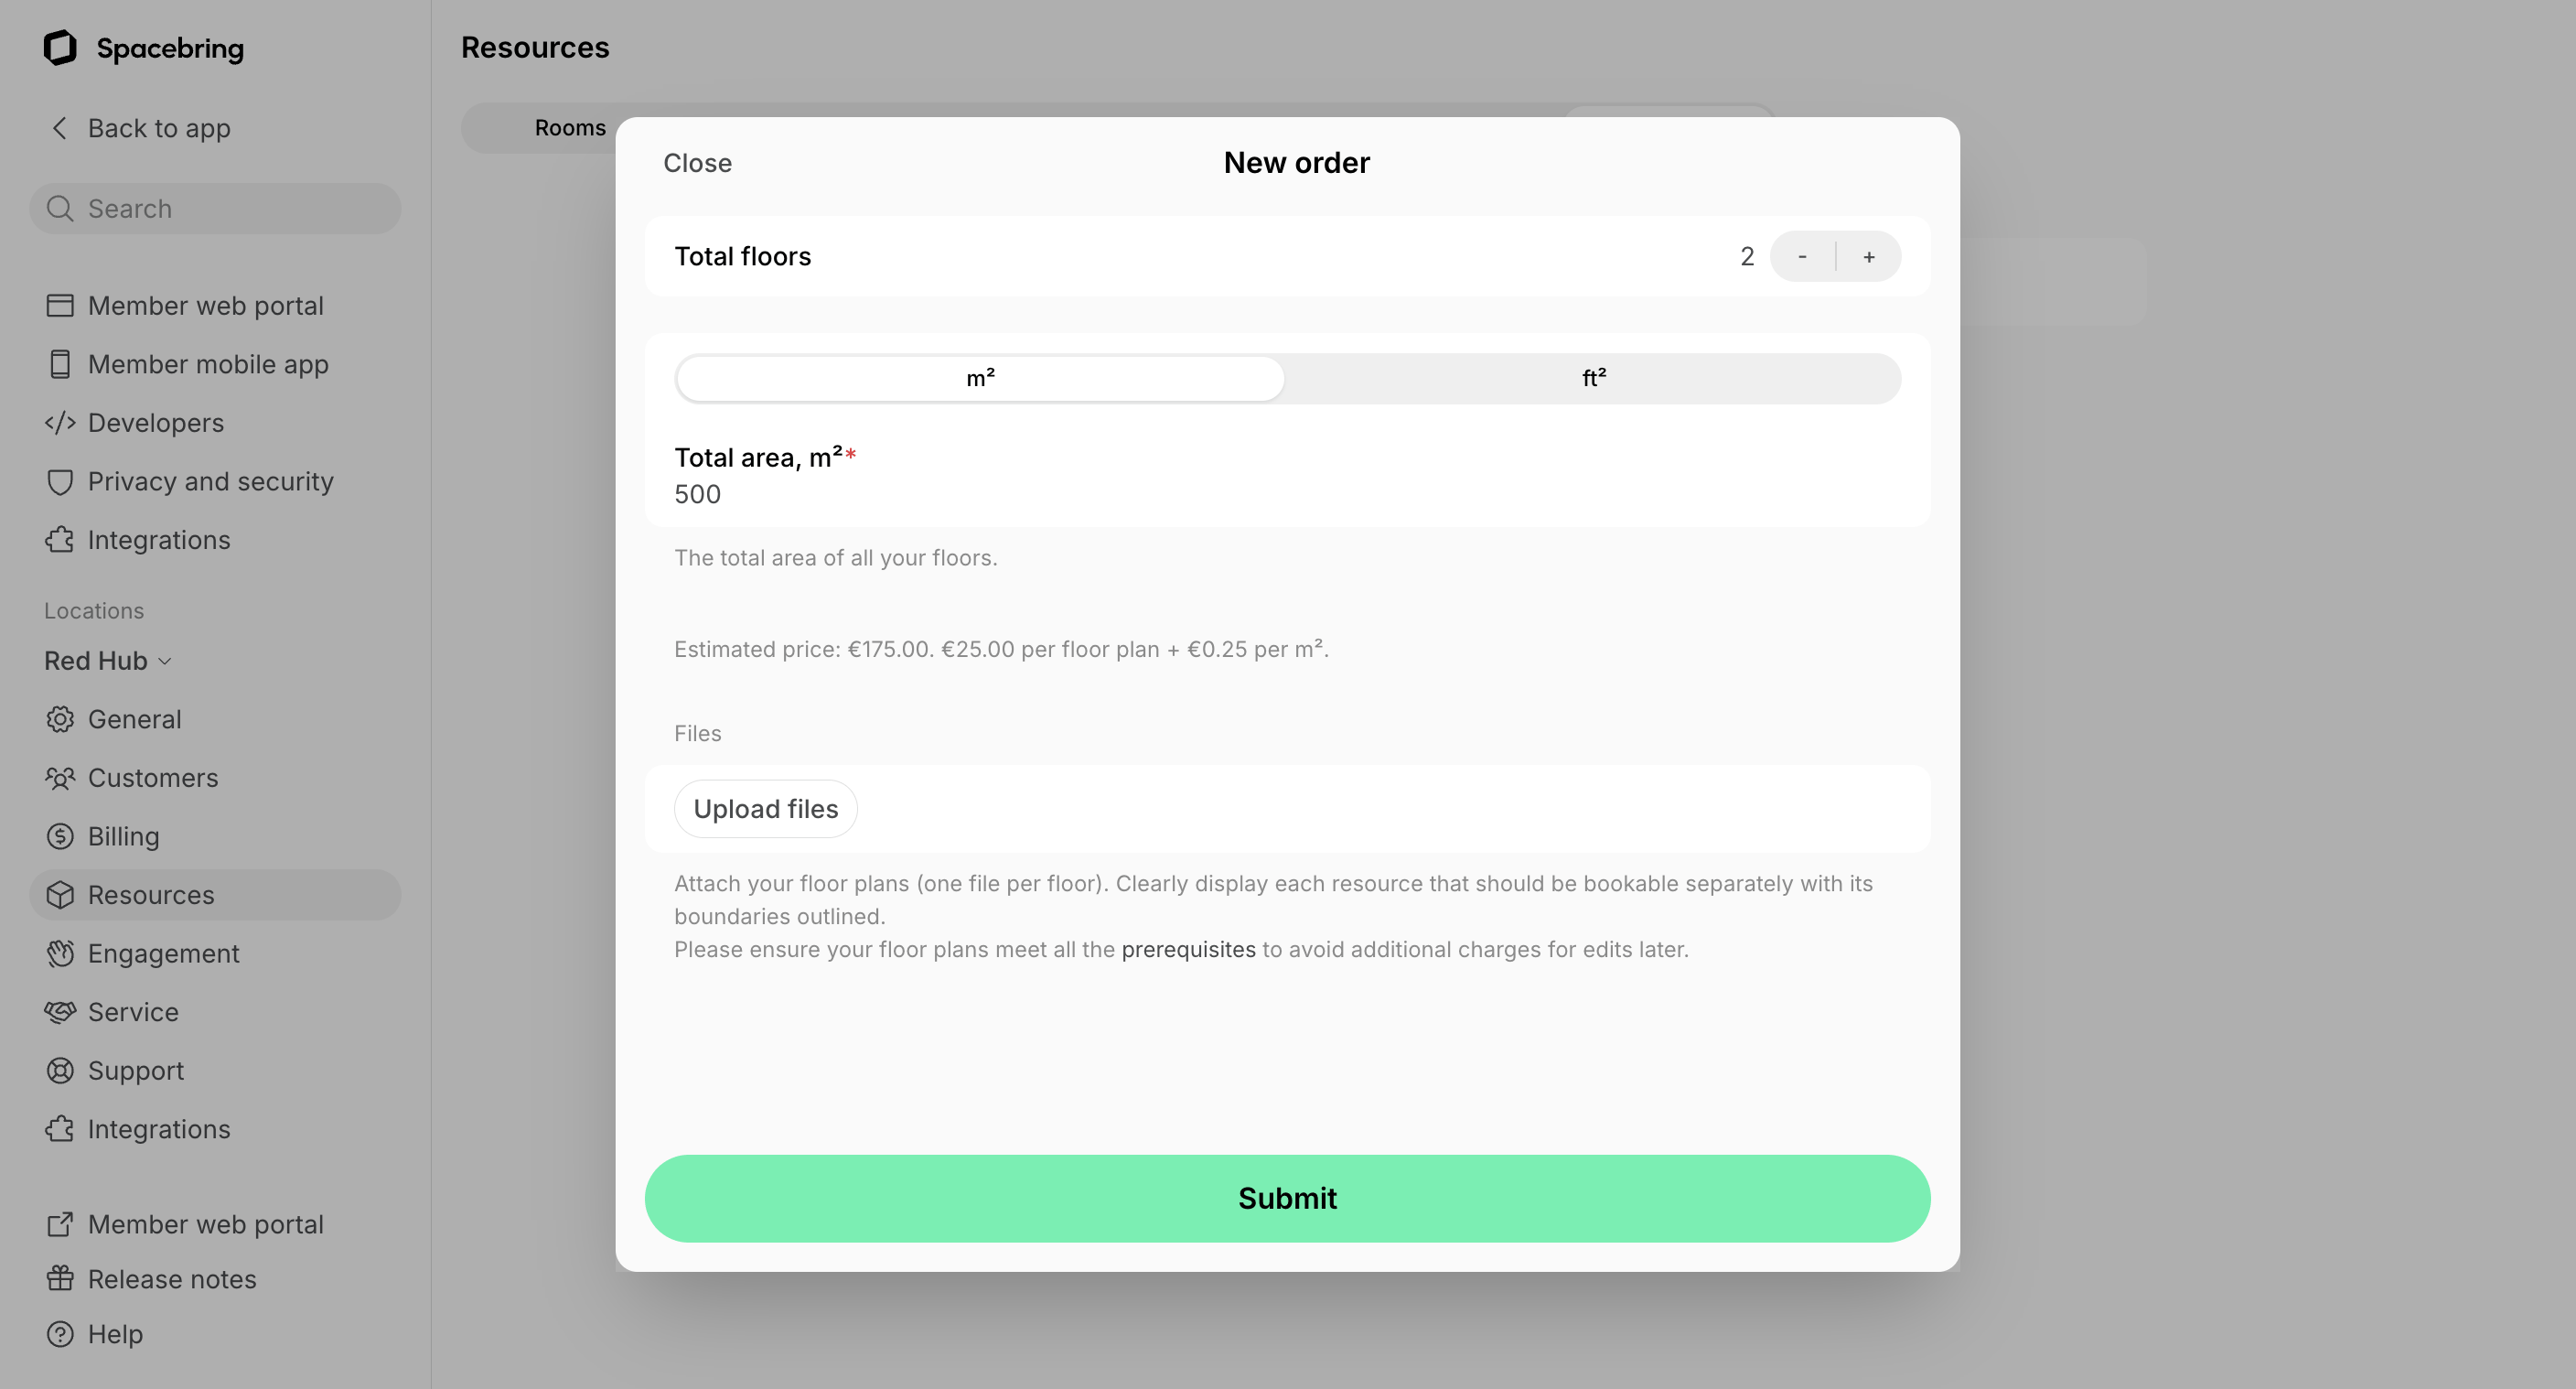
- Check the estimated price shown under the entered details, then press Purchase. By doing so, you authorize Spacebring to charge you the one-time setup fee, plus any applicable taxes or fees. The payment is processed right away with the payment method of your Spacebring subscription.
- We begin preparing your floor plan(s). It takes up to 14 days per floor.
- Once created, we provide you with a preview and apply any requested edits.
- Once approved, we upload the floor plan to your location for you to map and publish.
Only owners can order floor plans.
Map and publish a floor plan
The Spacebring team uploads your floor plan to your location as a draft. Review it, map its resources, and publish it to make it visible to your customers.- On the left-side panel, next to your location name, click the (…) menu > Location settings.
- Go to Resources > Floors tab.
- The floor plan appears with an In review status, visible only to administrators.
- Press the (…) menu button next to the floor plan and select Review.
- Check the floor plan. If it’s correct:
- Add the floor plan’s name.
- Set its visibility.
- Map the resources you want to make bookable on it.
- Press Publish. The floor plan becomes visible to users in the member portal.
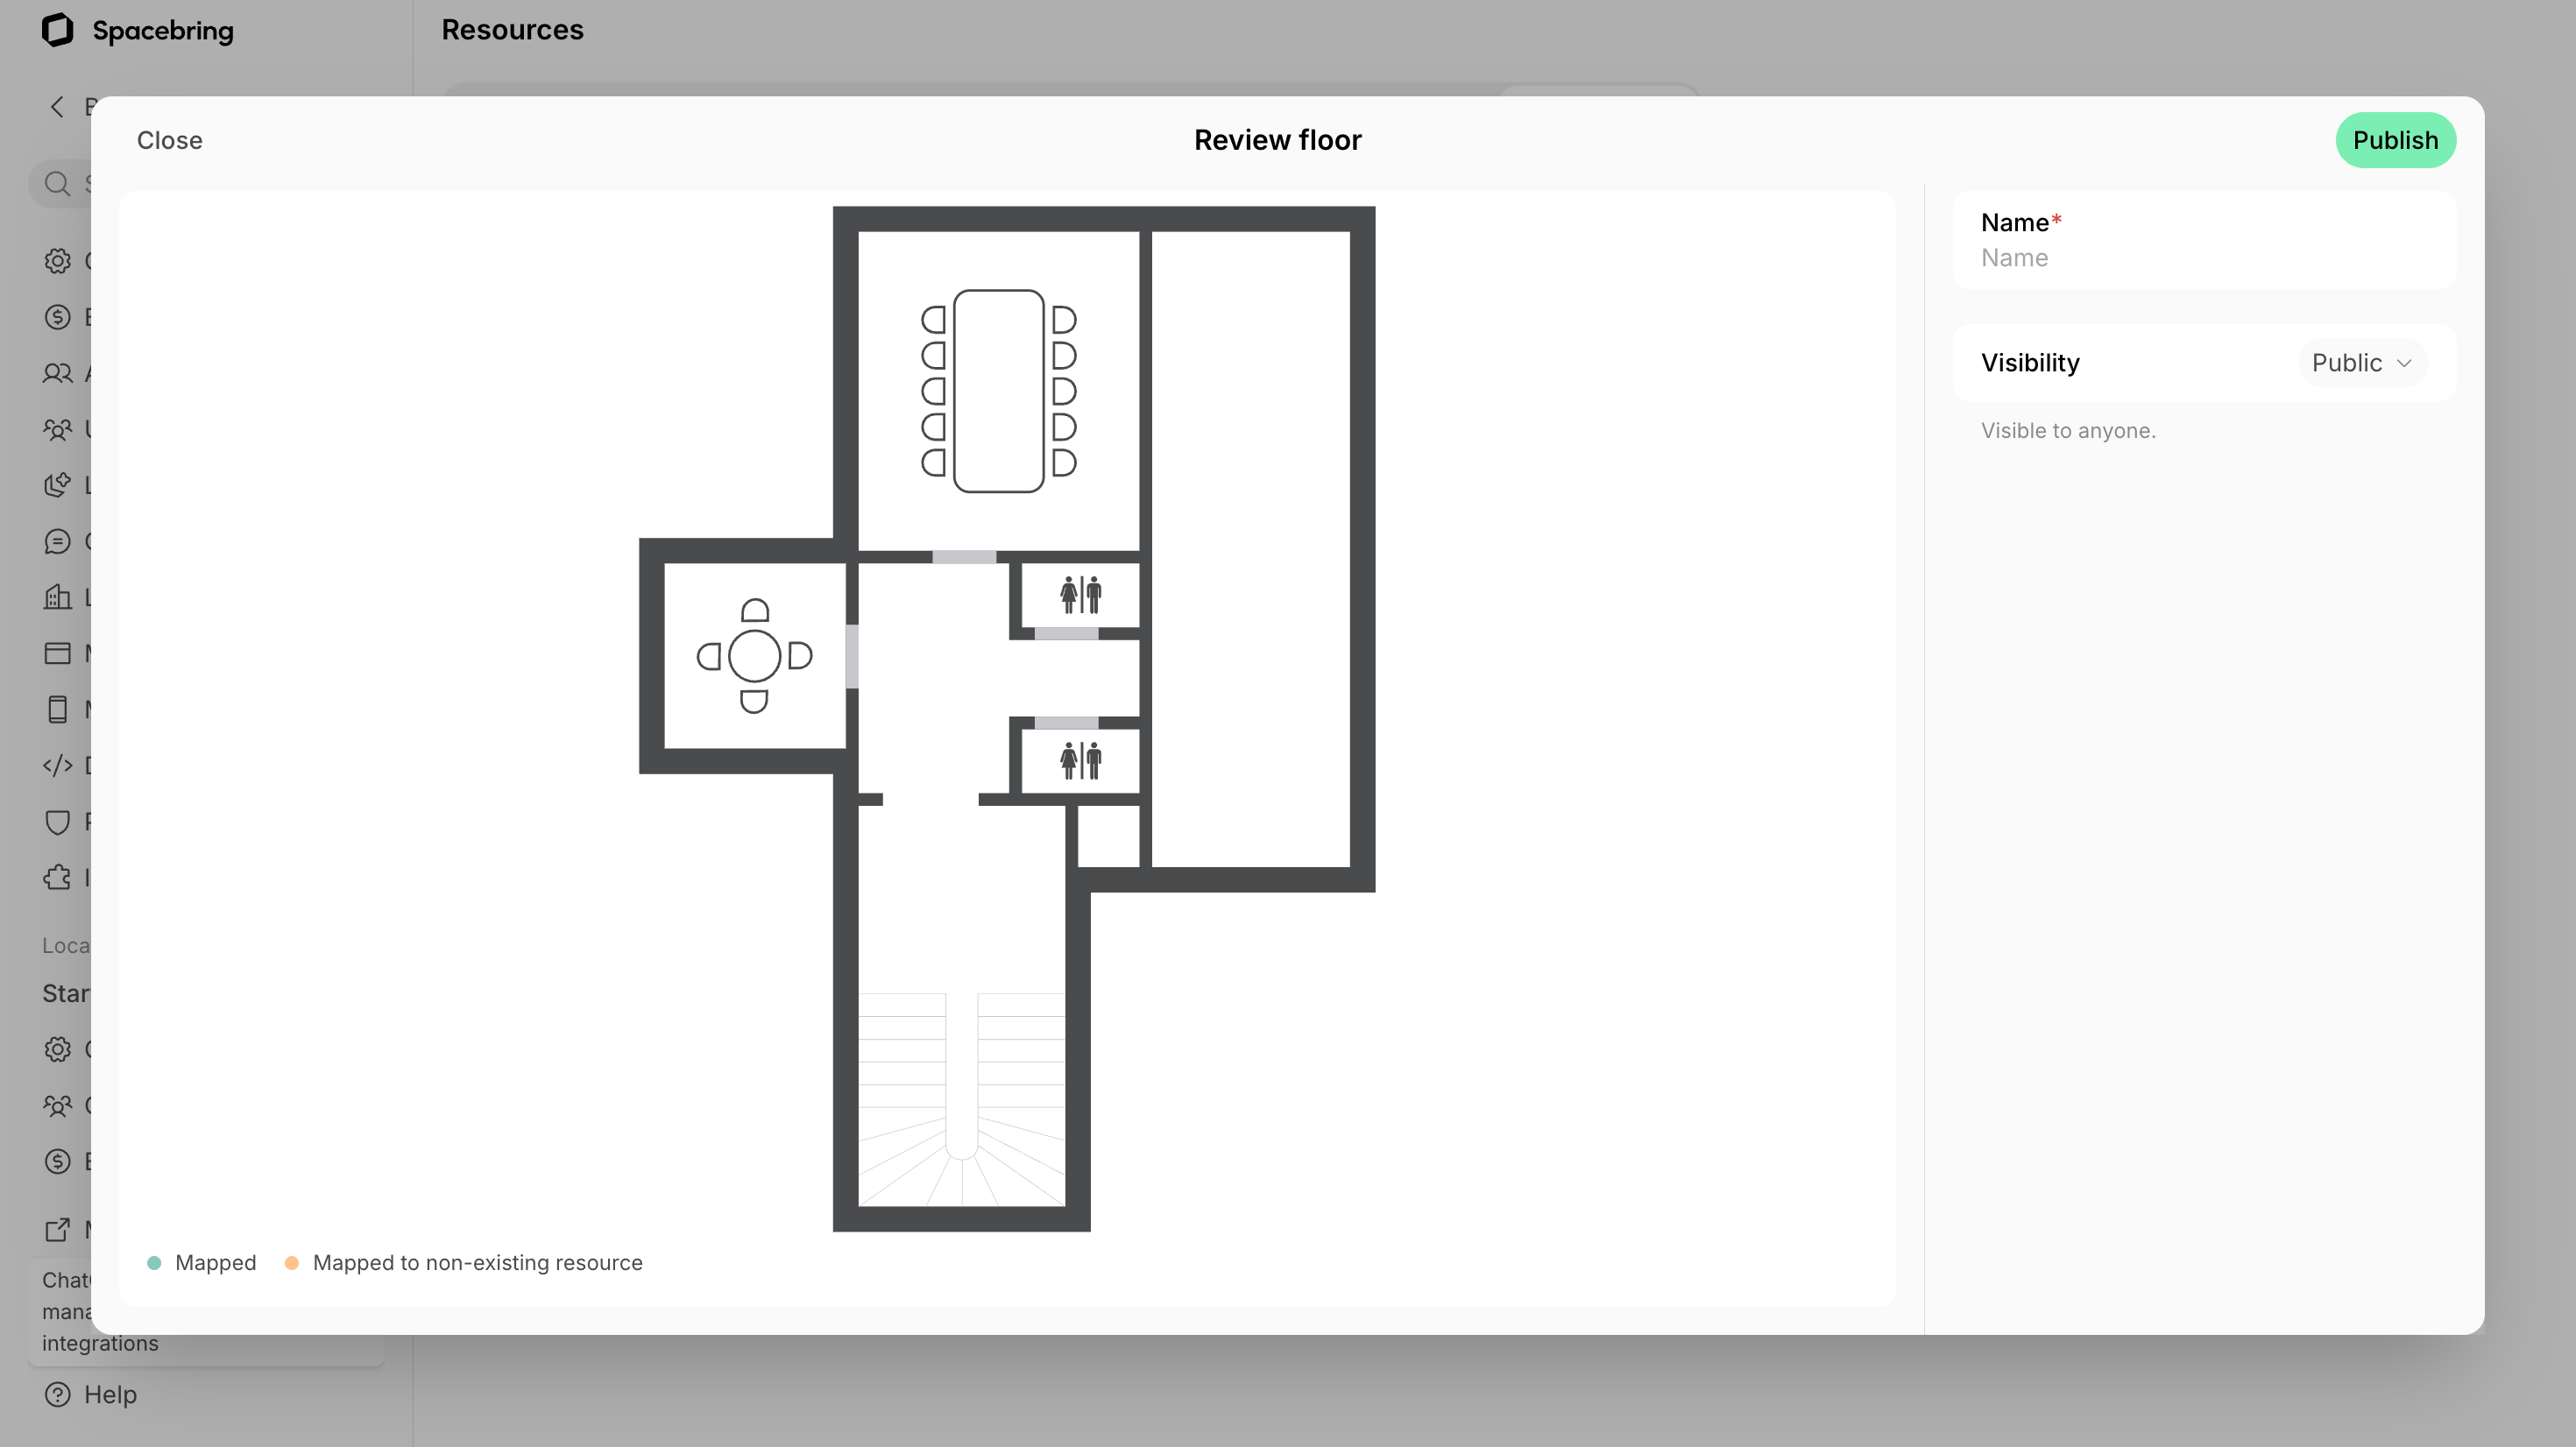
Map resources
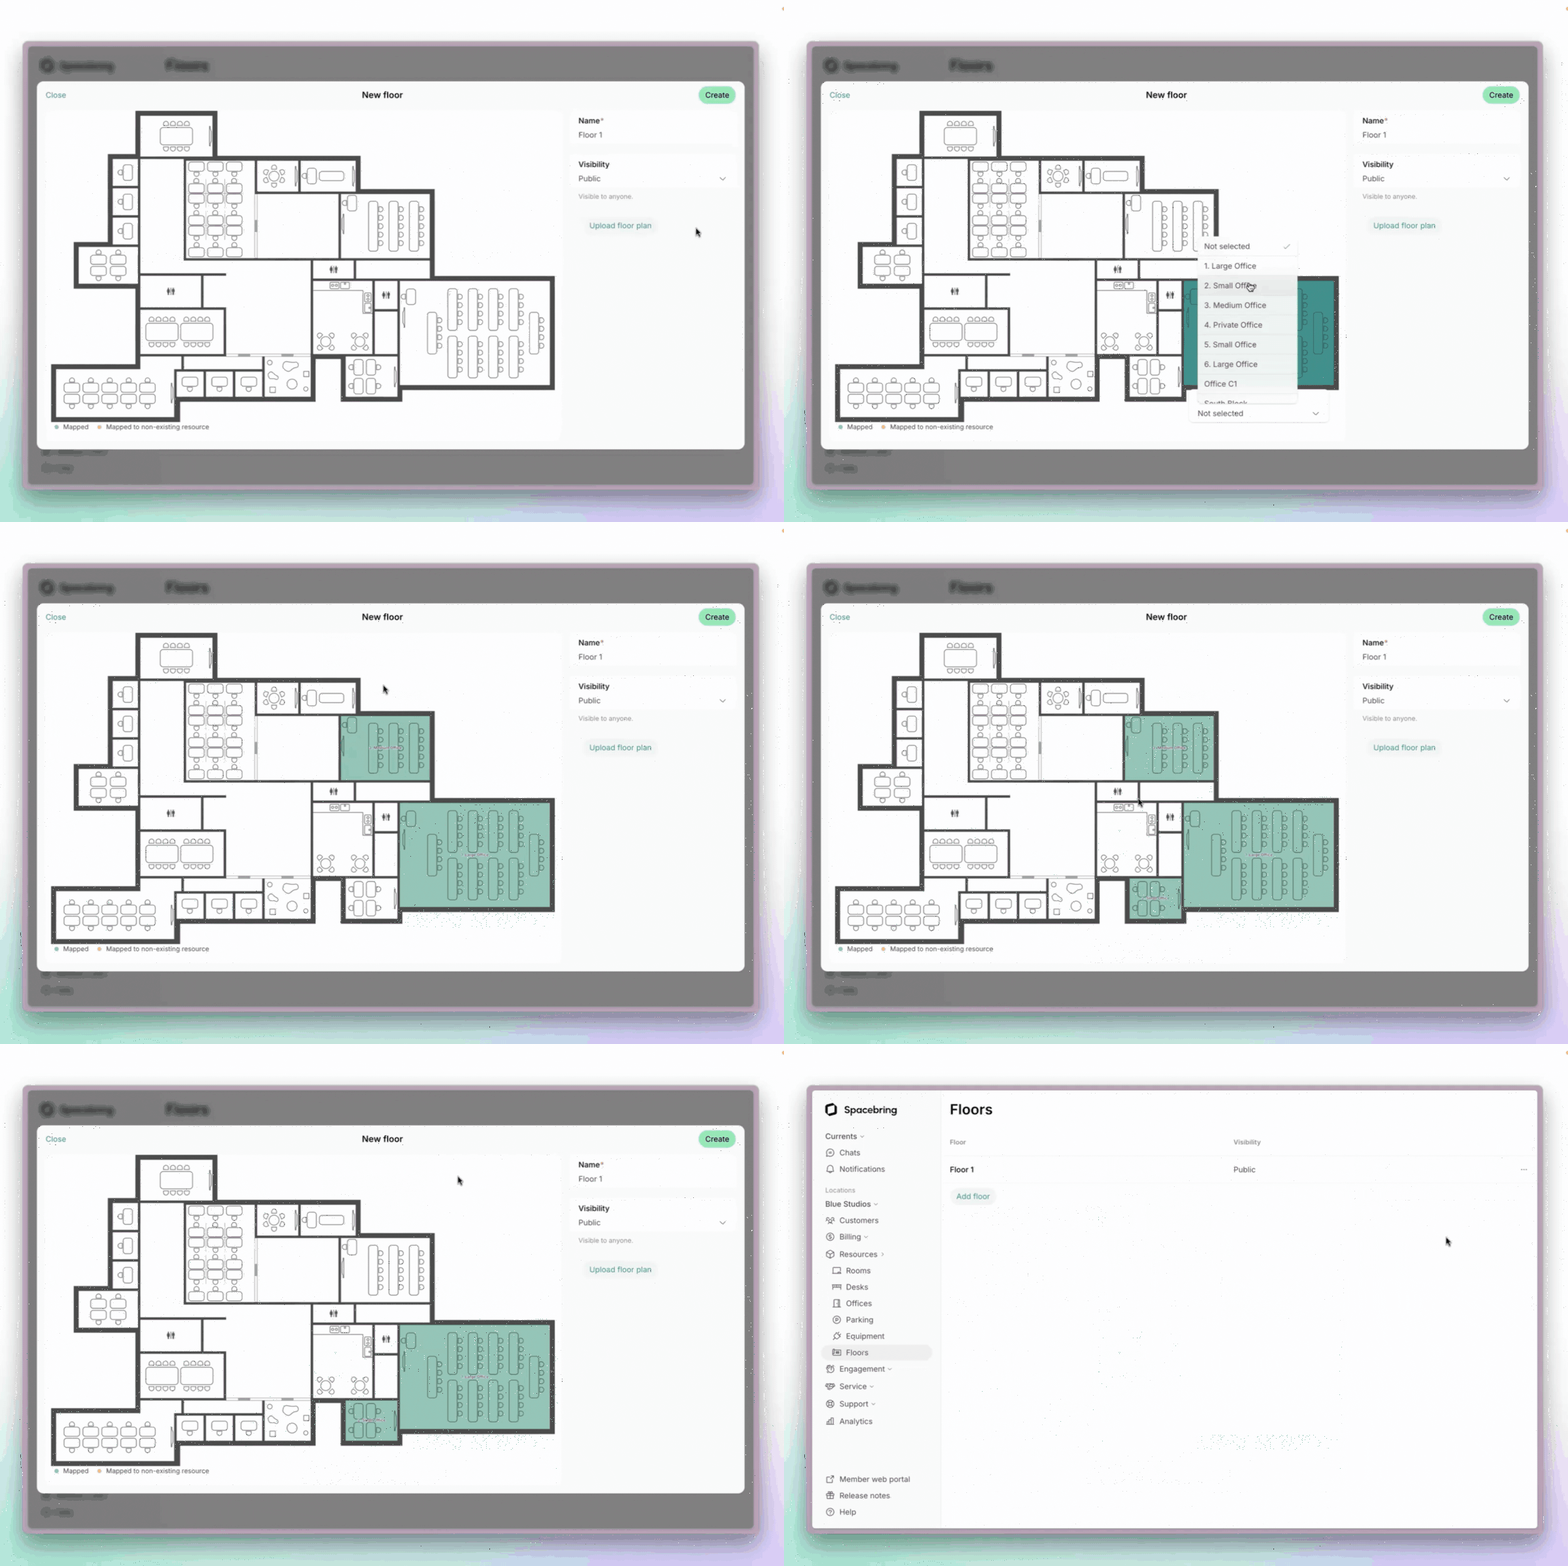
To make your floor plan interactive, map all your resources — rooms, desks, and offices — onto it, whether they’re currently free or already occupied by a customer.- Map an area as one resource: click the area, then select the resource from the dropdown. Ideal for areas booked as a whole, where people don’t need to choose a specific seat.
- Map individual seats as separate resources: click each seat, then assign its resource. Perfect for dedicated desks or individual seats in a shared office.
Edit or delete a floor plan
- On the left-side panel, next to your location name, click the (…) menu > Location settings.
- Go to Resources > Floors tab.
-
Press the (…) menu button next to the floor plan and select Edit or Delete.
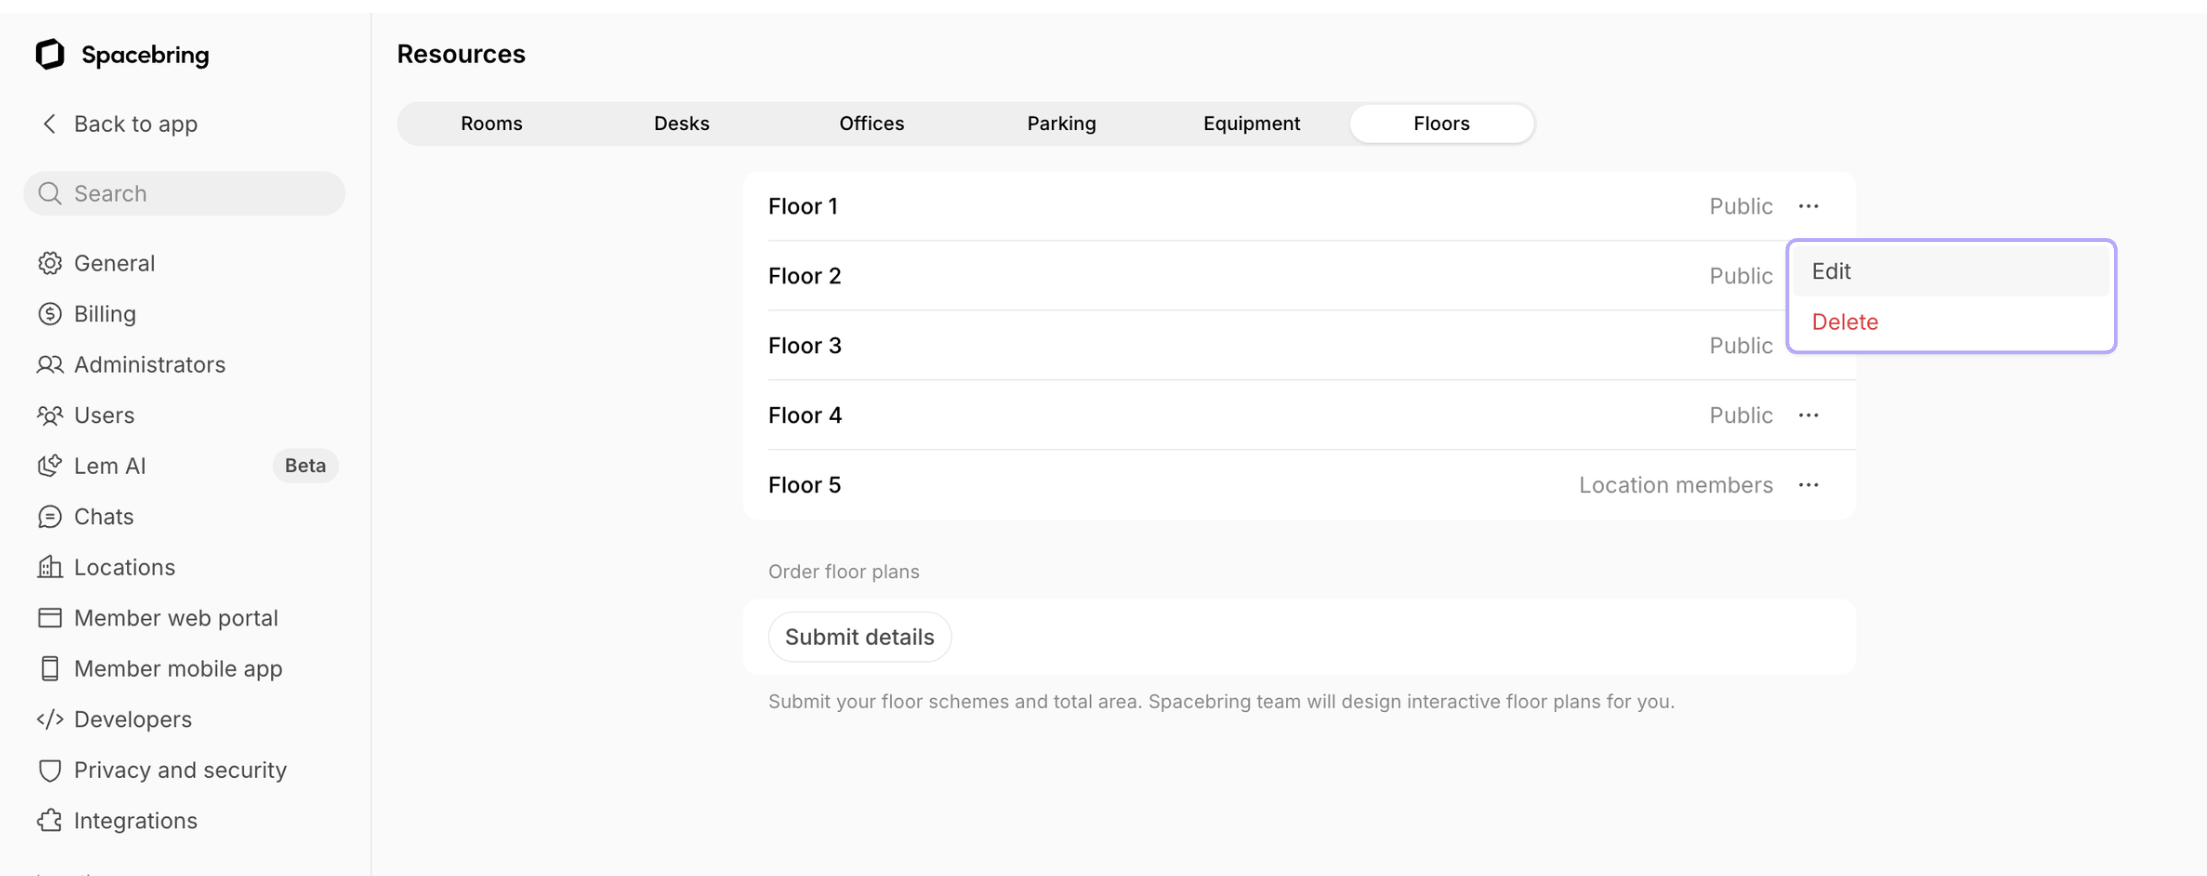
- You can update the floor name, visibility, and map resources differently.
- Adding new resources to the floor plan, or redrawing and relocating existing ones, can be done on request by our designer for an additional fee that depends on the complexity of the change. The standard rate is €25 per change request, regardless of how many floor plans are edited, plus €0.25 per m² of the area being modified.
We only provide support and modifications for floor plans that were originally created by the Spacebring team.
Only administrators with Settings permission can review, publish, edit, and delete floor plans.
How administrators use floor plans
Administrators access floor plans from:- Resources > Rooms, Desks, or Offices pages > Floors tab, for daily availability.
- Resources > Assignments page > Floors tab, for long-term rental availability.
Floors tabs are currently available only in the admin web portal, not the admin mobile app.
Check daily availability
- Go to Resources > Rooms, Desks, or Offices page > Floors tab.
- Select Today or the necessary future date.
- Choose the needed floor from the dropdown.
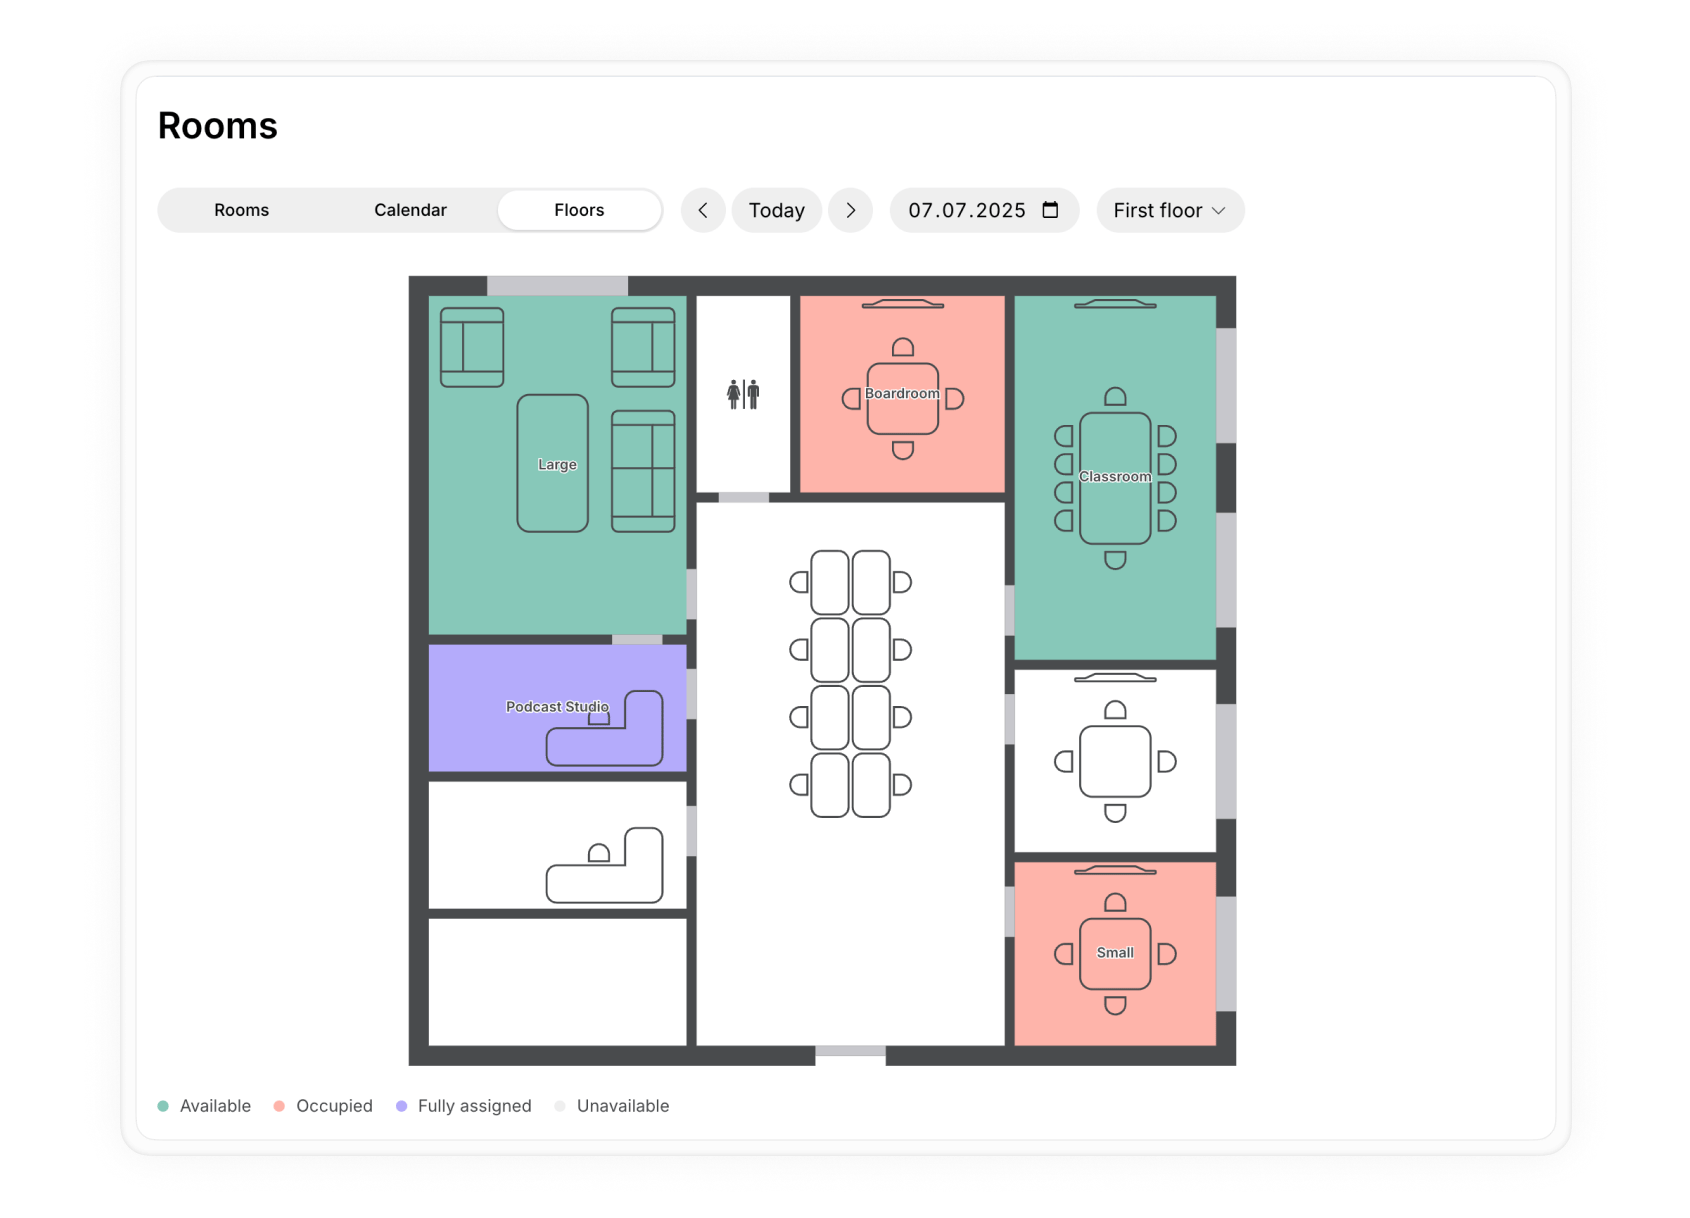
- Green fill - available for booking at the moment/on the selected date.
- Peach fill - occupied at the moment/on the selected date.
- Purple fill - fully assigned to a certain customer(s) on the selected date.
- White fill - unavailable for booking.
The resources are green on the floor plans on the Resources > Rooms/Desks/Offices pages until fully booked or fully assigned.
Check long-term availability
- Go to the Resources > Assignments page > Floors tab.
- Select Today or the necessary date in the future.
- Use the Resource menu to filter by one or more resource types, or leave it unfiltered to view all.
- Choose the needed floor from the dropdown.
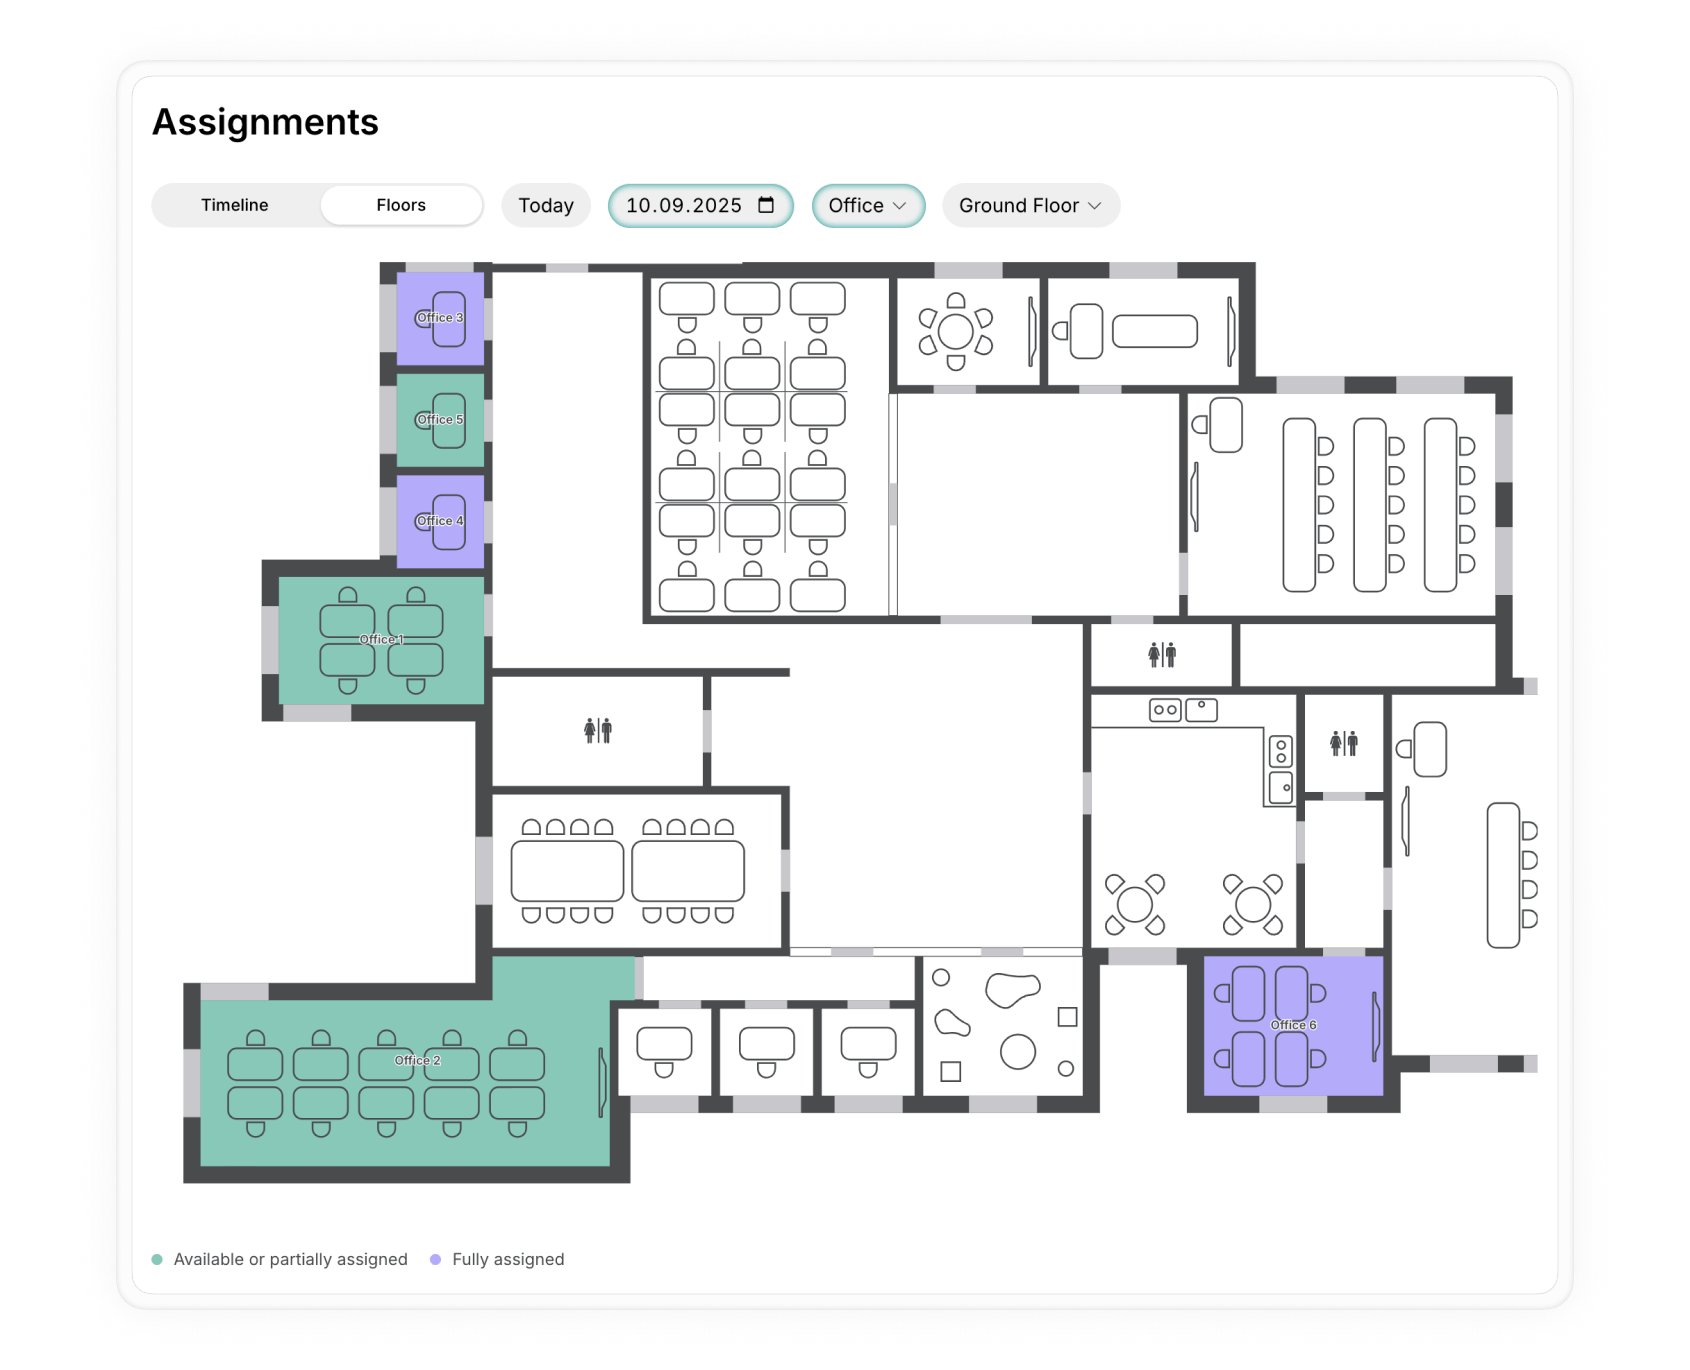
- Green fill - available for rental or partially assigned on a selected date.
- Purple fill - fully assigned to a certain customer(s) on a selected date.
How users use floor plans
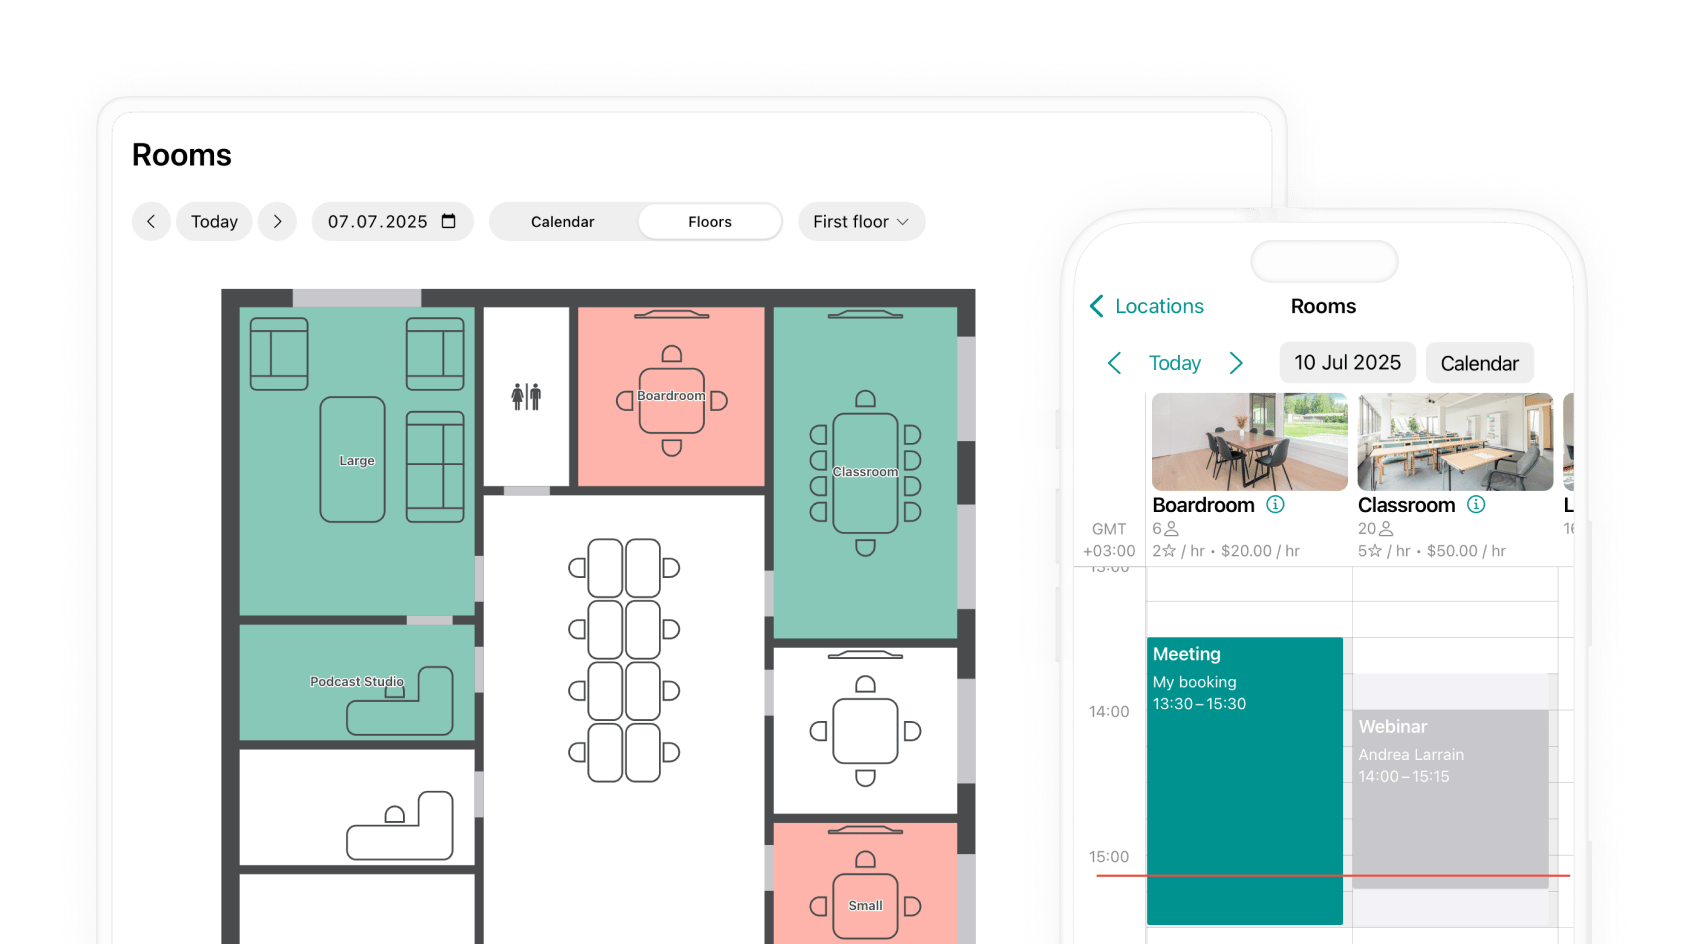
Users book rooms, desks, and offices directly from interactive floor plans on the Rooms, Desks, and Offices pages in the member web portal and mobile app.Rooms
- Go to Locations > Rooms page.
- Choose the needed floor from the dropdown.
- Tap on the room on the floor plan, which shows up as green > proceed with a room booking. If the room has a parent room, choose whether to book the room itself or its parent room first.
- Green fill — available for booking at the moment.
- Peach fill (red on the mobile app) — already booked at the moment.
- White fill — fully assigned to another customer, or not available.
Desks
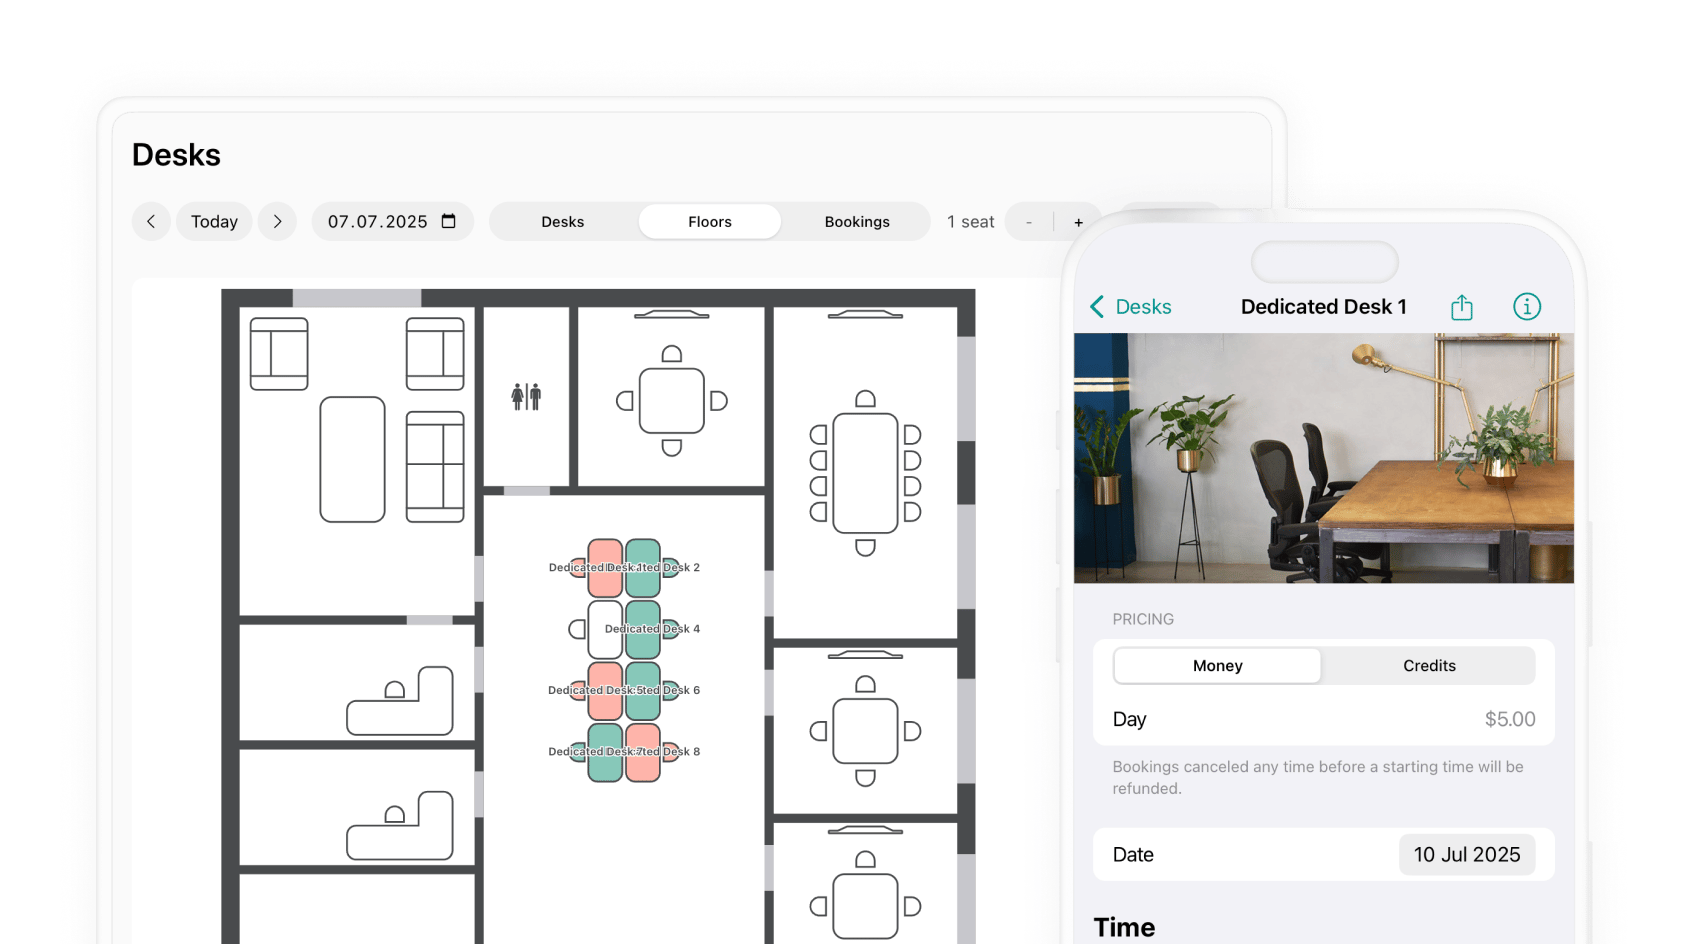
- Go to Locations > Desks page.
- Select Today or the necessary date in the future.
- Choose the needed floor from the dropdown.
- Tap on the desk on the floor plan, which shows up as green > proceed with a desk booking.
- Green fill — available for booking on the selected day.
- Peach fill (red on the mobile app) — fully occupied on the selected day.
- White fill — fully assigned to another customer, or not available.
Offices
- Go to Locations > Offices page.
- Choose the needed floor from the dropdown.
- Tap on the office on the floor plan, which shows up as green > proceed with an application.
- Green fill — available for rental.
- Peach fill (red on the mobile app) — all seats are assigned.
- White fill — the entire office is fully assigned to another customer, or not available.
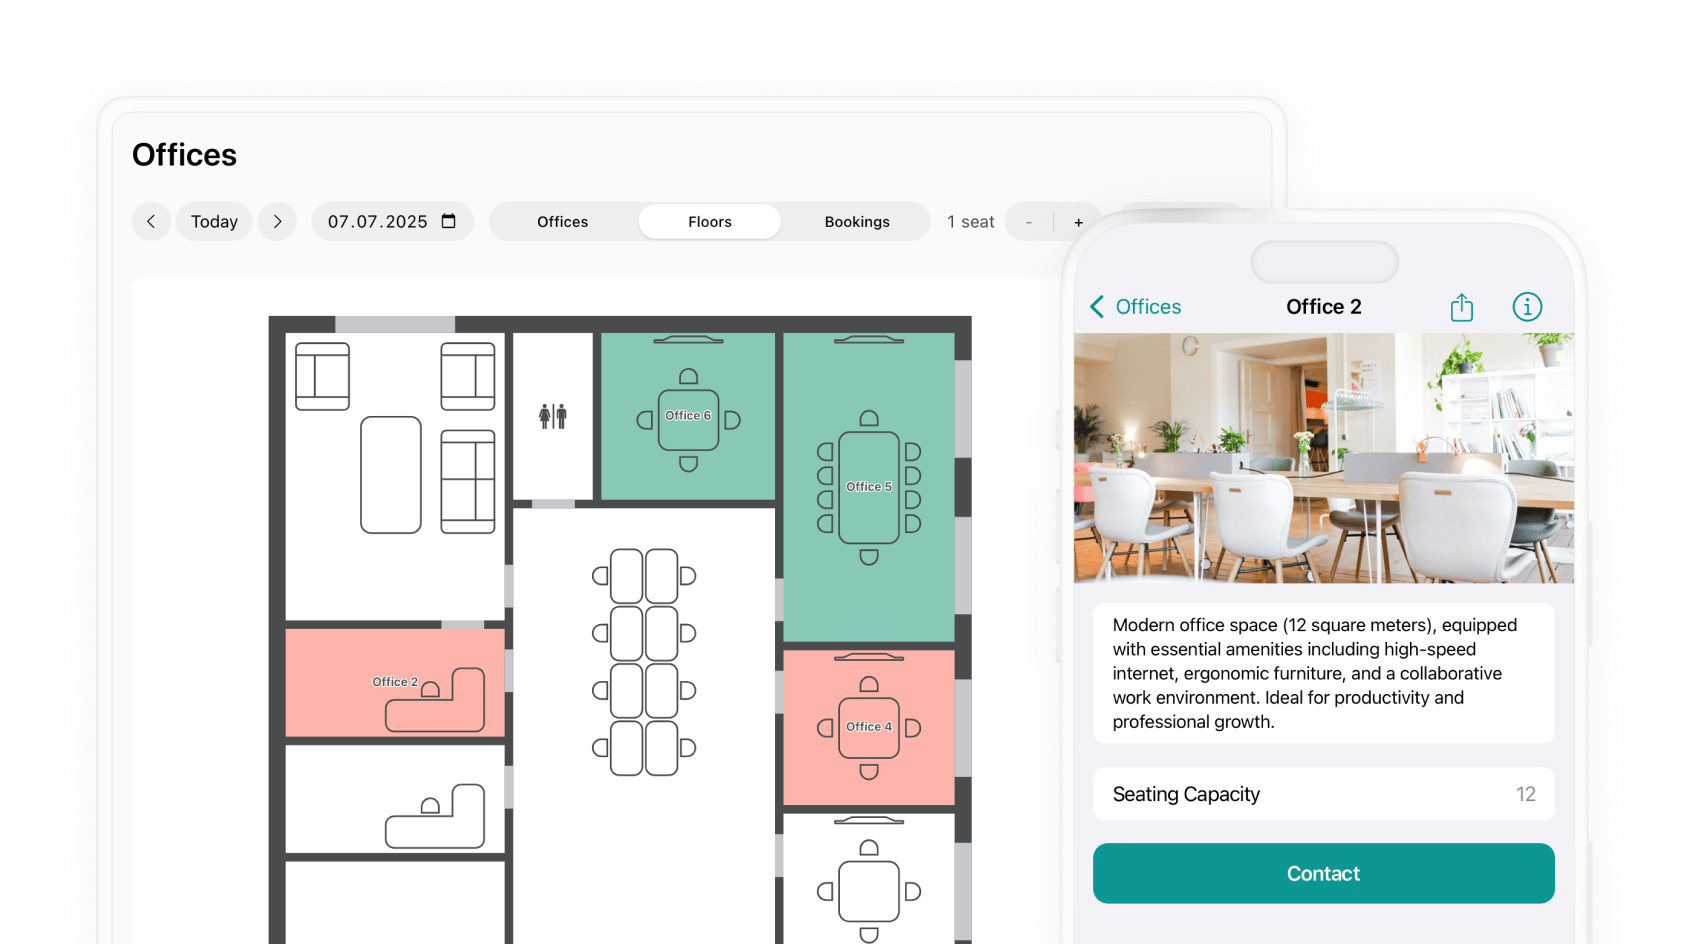
All users can view available offices on the Offices page, book them if they have booking pricing, and apply or sign up for a long-term rental. Members with an office fully assigned to them book seats in their own office instead.
FAQs
Why do I need a floor plan?
Why do I need a floor plan?
Floor plans not only let users book resources directly from the floor plan, but also give administrators a clear view of space availability making it easier to monitor and optimize space usage.
Can other users see the floor plan on the Assignments page?
Can other users see the floor plan on the Assignments page?
The Assignments page is only accessible to administrators in Spacebring. Users in the member web portal or mobile app can view floor plans only on the Rooms, Desks, and Offices pages.
Is it secure to show all my resources on the floor plan?
Is it secure to show all my resources on the floor plan?
Users can see the location and availability of resources, but not who is using them. Company or member assignments are not visible, ensuring privacy and security.