Create a company
- Go to the Customers page.
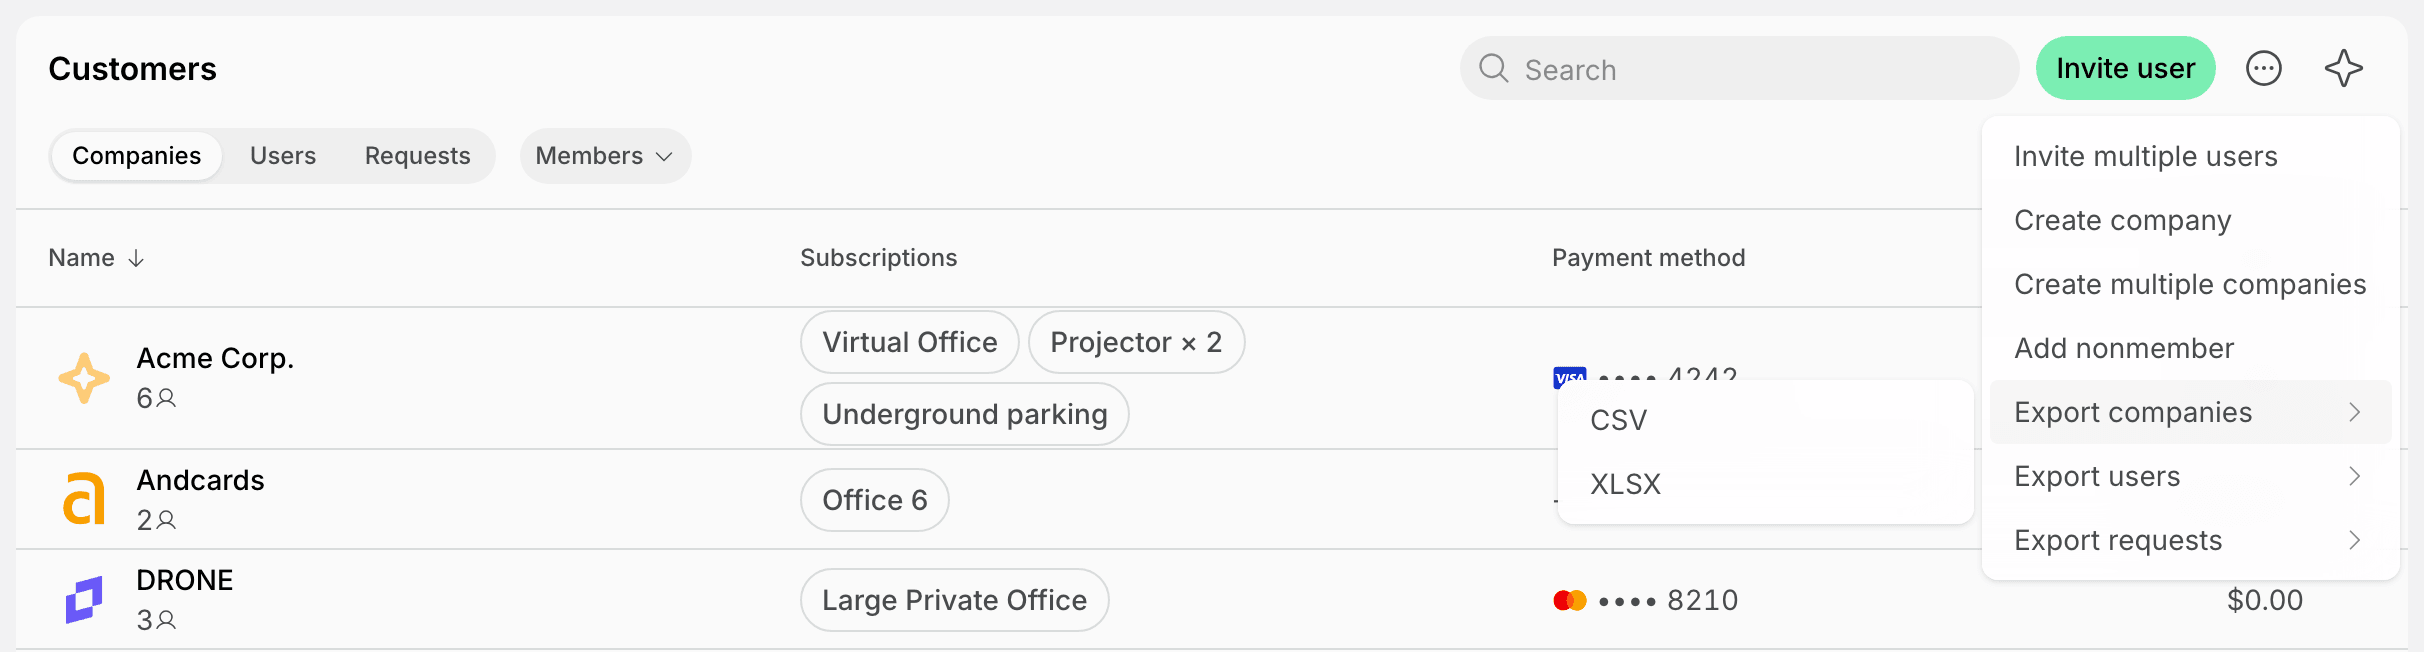
- Press the menu (…) top right > Create company.

- Fill in the company details:
- Logo — the company logo, 128×128px recommended. Adding a Website pre-fills the logo from it, and you can still upload your own.
- Name — the company name. Required.
- Email — the company’s contact email. Invoices and receipts go to this address and to company managers, unless you set dedicated company Billing emails.
- Website — the company’s website address.
- Auto-approve new members — enable it to add users invited by a company manager to the company right away. Disable it to approve every invitation to join the company yourself. Invitations from company members always need your approval.
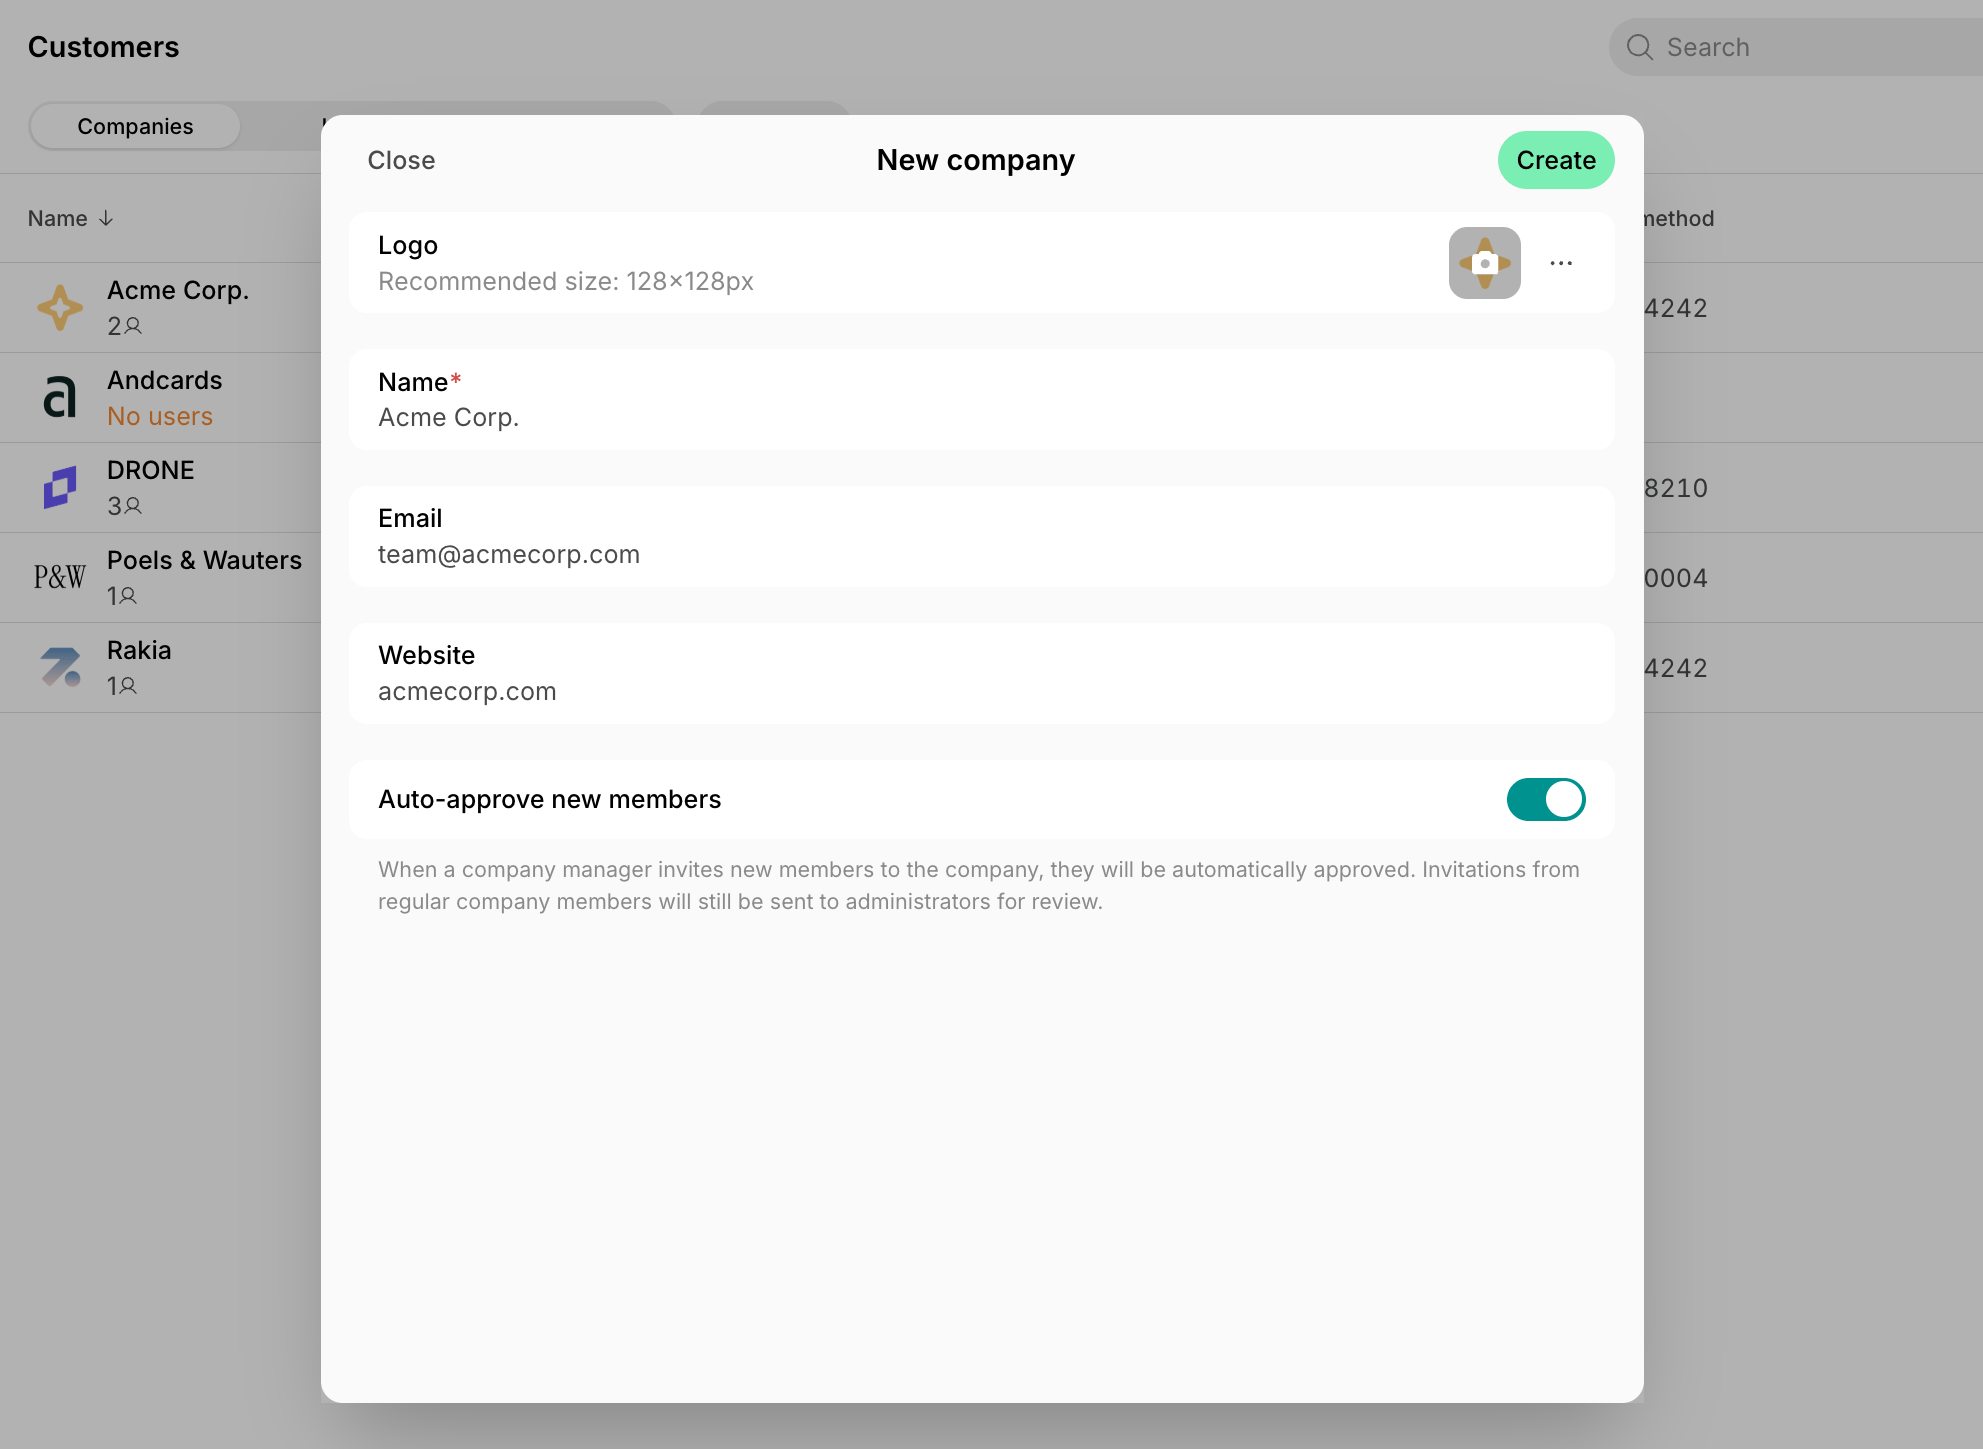
- Press Create. The creation date appears in the company profile’s Activities section.
- Press Create subscription to set up the company’s membership or rental.

Create multiple companies
Prepare a spreadsheet with the following columns:
Leave the Plan ID, Start date, and End date columns empty to create the companies now and set up their subscriptions later.
To find the plan ID, go to Catalog > Plans > press (…) > Copy public link. The last part of the URL is the plan ID. If the plan has the Sign-up option disabled, enable it to copy the link, then disable it again. You can also pick the plan from the Plan dropdown after pasting, instead of using an ID.
- Go to the Customers page.
- Press the menu (…) top right > Create multiple companies.

- Copy the rows from your spreadsheet and paste them into the Mass create table.
- Press Create.
Add company members and managers
Companies consist of company members and company managers.As an administrator
- Open the company profile.
- On the right-hand panel:
- Click Add if you’ve already invited users.
- Click Invite to invite a new user.
- Click Mass invite to invite several users and add them all to this company.

- To make someone a manager, click (…) > Make manager next to their name.
Only administrators can assign and remove company managers.
Users can belong to only one company in each location. Adding a user to another company in the same location moves them to it.
Choose who receives company billing
- If company managers should also receive invoices and receipts, keep them as is — no extra setup needed.
- If other addresses — for example, the company’s accounting or finance team — should receive company invoices and receipts:
- In the right-hand panel, locate the Billing details section > click Edit.
- In Billing emails, add every address that should receive invoices and receipts, separated by commas, and save.
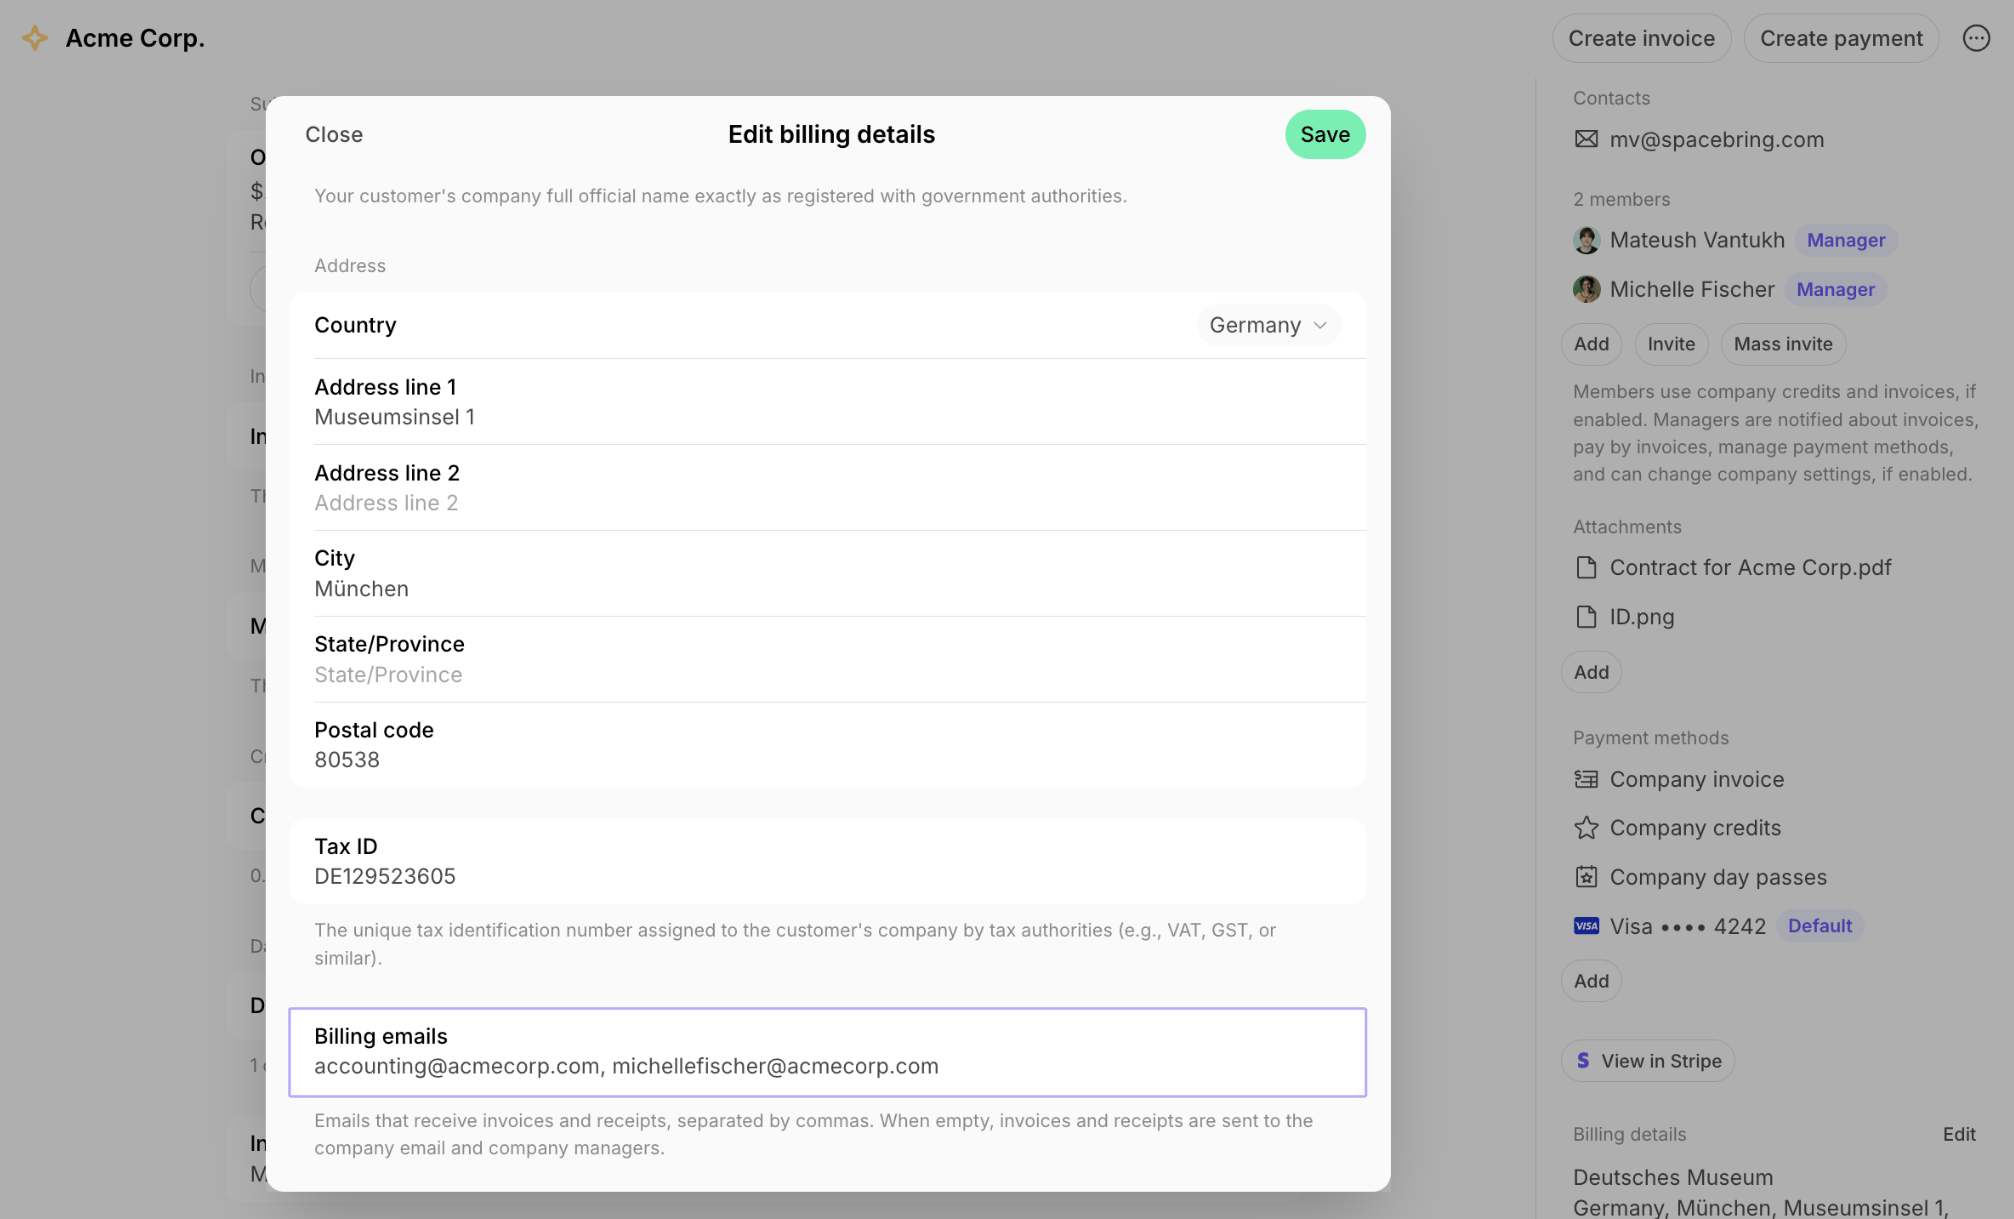
Addresses that aren’t company managers can’t view or pay invoices in the member portal; they only receive them by email, with the PDF attached.
As a company member
- Users go to Membership > the section with their company name > Members.
- Press Invite user and enter the person’s name and email.
- What happens next depends on who sent the invitation:
- A company manager’s invitation adds the user right away, if Auto-approve new members is enabled for the company.
- Any other invitation goes to the Customers page > Requests tab, and the user joins once an administrator approves the request. A company member’s invitation always needs approval, even with Auto-approve new members enabled.
Company members and managers can only invite users who aren’t members of that location yet.
What’s next
Once the company and its members are in place:- Add the company’s billing details so its invoices and receipts come out with the correct details.
- Create a subscription for the company so its members share one membership or rental, its credits, day passes, access, discounts, and billing.
- Set payment method permissions to control which services company members can pay for with company payment methods, and let them pay on the company invoice.
- Add internal notes and attachments to the company profile if your team needs them.
- Follow the company’s activity in its profile: the Activities timeline, invoices, and balances.
Manage companies
Edit a company
- Go to the Customers page > Companies tab.
- Click (…) next to the company’s name > Edit.
- Change the Logo, Name, Email, Website, or Auto-approve new members > press Save.

Remove company members
Removing a user from a company keeps their account in the location. They stay a member and simply no longer belong to the company.As an administrator
- Open the company profile.
- Click (…) > Remove next to the user’s name.
- For a company manager, choose Make member to keep them in the company without the manager role, or Remove to take them out of the company.

As a company manager
Company managers can remove anyone from their company, including other company managers.- Go to Membership > the section with the company name > Members.
- Click (…) > Remove next to the person’s name.

Remove a company
Remove a company that no longer rents a space or whose contract has ended. It moves to Nonmembers, keeps its history, and you can restore it later.- Go to the Customers page > Companies tab > open the company > press the menu (…) top right.
- Choose what happens to the company’s members:
- Remove — the company becomes a nonmember, and its members stay members of the location, on the Customers page > Users tab.
- Remove with members — the company and all its members become nonmembers.
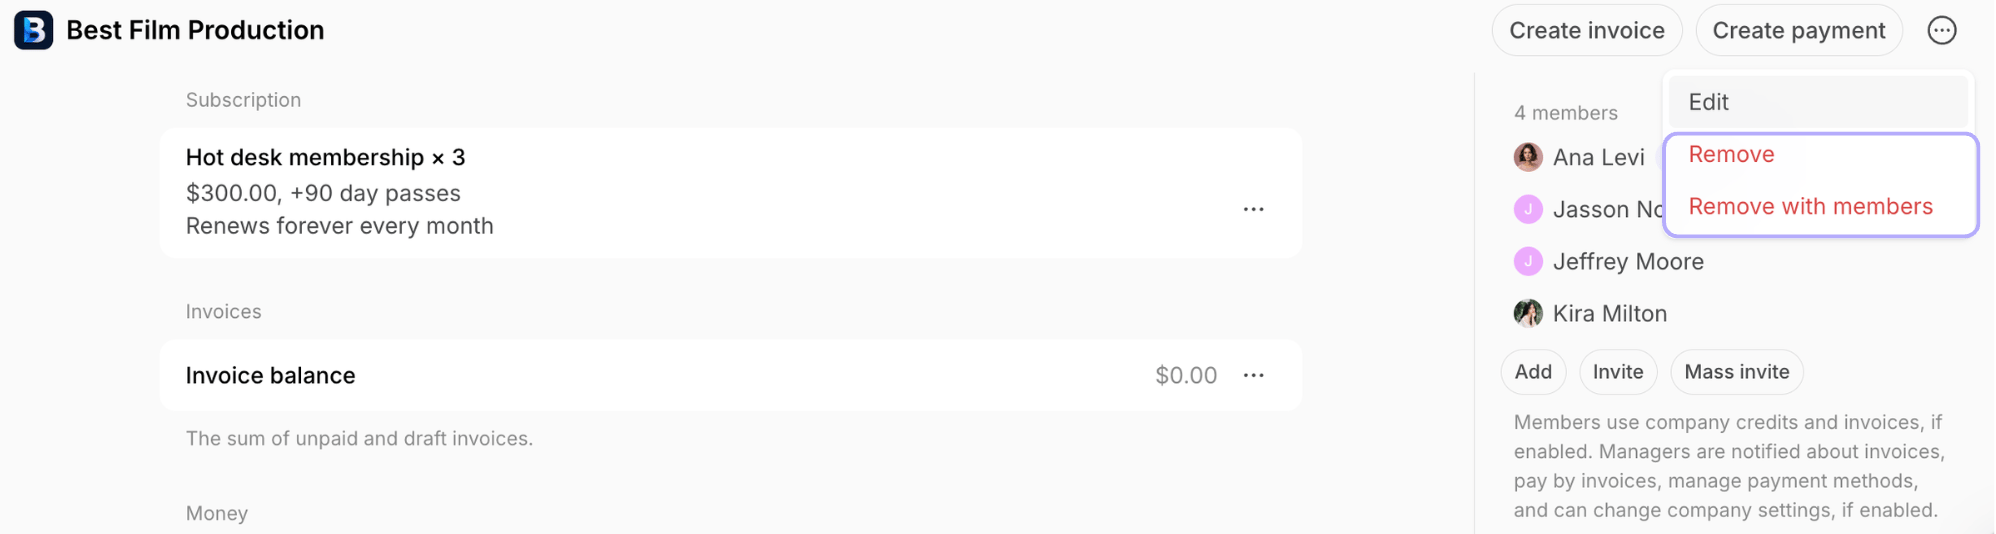
- Confirm your choice.
- It moves to Nonmembers on the Customers page > Companies tab.
- Its subscription is canceled immediately.
- If the company has any pending invoice items, the system creates an invoice with them, but leaves it in Draft instead of issuing it, so you can review and issue it yourself.
- Its default payment method stays attached, so you can still charge it.
- Its credit, payment, and invoice history is kept.
- It loses its company members, so nonmember companies have no users.
- You can restore it at any time.
Delete a nonmember company
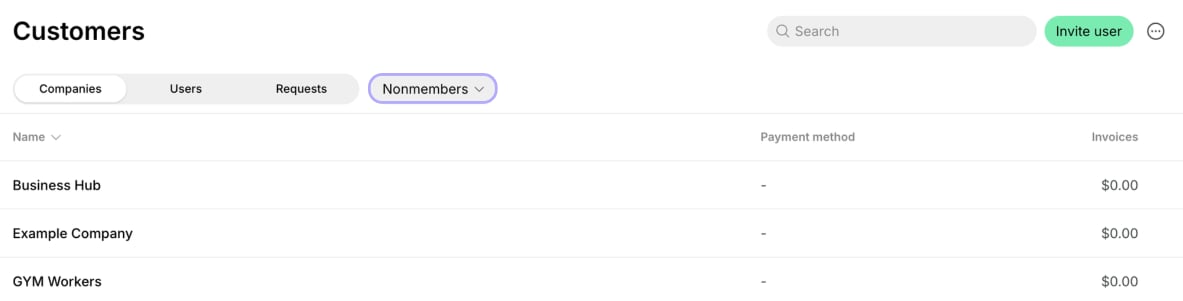
Deleting removes the company from the location permanently. Use it to clear out companies you no longer need.- Go to the Customers page > Companies tab > select Nonmembers in the dropdown.
- Open the company.
- Press the menu (…) top right > Delete > confirm your choice.

Restore a company
Restoring moves the company back to the Customers page, where you can add company members, create a subscription, and manage the company as before.- Go to the Customers page > Companies tab > select Nonmembers in the dropdown.
- Open the company > press Restore.
A restored company comes back without the users who belonged to it earlier.
Track companies
Companies are listed on the Customers page > Companies tab. Switch between Members and Nonmembers in the dropdown above the list, search by name, and sort by any column.Export a companies report
- Select Members or Nonmembers in the dropdown above the list. The report covers only the selected group, so export the two separately.
- Click (…) in the top right corner > Export companies > CSV or XLSX.