Enable Shop
- Click the menu (…) near the location name on the left-side panel.
- Go to Location settings > Service > Shop.
- Enable the “Shop” switch.
- Create product categories to group your products by type. For example, “Cafe”, “Merch”, “Services”, etc.
By default, shop categories are sorted alphabetically by title. Drag and drop categories to rearrange their order.
- Enable the “Order confirmation email” switch and customize your confirmation email template.
Users automatically receive the customized order confirmation email text after each order.

Add products
- Go to Service > Shop > press
Add productin the top right corner.

- Configure the product details:
| Product property | Meaning |
|---|---|
| Cover photo | A picture with a 2x1 ratio. |
| Title | The title of the product. |
| Description | Details you’d like users to know when ordering. |
| Category | Select which category the product belongs to. |
| Featured | If enabled, the product will be prominently pinned at the top of the Shop page. |
| Options | Add variations for the product. For example, if you’re selling a branded T-shirt, your options might be different sizes and colors. If you’re selling coffee, options could include “Latte” or “Americano.” For each product option set:
|
| Order |
|
| Refund policy | Select whether orders are refundable. If an automatic refund is possible, it will only be processed if users cancel their orders while still in the “New” status. |
| Visibility | Manage access to the product by making it visible to administrators, location members, network members, or the public. |
How Shop works
- Customers can explore and purchase products on the Shop page. Understand how users order products.
- Administrators can also add any shop product as an item to a customer’s invoice, contract, or subscription.
- Use the “Promote” feature to create a feed post about the product and attract more customer attention to it. It’s a great way to announce new products available in your space or re-engage interest in existing ones.

Manage product availability
You can flexibly control and update the availability and quantity of your shop products and product options for orders.Set “Limited quantity”
Setting “Limited quantity” is ideal for products like merchandise, where you have a specific number of items in stock.- Go to the Service > Shop page.
- Create or edit a shop product.
- Open a specific product option within the product.
- Enable the “Limited quantity” switch and enter the number of units you have available.

The “Limited quantity” option only appears when the “Available for order” switch is turned on for this product option.
- The system will automatically track sales for this product option and update its availability.
- When only 2 or 1 item is left from the quantity you set, a badge will appear for users indicating “2 Left” or “1 Left.”
- When the entire stock quantity has been purchased, the product option will show an “Out of stock” badge.

- You can restock a product option at any time by editing its quantity, and users will be able to continue ordering it.
Disable orders for a certain product option
If a particular product option (like a specific salad variation) is temporarily unavailable, you can disable just that option within the product at any time.- Go to the Service > Shop page.
- Create or edit a shop product.
- Open a specific product option within the product.
- Disable the “Available for order” switch.


Disable orders for the entire shop product
To temporarily stop selling an entire product, you can disable orders for it.
Order button. Therefore, users won’t be able to purchase it.

You can make the product option or product available for order again at any time.
You can also temporarily hide a product from all users by changing its “Visibility” to “Administrators”.
Edit or delete a product
- Go to Service > Shop.
- Hover over the product > press the menu (…) next to it >
EditorDelete.
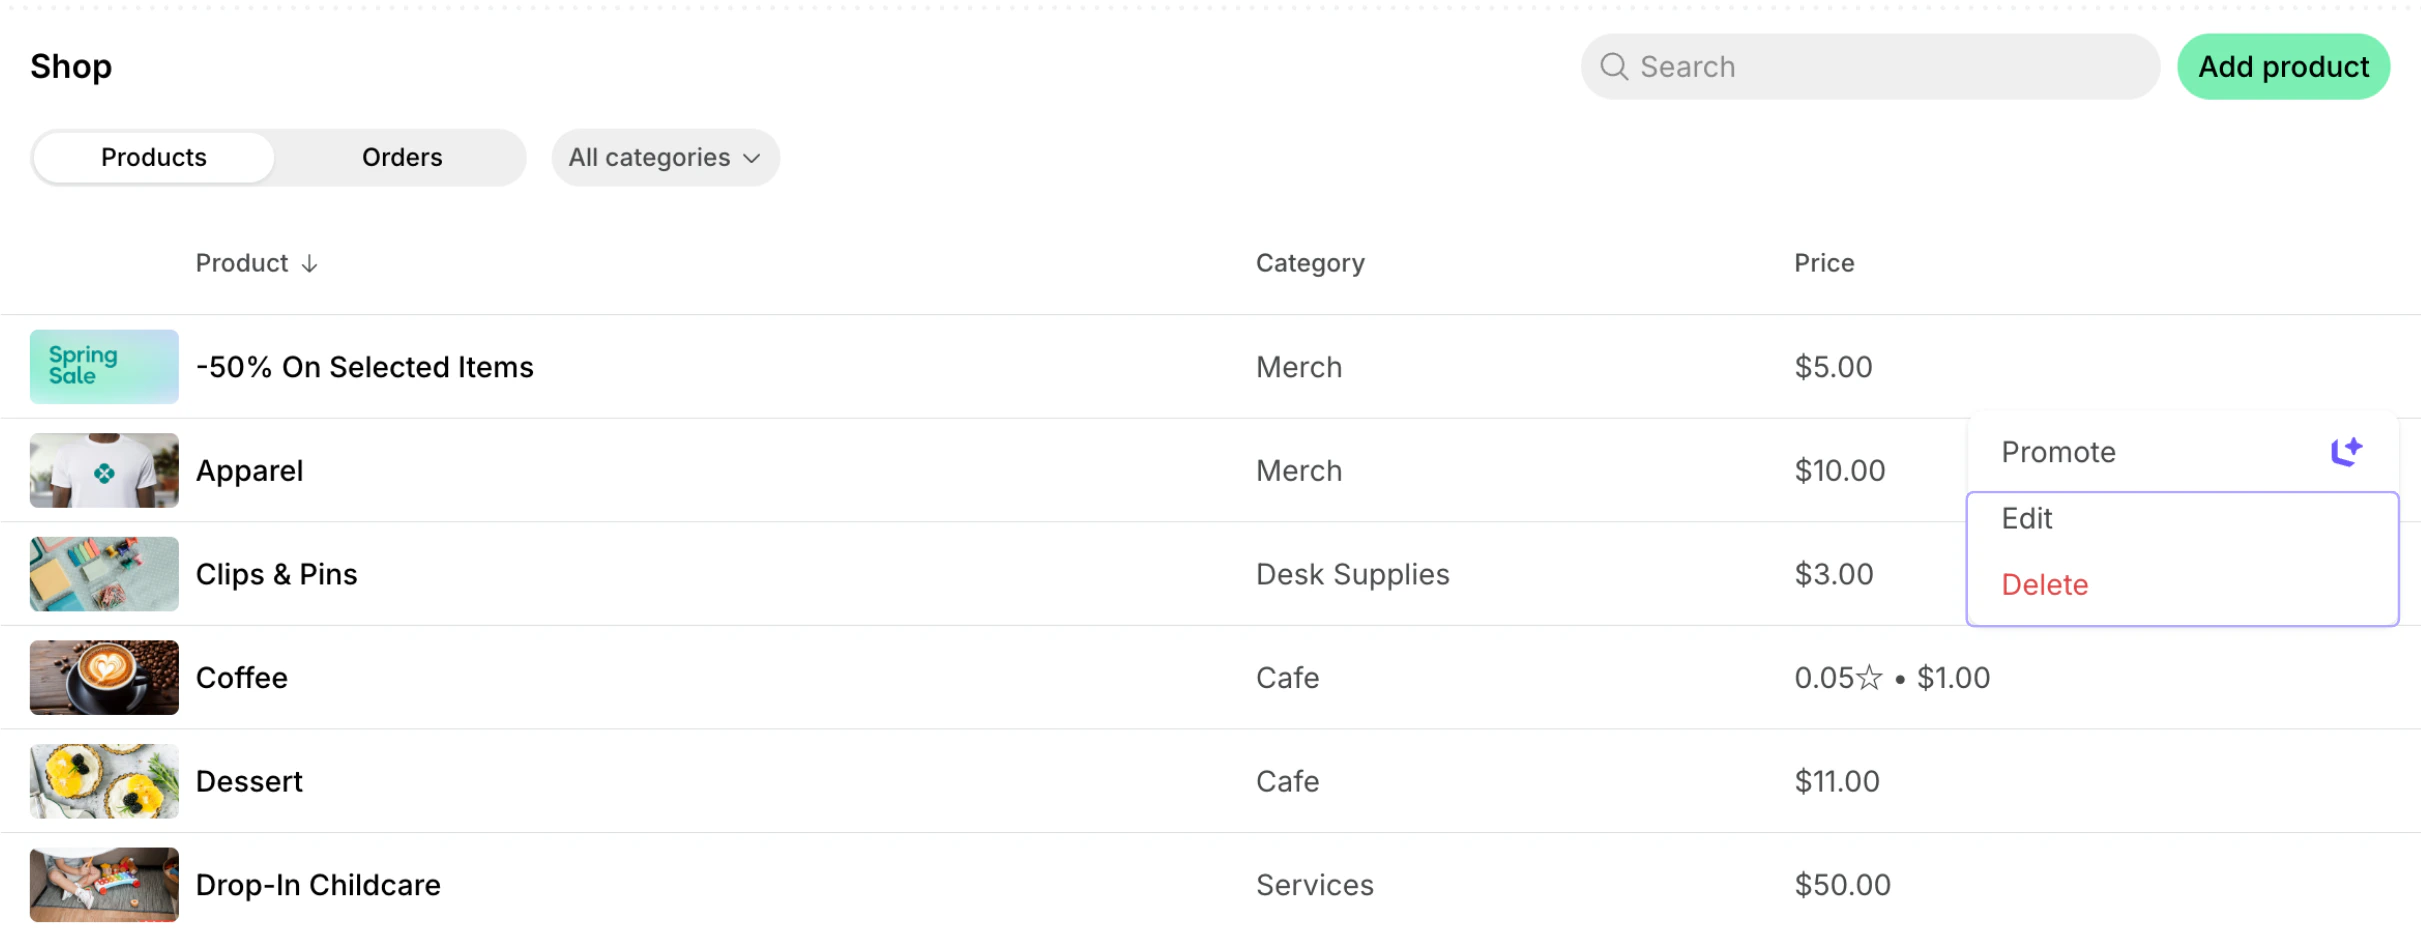
If you update a product, users will be notified with a red notification dot on the Shop button. The product will appear at the top of the category on the Shop page.
Editing the refund policy applies only to future orders made after the administrator’s changes.
Deleting a product is irreversible and can not be undone.
Edit or delete a product category
- Go to Location settings > Service > Shop.
- Press the menu (…) next to the necessary category >
EditorDelete.
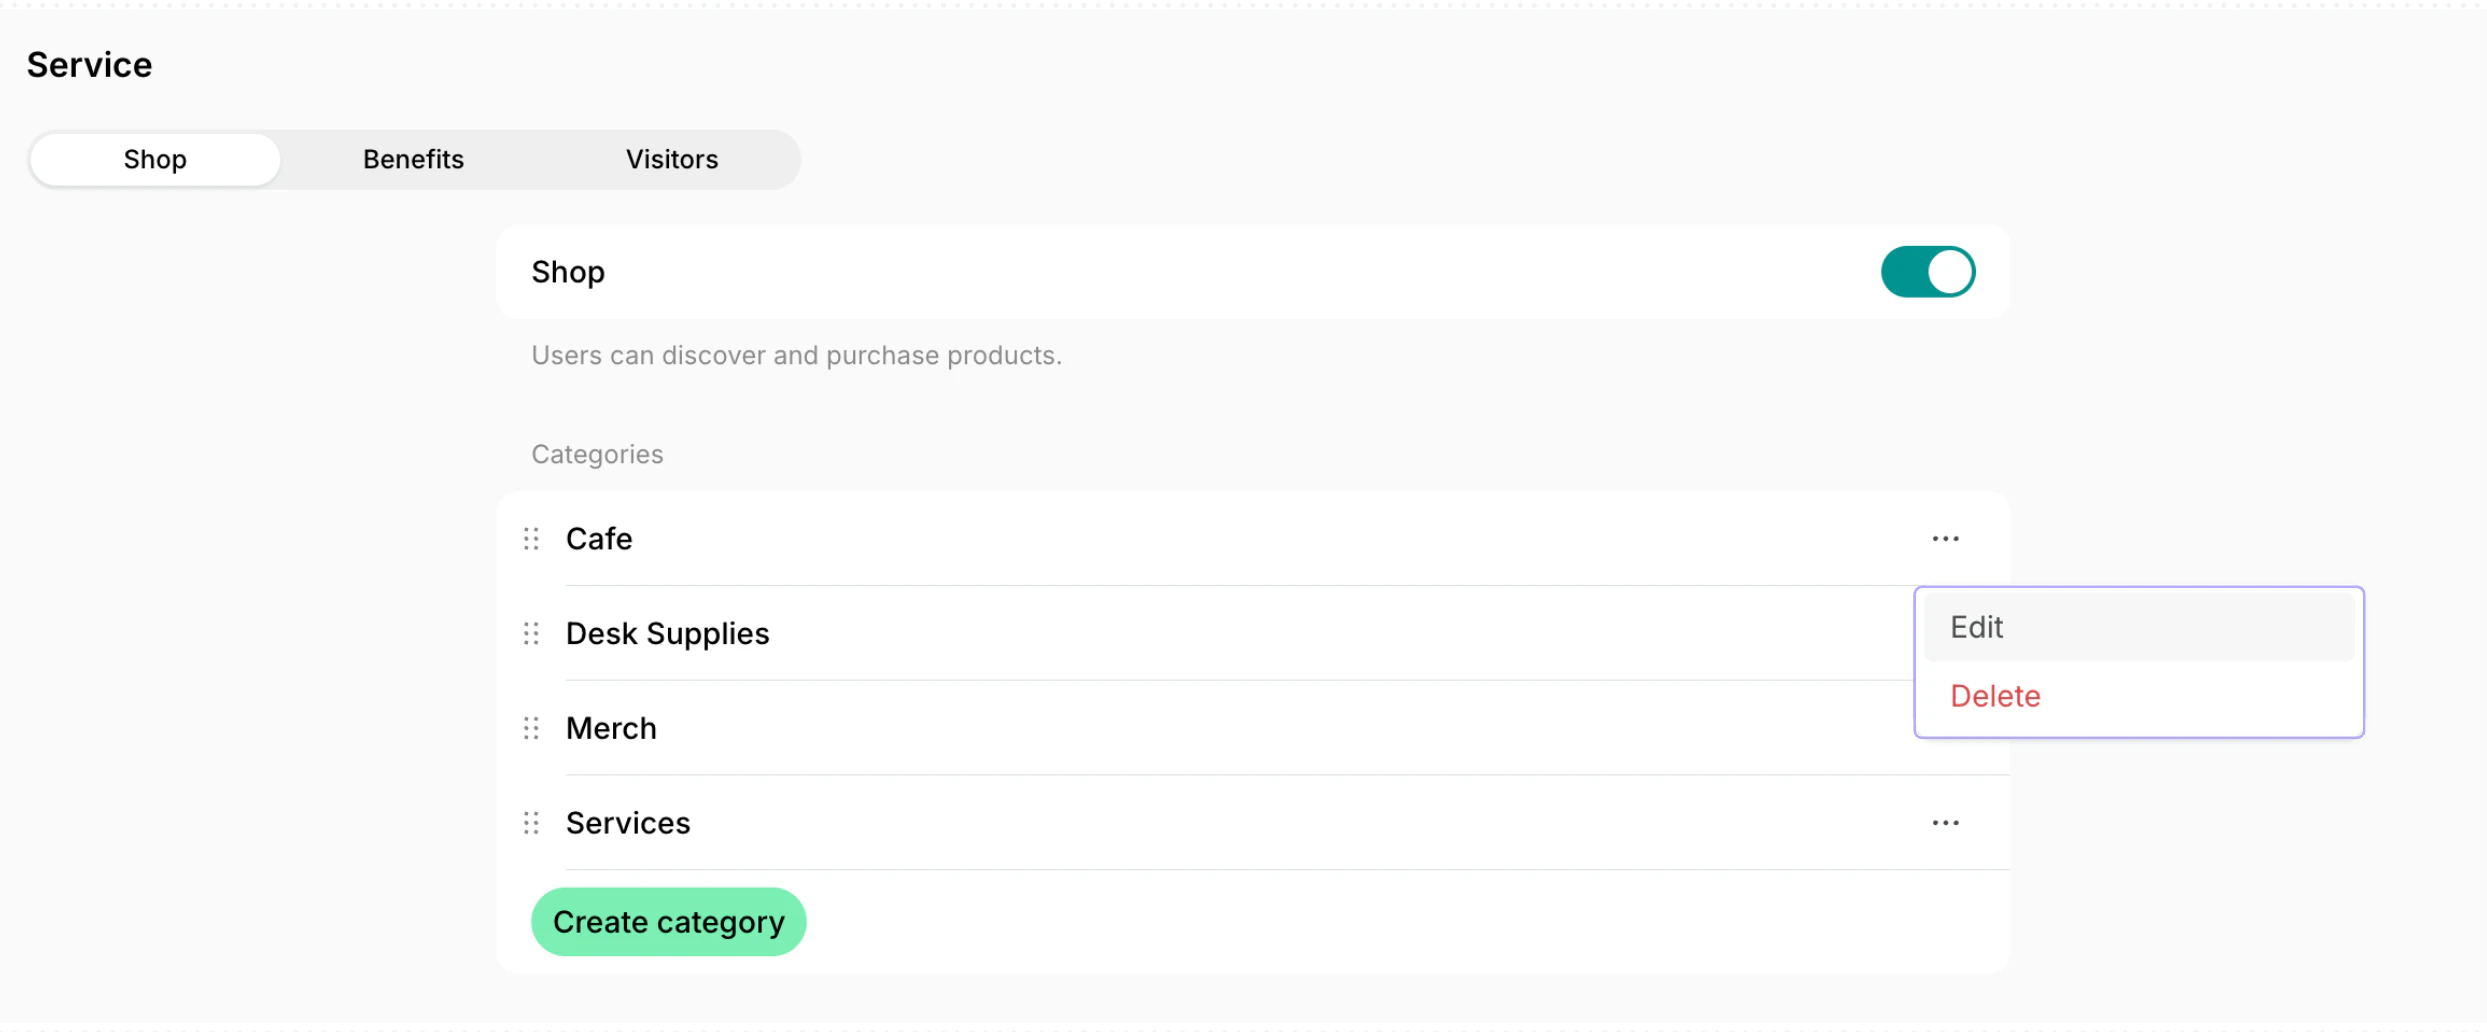
Deleting a product category is irreversible and can not be undone. All products from the selected category will be deleted automatically.