Create an event
- Go to the Location settings > Engagement > “Events” tab, and enable the “Events” switch.
- Go to Engagement > Events and press the
Create eventtop right.
| Cover photo | An image in 2×1 ratio. |
|---|---|
| Name | The name of the event. |
| Venue | The address where your event takes place. |
| Starts | Event start date and time. |
| Ends | Event end date and time. |
| Description | Details about your event. |
| Limited attendees | Enable to limit the number of attendees. |
| Show attendees | Enable to show the number and list of attendees under the event. |
| Joining | If enabled, your customers will be able to join the event - purchase a ticket if the event is paid or book a spot if the event is free. |
| Pricing | Indicate ticket prices in ☆ and money. To create a free event, leave both “Money” and “Credits” options disabled. |
| Custom tax rate | Enable to set custom tax rate for the event monetary price if the fixed location tax doesn’t apply to it. |
| Refund policy | Select whether tickets are refundable. If canceled before the set time, an automatic refund will be issued. |
| Confirmation email | Enable this to send event attendees a custom confirmation email. |
| Visibility | Manage access to the event by making it visible to administrators, location members, network members, or the public. |
- Press the
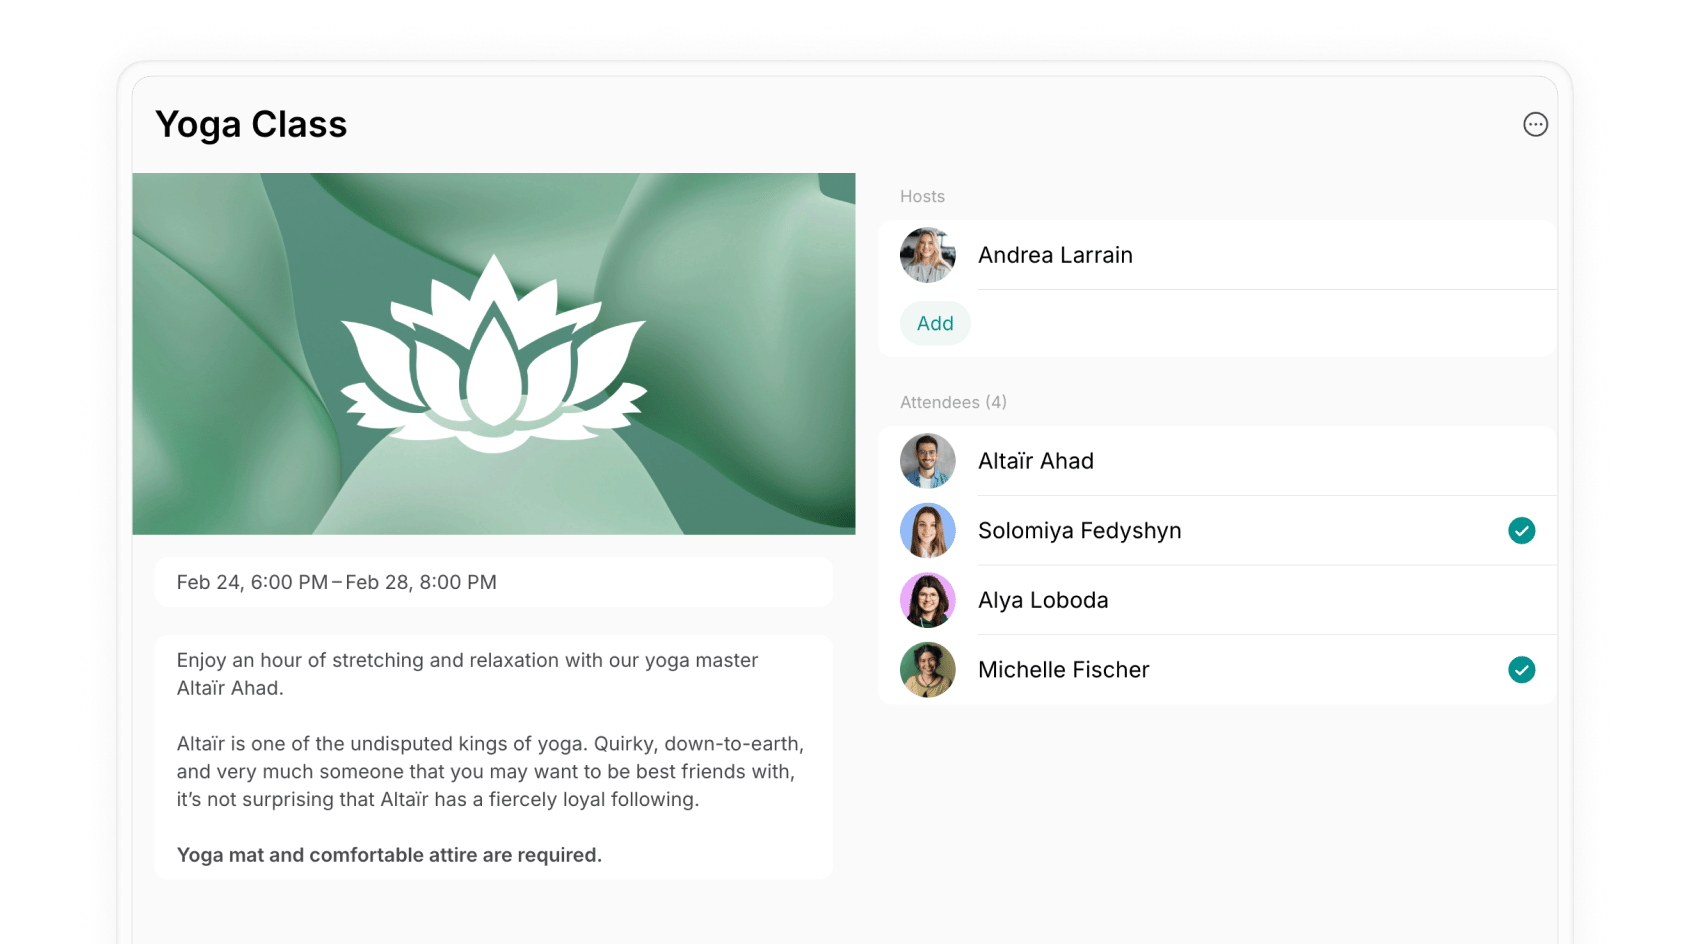
Createbutton. - Upon saving an event, press the
Addbutton to add hosts. This will allow users to know who will be running the event.

Hosts can be selected from location members.
Create recurring events
If your event only repeats once or a few times, you can duplicate it directly:- On the Events page, click (…) next to the event >
Duplicate.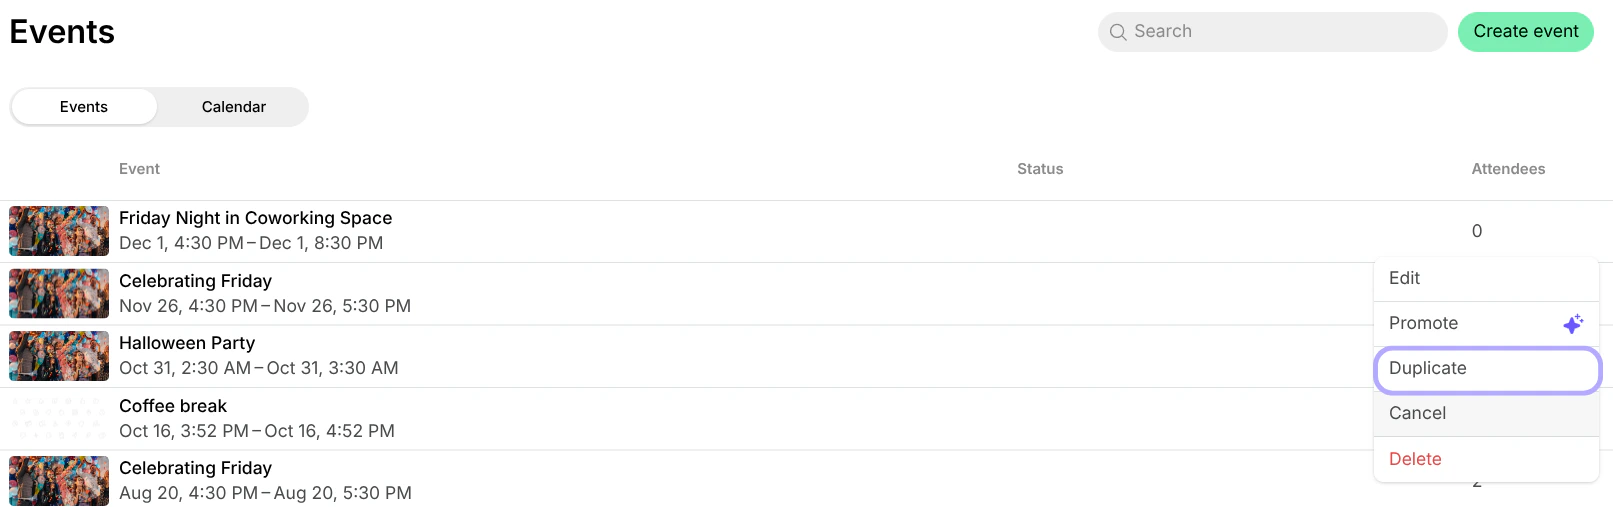
- The duplicated event will open.
- Edit it and update details such as date, time, or any other information.
What’s next
- Once you create an event, it appears on the Events page. Understand how users view and join events.
- Use the “Promote” feature to create a feed post about the event and attract more customer attention to it.

- Use the “Calendar” tab to switch to a monthly calendar view of all events, or use the “Search” field to quickly find a specific event.

Check in event attendees
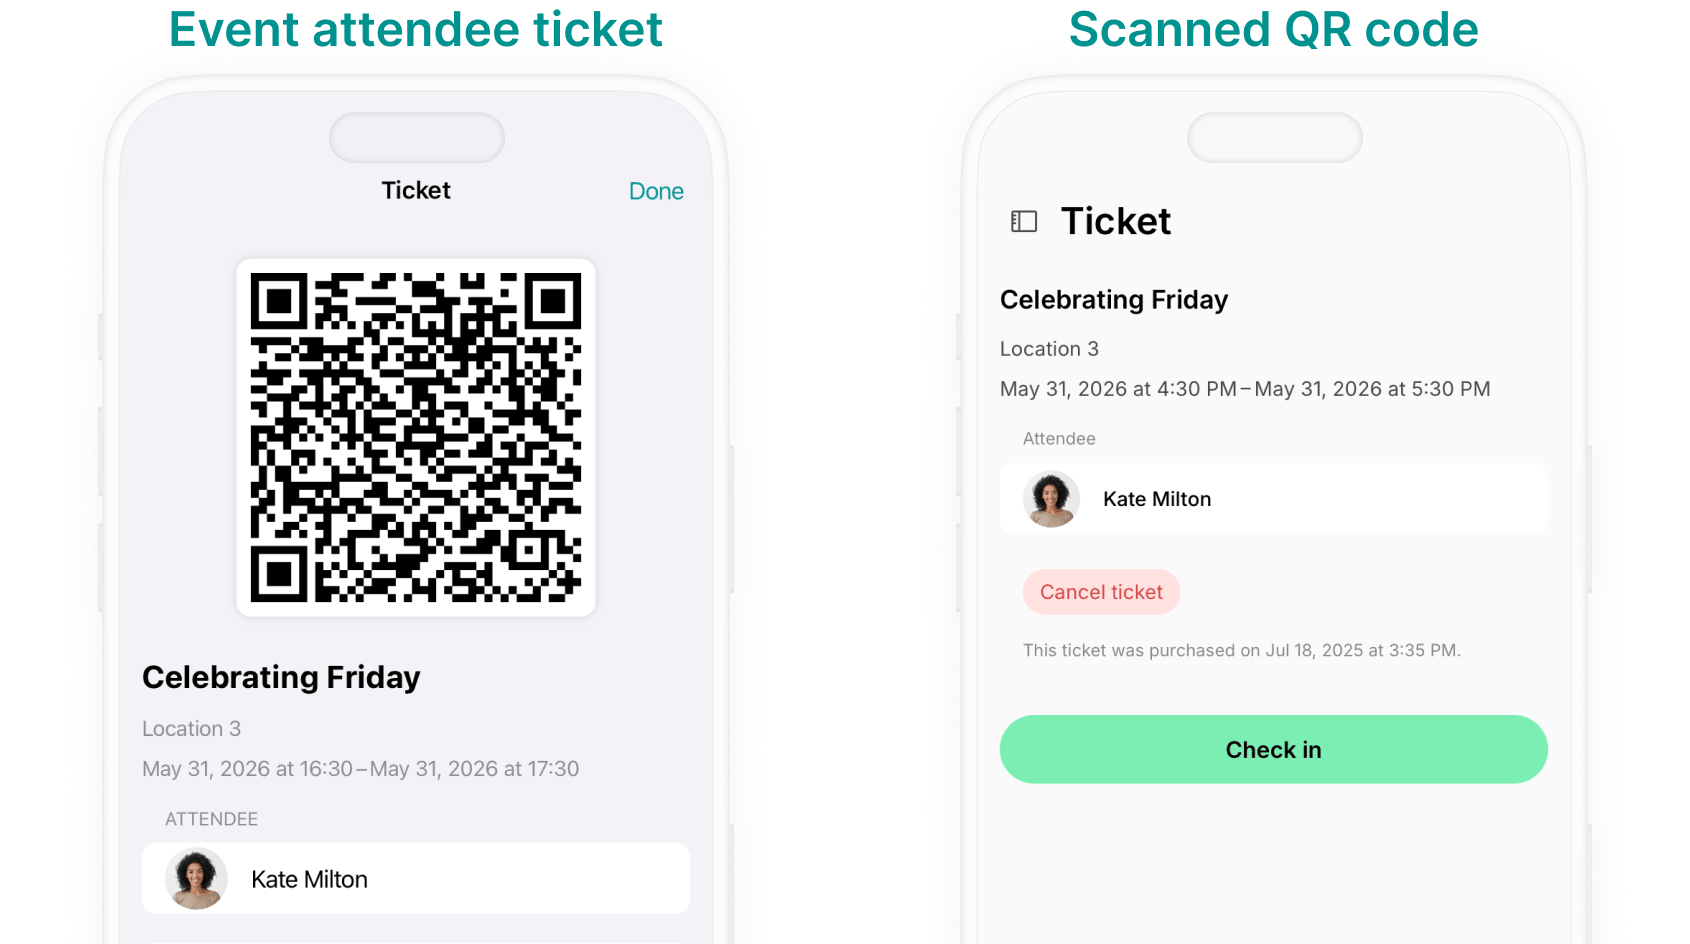
Administrators can check in event attendees to keep track of who’s arrived. Spacebring offers two convenient methods for you to do this.Check in by scanning attendee tickets
- On your mobile device, log in to Spacebring in your browser or PWA (Progressive Web App).
- Ask the event attendee to open their event ticket from the Account > Tickets page on their device.
- Scan the QR code on the attendee’s ticket using your phone’s camera.
- Tap
Check in.
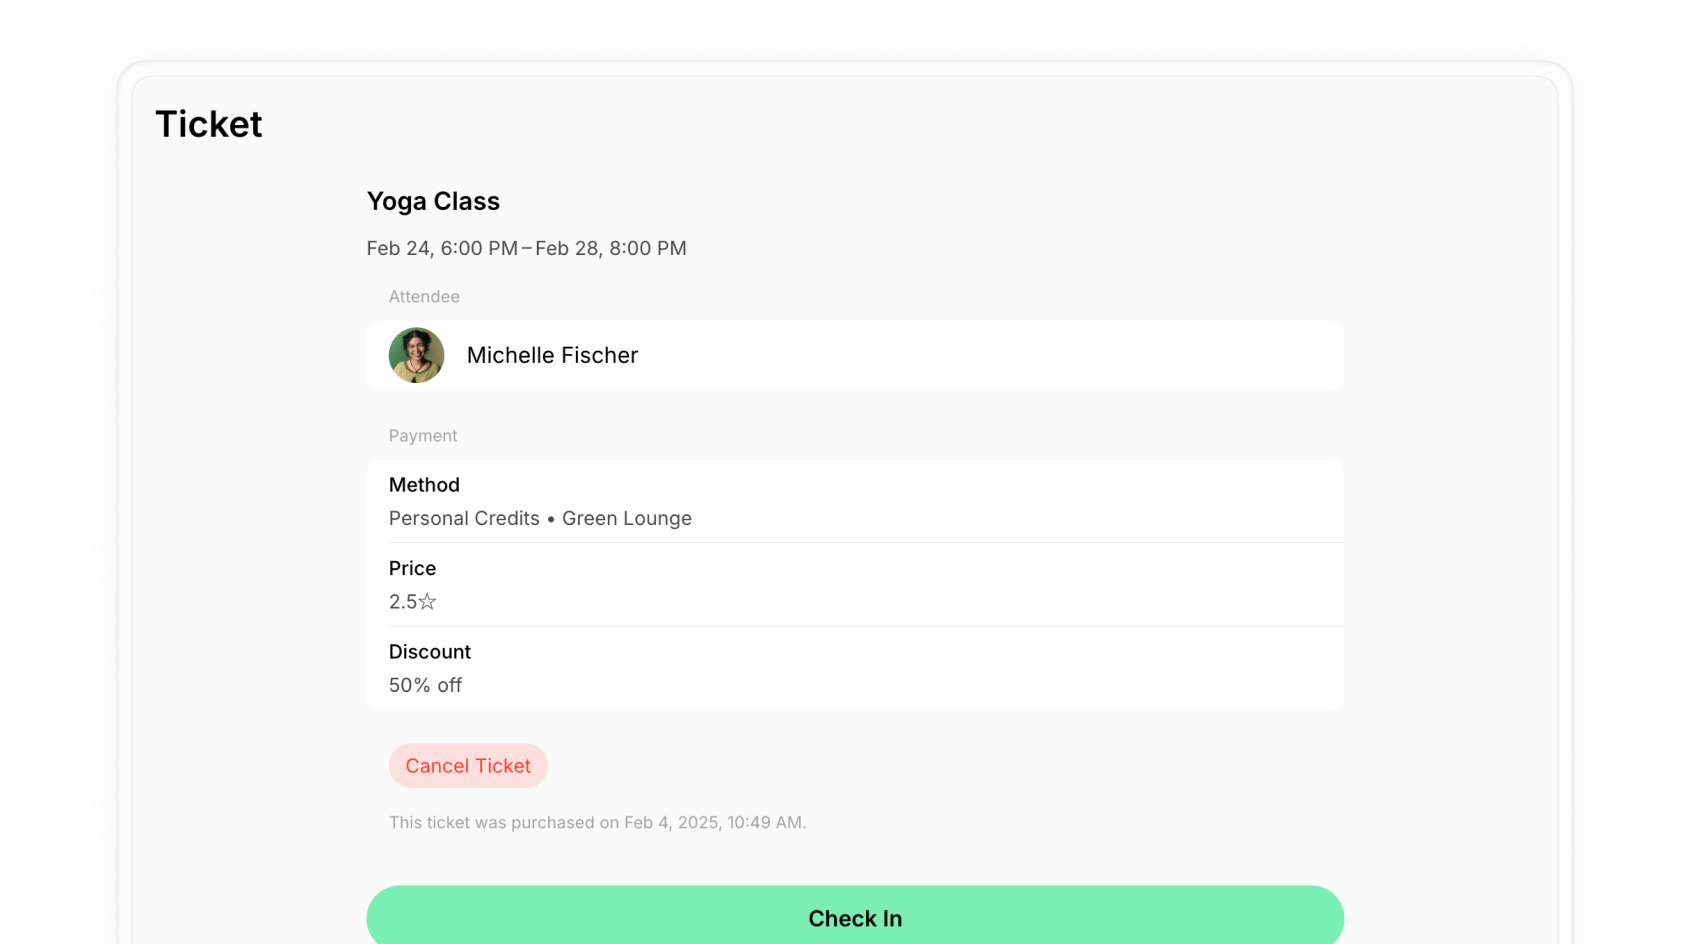
Check in directly from your Spacebring account
- Log in to Spacebring on your mobile device or desktop.
- Go to Engagement > Events page > open the event and tap on the necessary attendee.
- Tap
Check inat the bottom of the page.
Export event attendees
- After your event concludes, enhance your understanding of its efficiency by downloading the event attendees CSV: 1. Go to Engagement > Events > open the relevant event. 2. Click (…) on the top right corner > Export attendees as CSV.
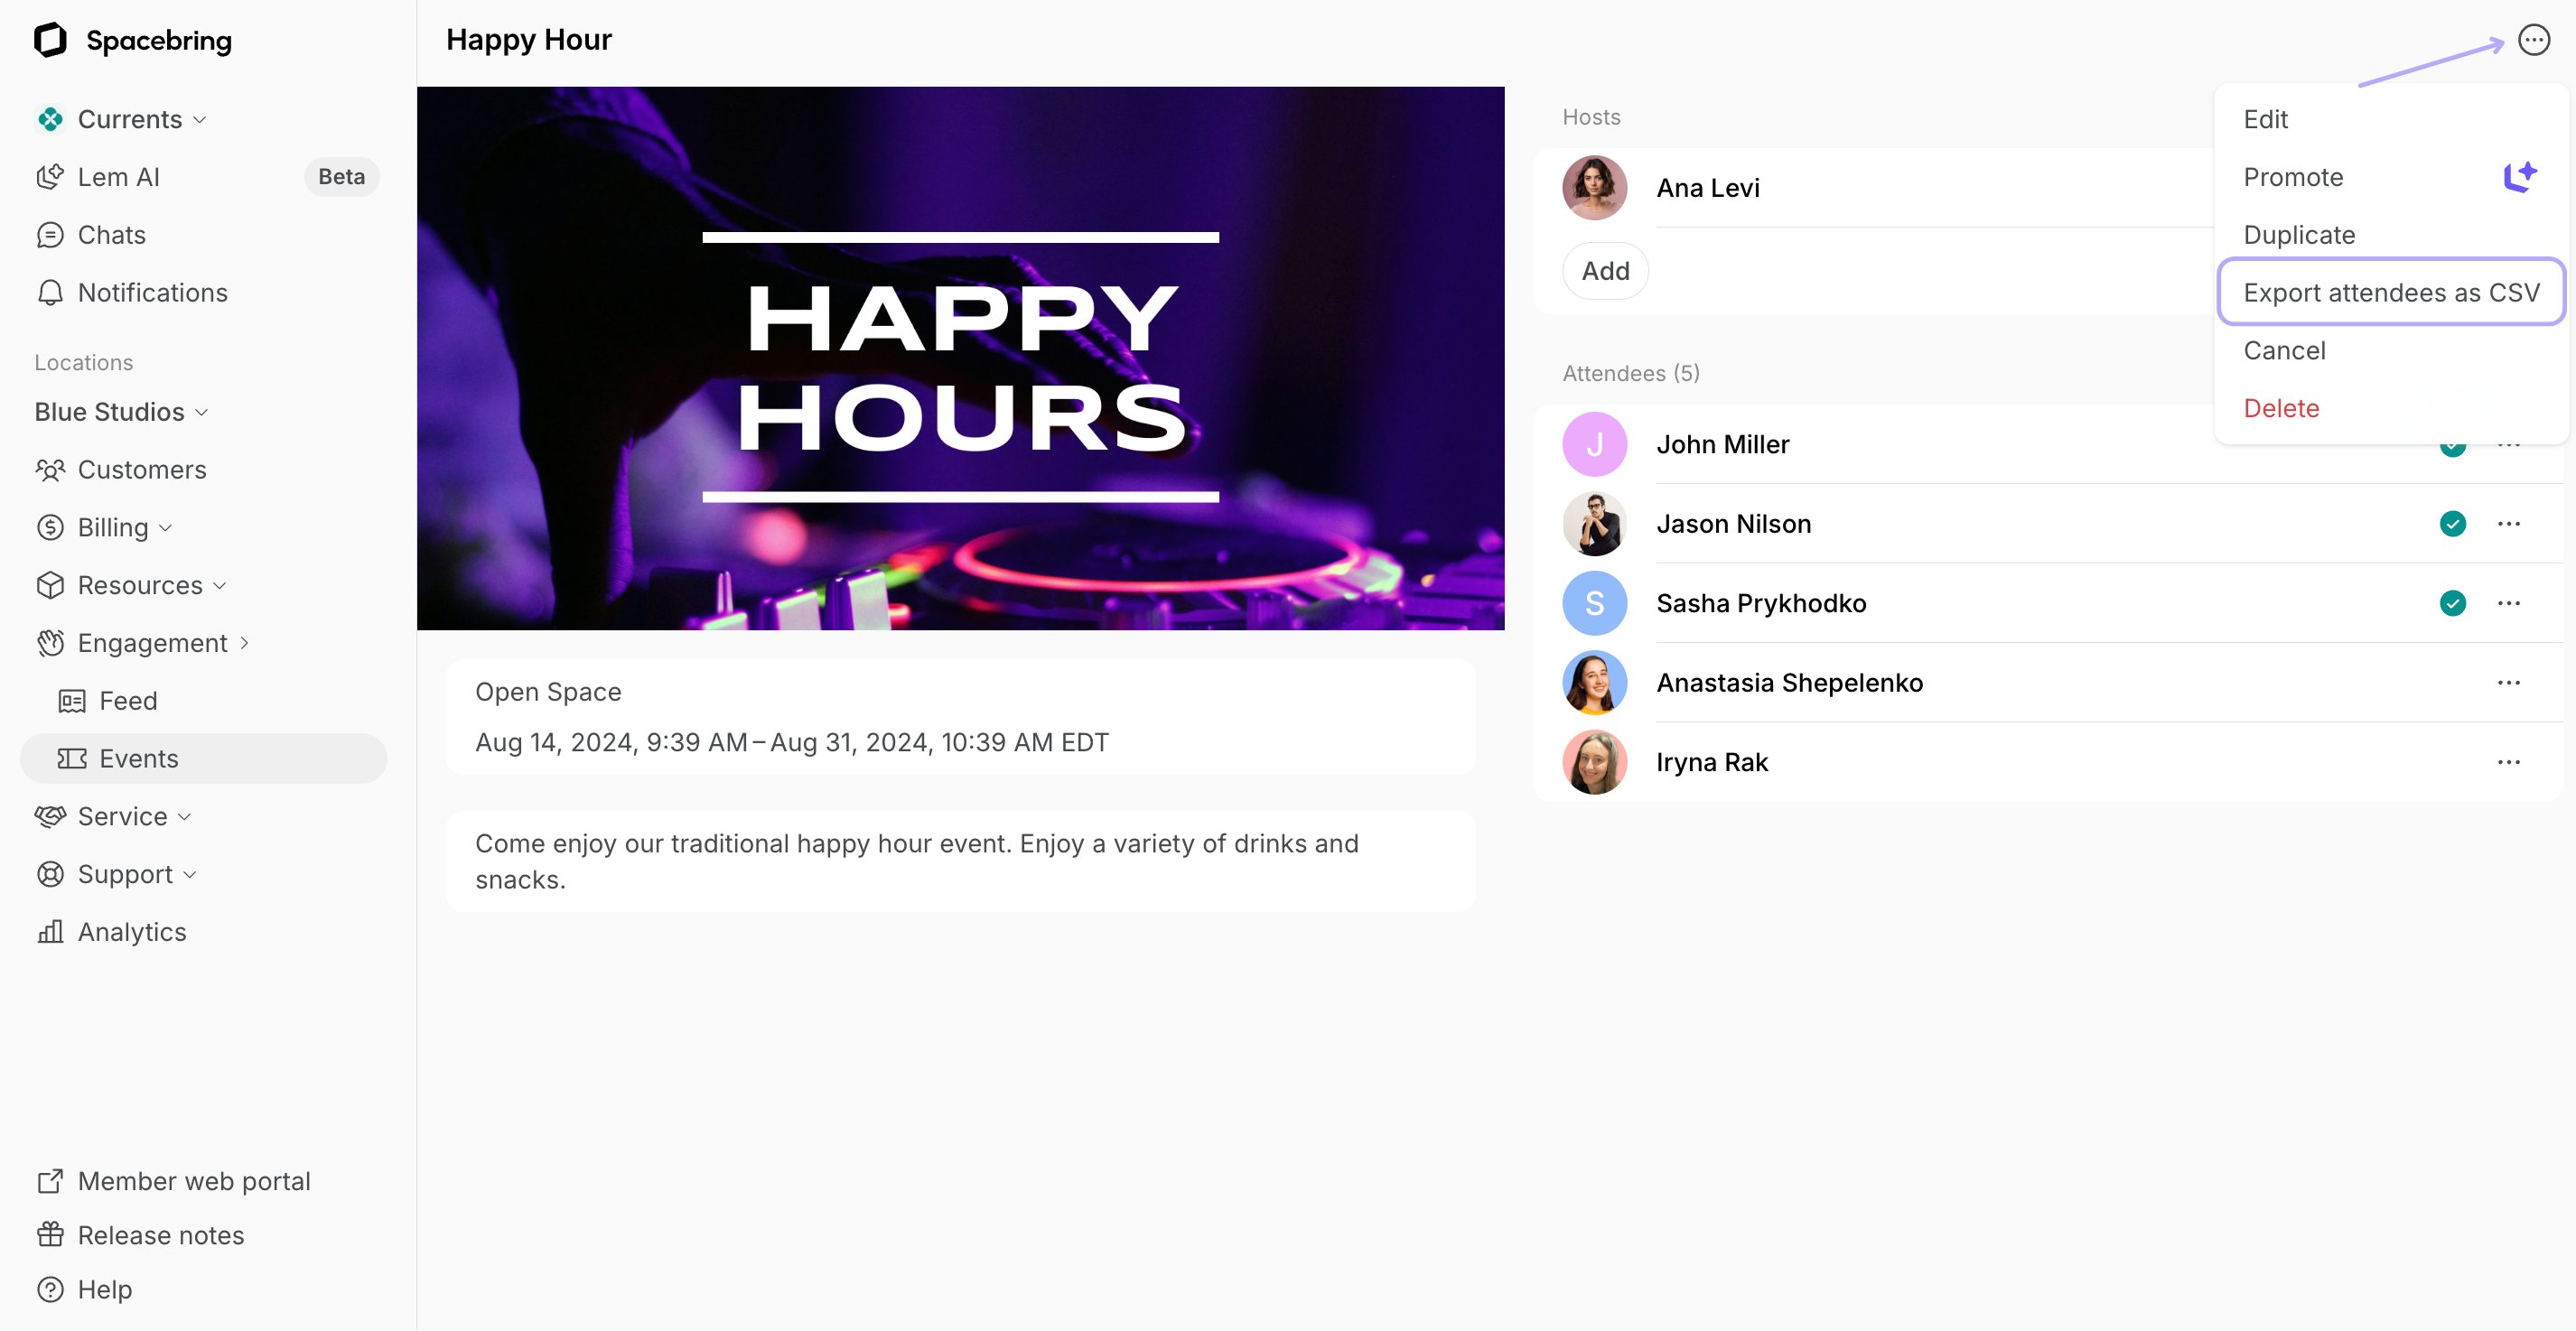
- This CSV provides the attendees contacts, create date, check in date and payment details.
- This segmentation enables you to tailor your outreach strategies: for example, you can send a personalized thank-you and share event highlights with attendees. This helps improve future event planning and conversions.
Edit an event
Editing an event allows you to make changes or updates to the event details, such as the date, time, or any other information.- Go to the Engagement > Events page.
- Hover over the event > press the menu (…) next to it > press
Edit.
- Make the necessary changes and press
Save.
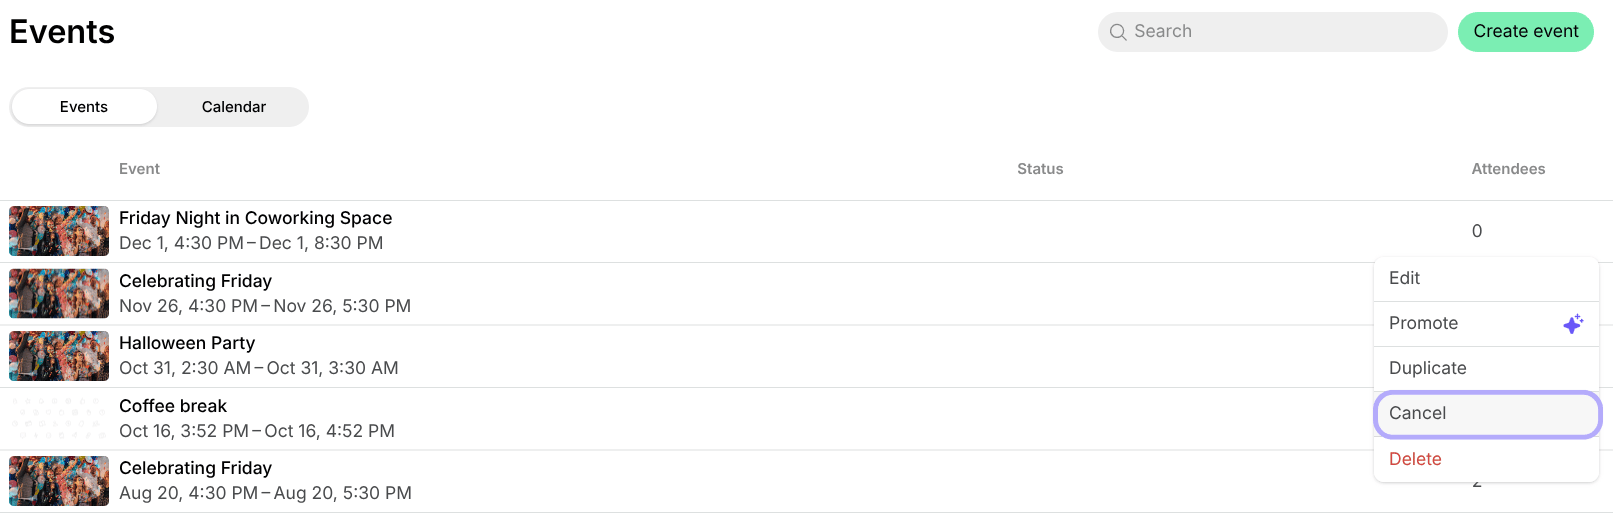
Cancel the event
- Go to the Engagement > Events page.
- Click the (…) menu button next to the necessary event >
Cancel.
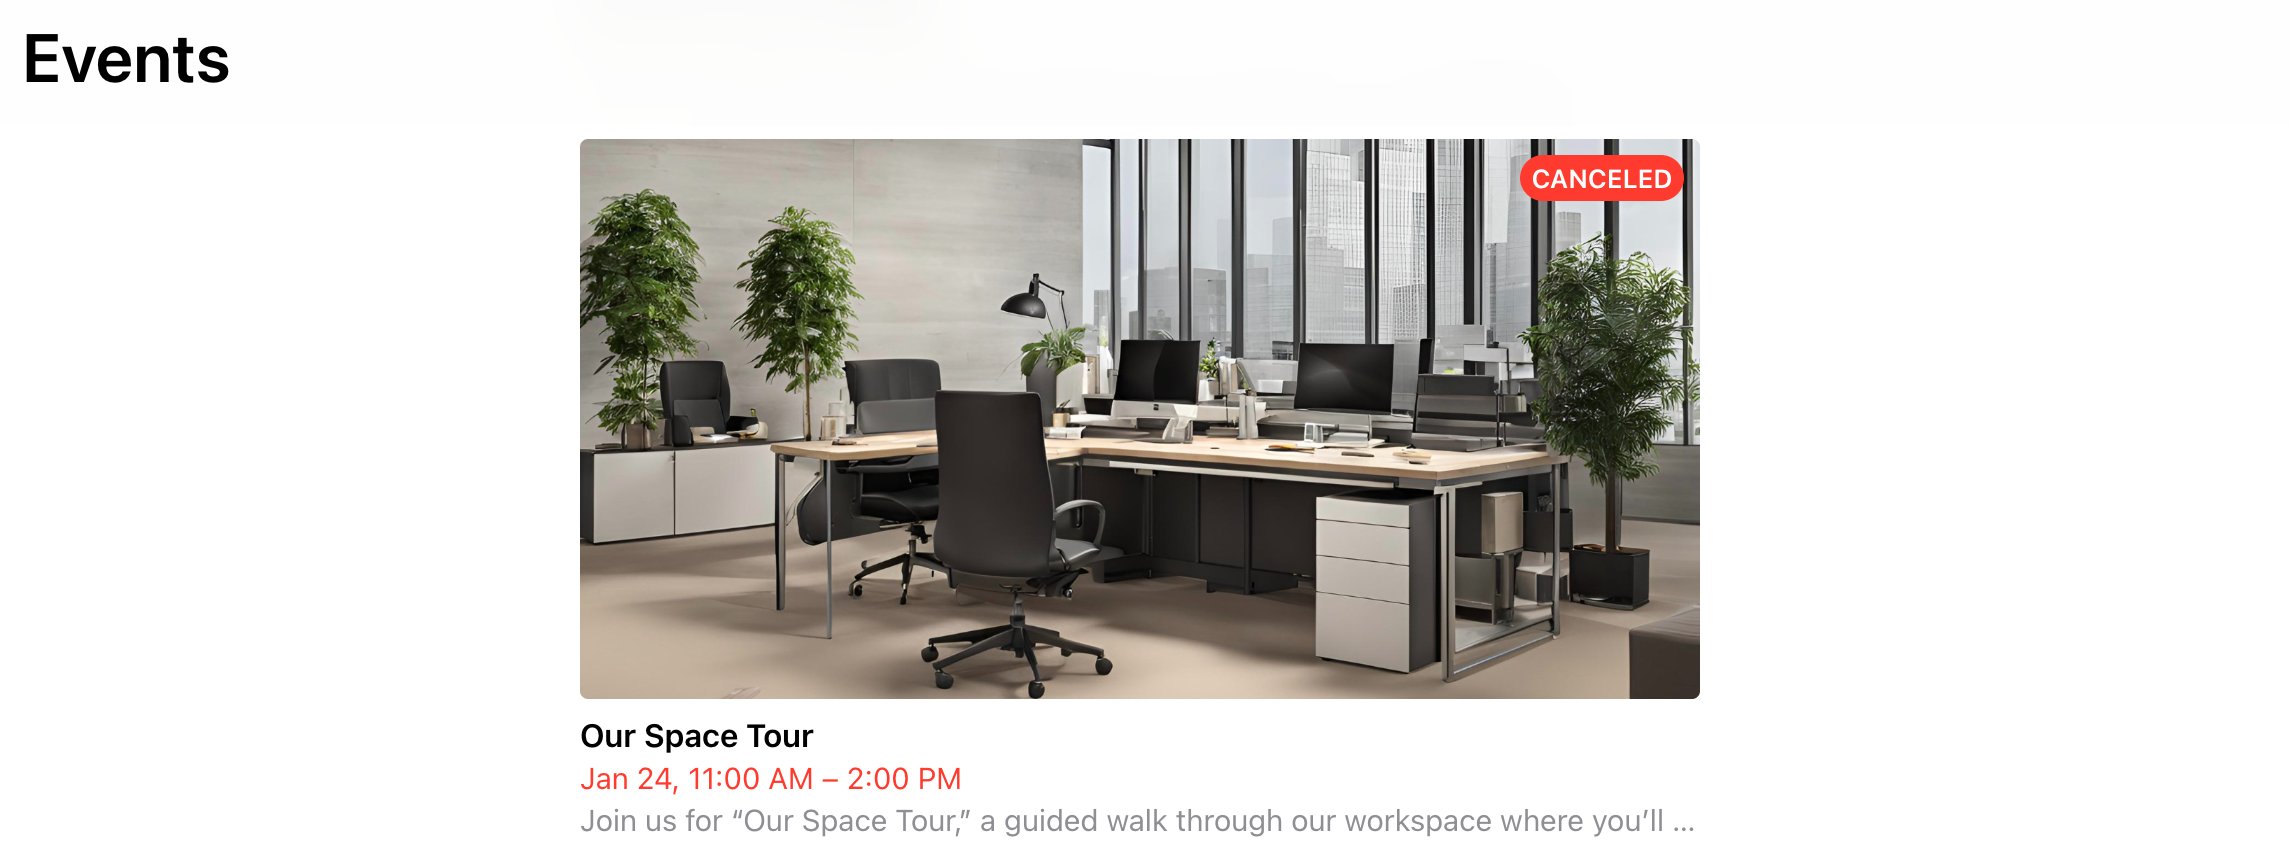
How users are notified about event cancellation
All event attendees receive a push and an email notifications that the event has been canceled.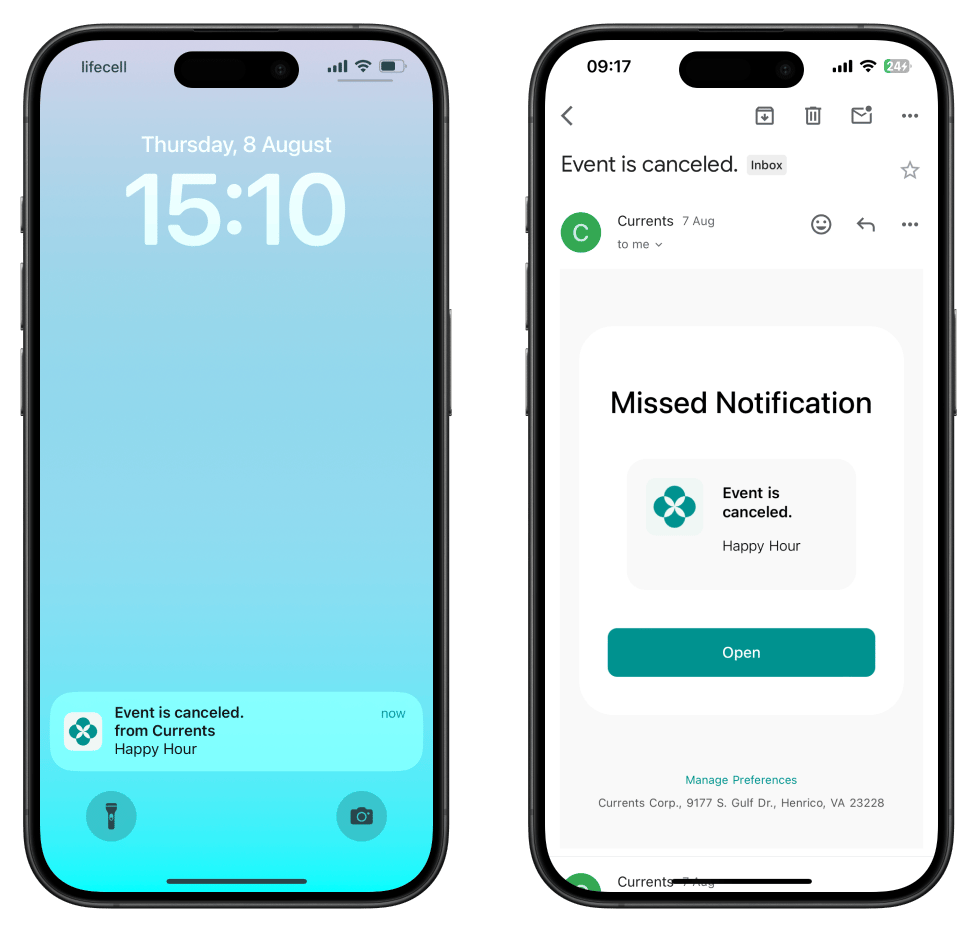
Attendees do not receive a refund if you cancel the event. A refund can only be initiated if the attendee cancels the ticket. Understand refunds
Delete an event
- Go to the Engagement > Events page.
- Hover over the event > press the menu (…) next to it > press
Deleteand confirm your choice.
Deleting an event is irreversible and can not be undone.
How to make events free for members, and paid for nonmembers?
How to make events free for members, and paid for nonmembers?
To give members free access to all or a specific event, add a 100% discount coupon for event tickets in their subscription. Then, when creating an event, set the regular price for nonmembers.
Can members add events to the app?
Can members add events to the app?
Only administrators can create events. However, you can allow members to submit event requests through the Shop page.To set this up, create a product on the Shop page (e.g. “Request to host an event”) with relevant rules, a questionnaire, and your event hosting guidelines. Interested members can apply by purchasing the product and providing event details in the “Comment” section. An administrator will then review the request, create the event, and select the member as a host.
Why can't I see the `Promote` button?
Why can't I see the `Promote` button?
Why is the 'Promote' event feature generating posts in the wrong language?
Why is the 'Promote' event feature generating posts in the wrong language?
The “Promote” event feature relies on AI to identify the language and context of your event. If your title or description is too generic (e.g., “test event”), the system may misinterpret it. For best results, add a clear and descriptive title and description so the AI can generate accurate content.