

Enable check-ins
- Click the menu (…) next to your location name > Location settings > Front desk > Check-ins.
- Enable the Check-ins switch.
- Enable the switches for the users who should get a check-in code and check in with it:
- Event tickets — users who have an event ticket.
- Room bookings — users who book a room, and their invitees.
- Desk bookings — users who book a desk, and their invitees.
- Subscriptions — members who have an active subscription. They check in with their personal code.
- Visits have no switch. Visitors always get an invitation with a visit code as soon as they are registered.
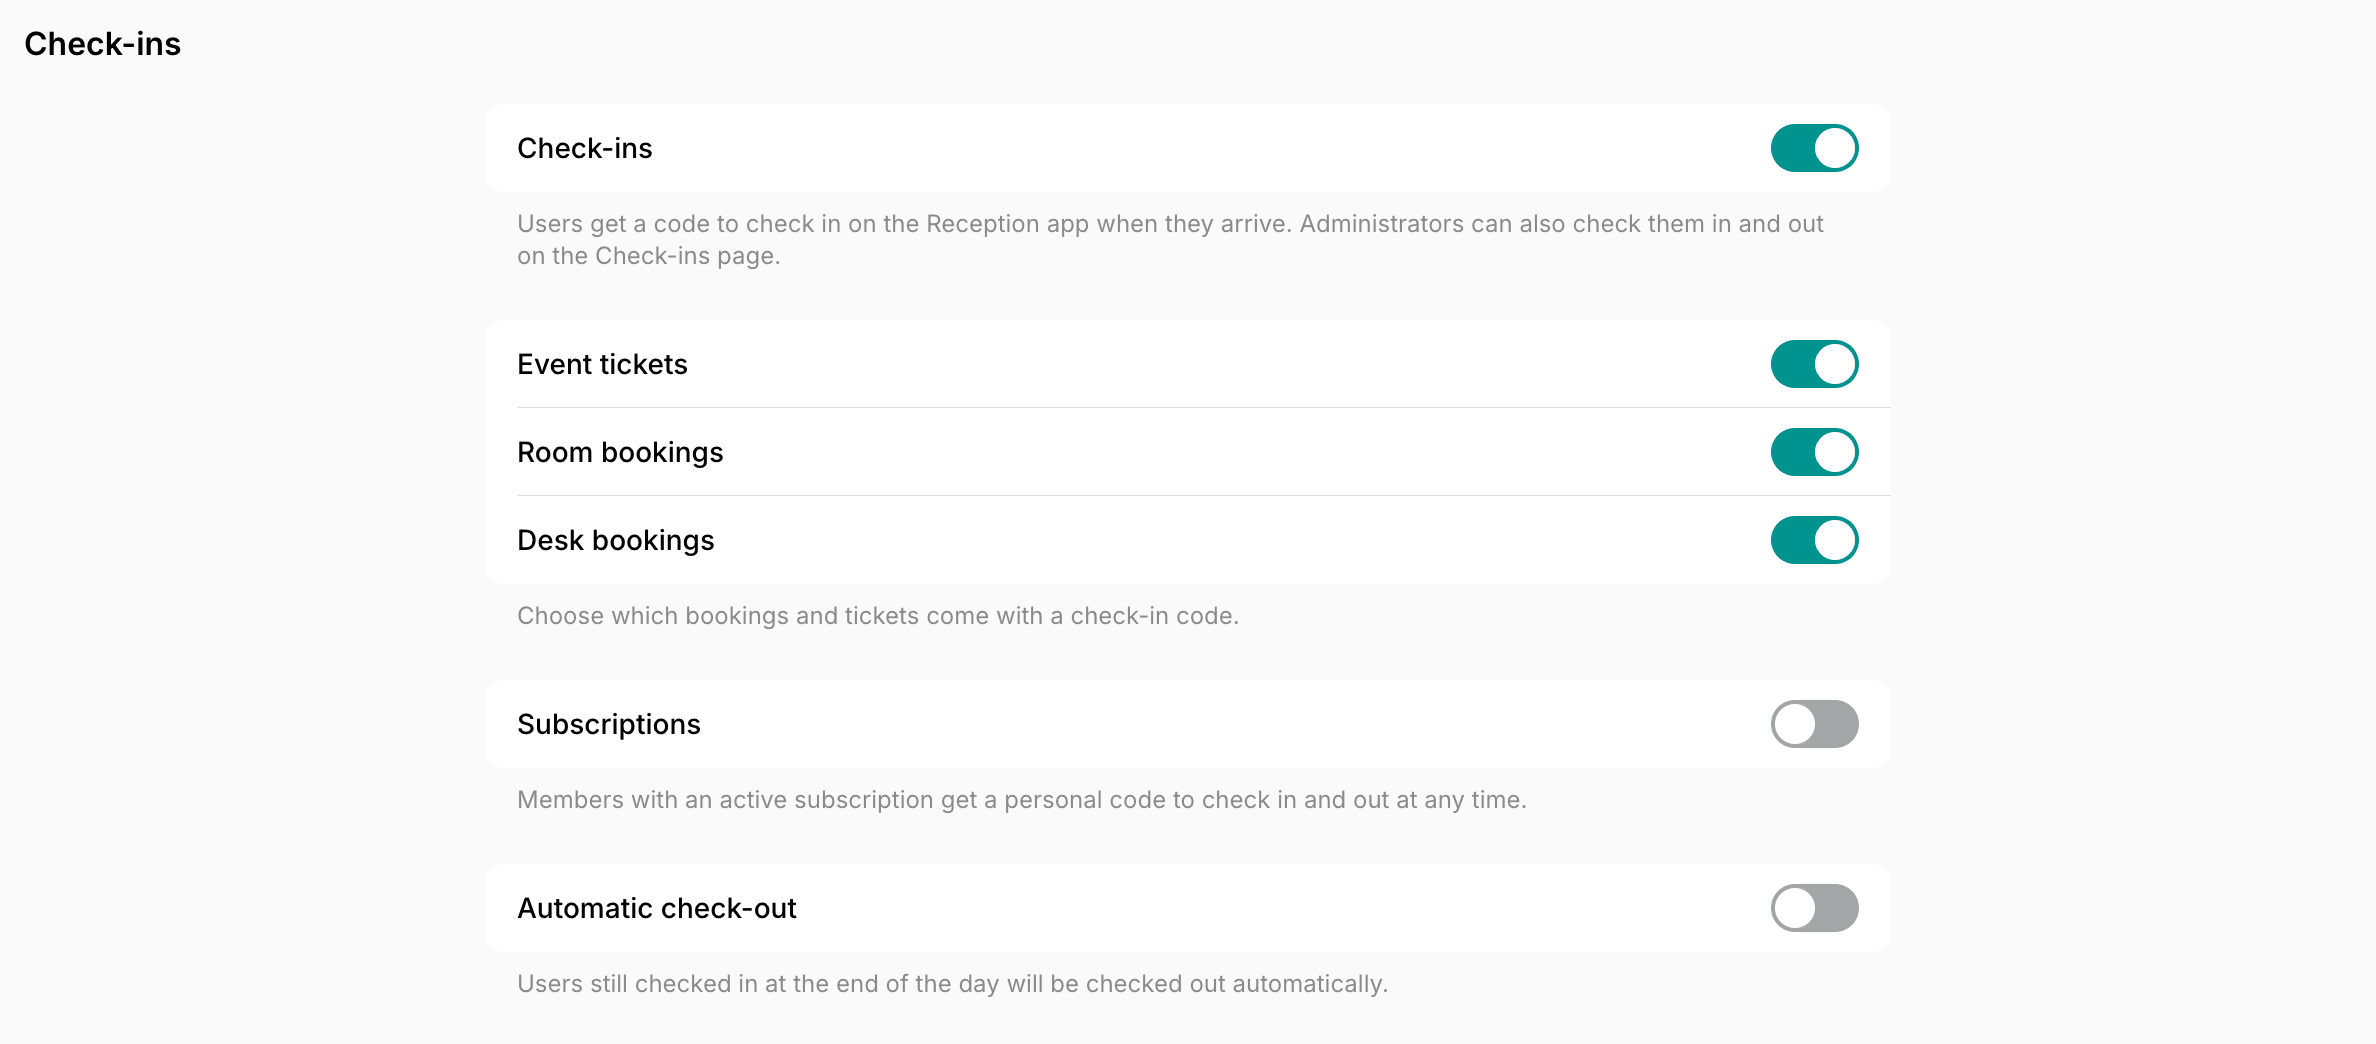
Turning Check-ins off turns all these switches off and hides the Check-ins page. Visitors still get a visit code and check in with it on the Reception app. You track their visits on the Front desk > Visitors page.
When you enable Room bookings or Desk bookings, only new bookings get a code. When you enable Event tickets, both new and already purchased tickets get a code.
How users get a check-in code for a booking, an event ticket, or a visit
- A user books a room or a desk, gets an event ticket, or is registered as a visitor.
- Spacebring gives them a six-digit check-in code. On a booking, the booker and each invitee get their own.
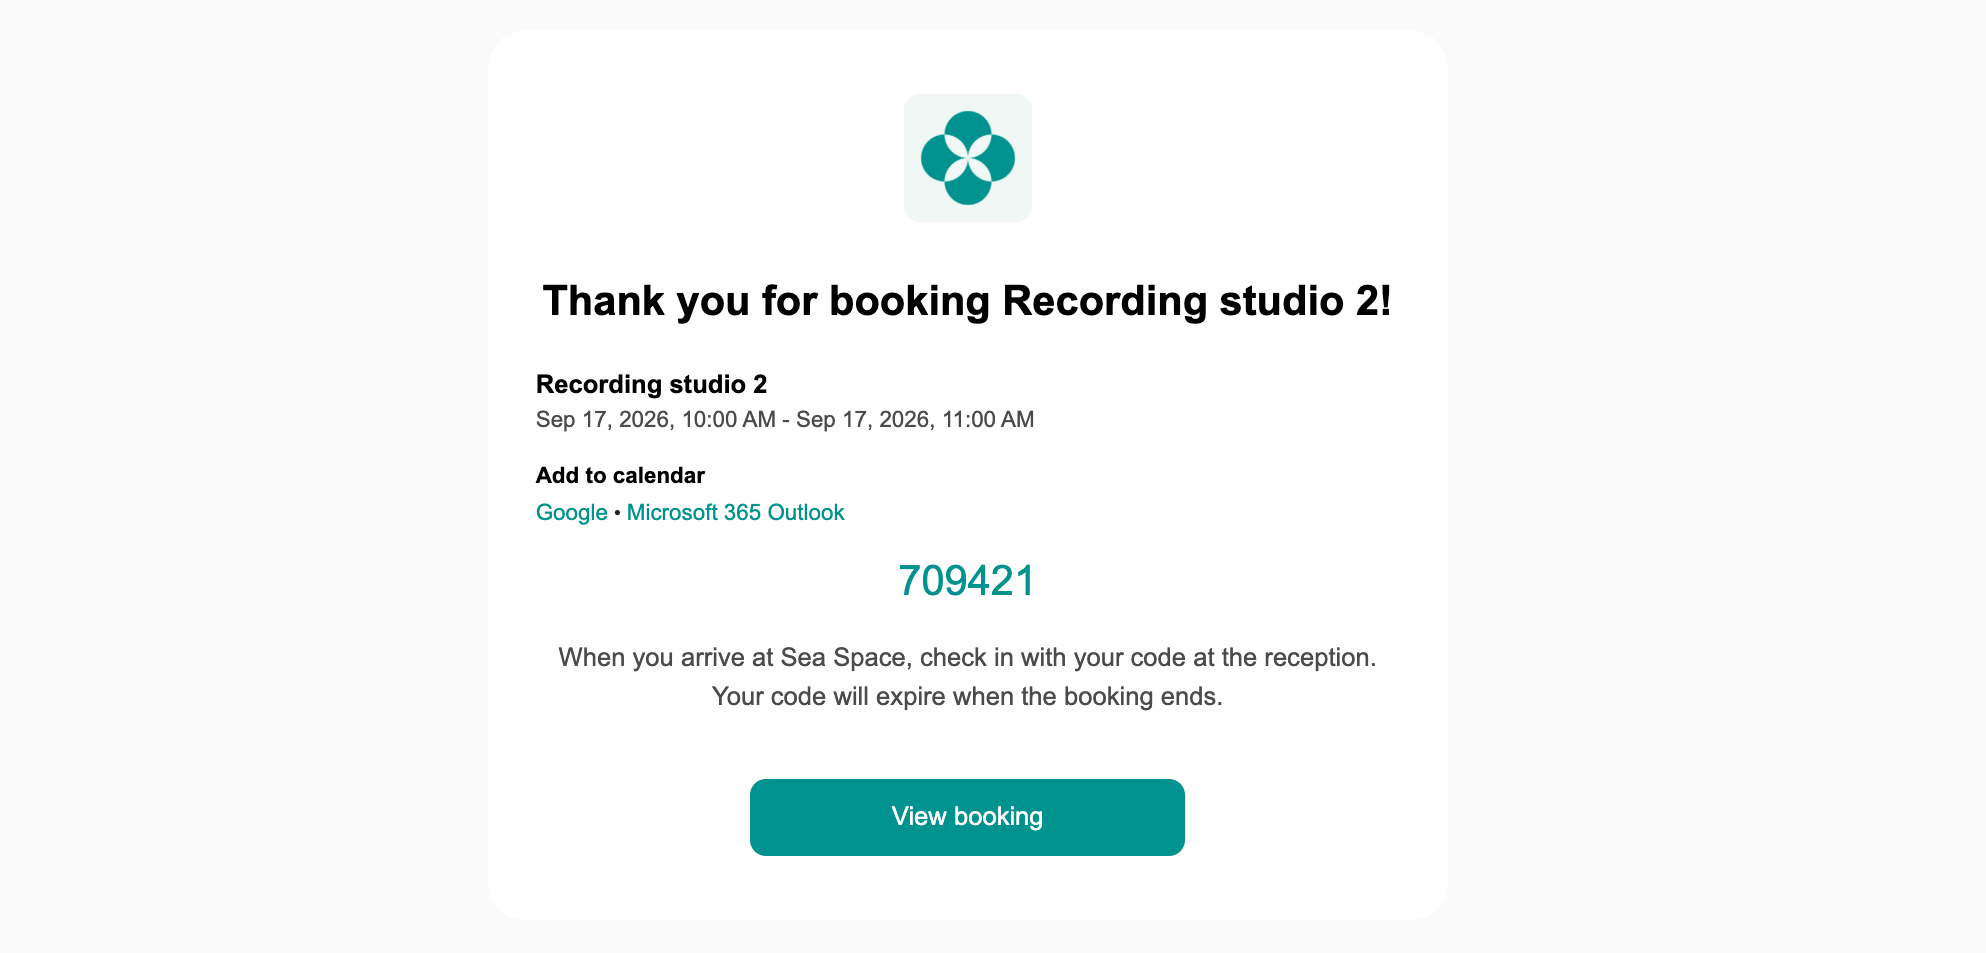
- Spacebring sends the code:
- For a room or desk booking — in the resource’s confirmation email when one is set up, in the email someone gets when a booking is made for them or they are added to one as an invitee, and in the reminders before it starts, by push notification or email.
- For an event ticket — in the event’s confirmation email when one is set up, and in the reminders before the event, by push notification or email.
- For a visit — in the visit invitation email.
-
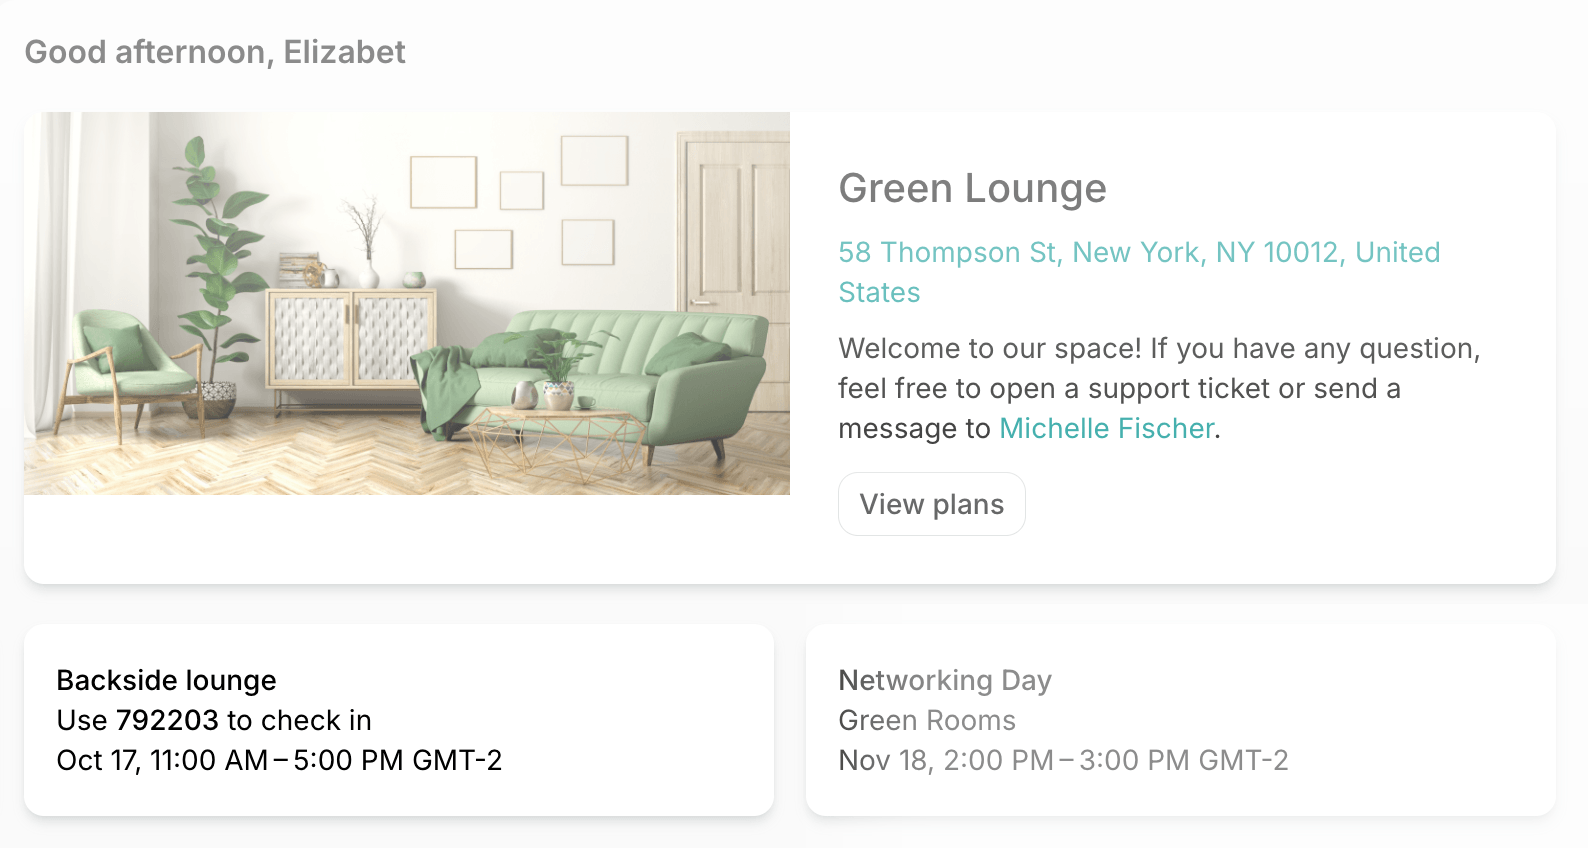
Users also find the code themselves in the member web portal and mobile app:
- On the widget on the location’s Home page, for a booking, an event ticket, or a visit that is coming up.
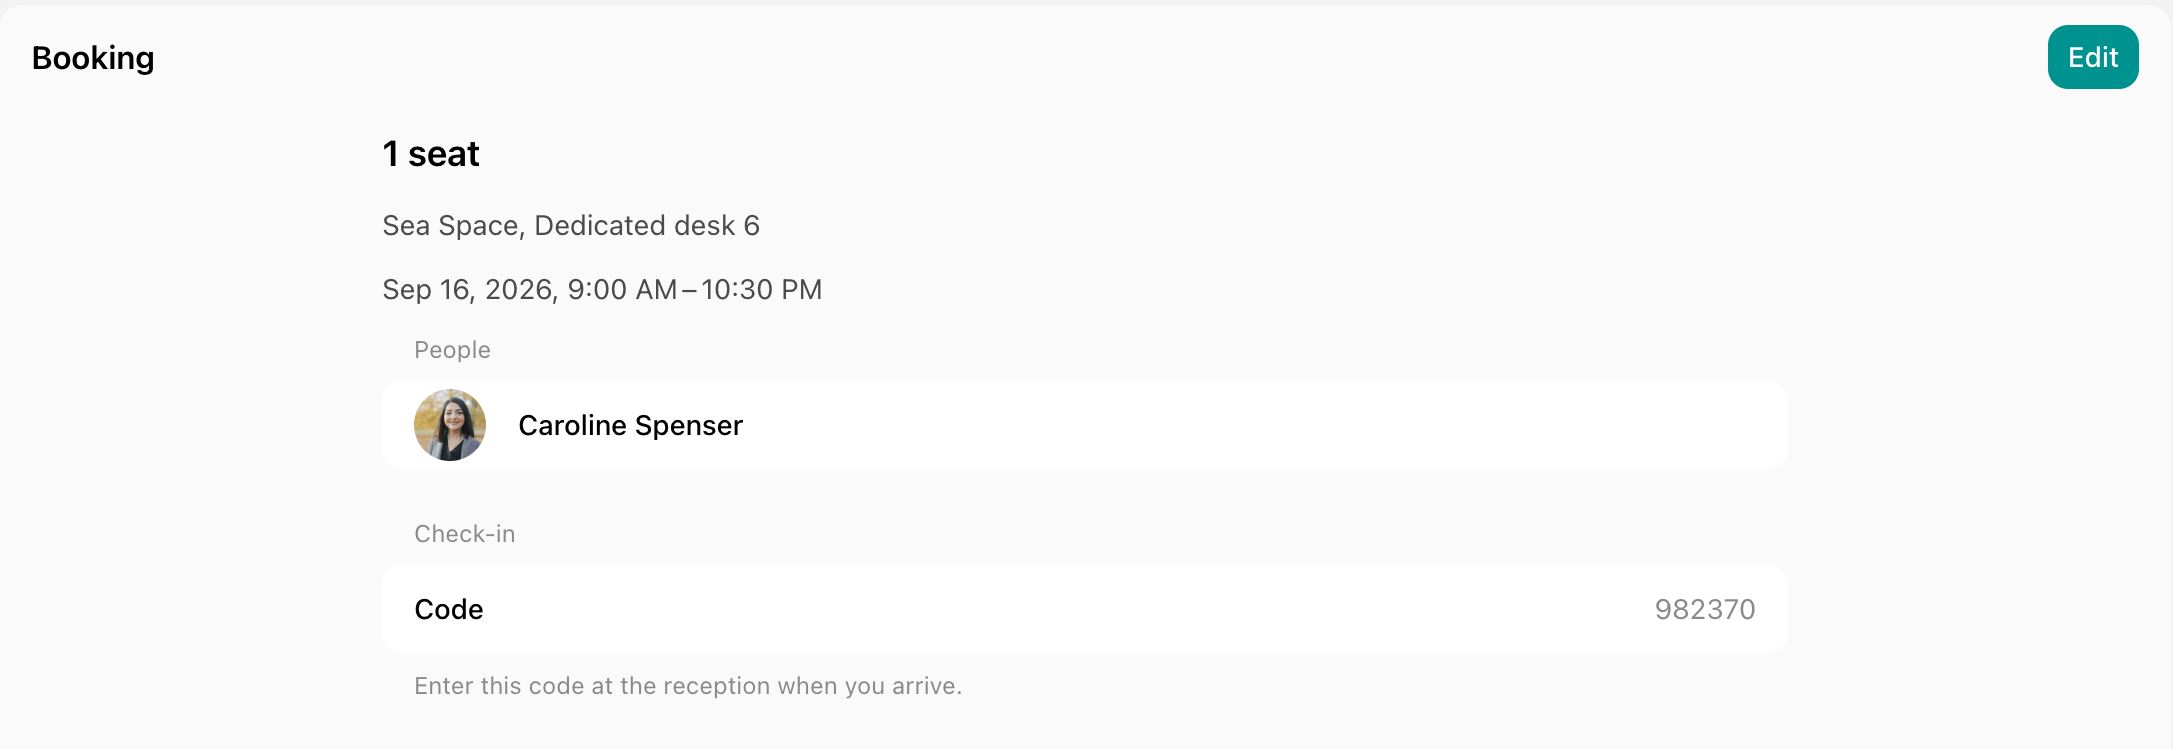
- On the booking on the Account > Bookings page, or on the ticket on the Account > Tickets page. An invitee sees their own code on the booking, not the booker’s.
- On the Visitors page, where the host can find their visitor’s code to share it again.
-
The code starts working an hour before the start and stops working at the end:
- A booking code — until the booking ends.
- An event ticket code — until the event ends.
- A visit code — until the end of the visit day.
How members get a personal check-in code
If you turn on check-ins for subscriptions with the Subscriptions switch, members with a subscription can also check in with a personal code, whether or not they have a booking:- Every member gets a six-digit personal code as soon as they become a member of your location.
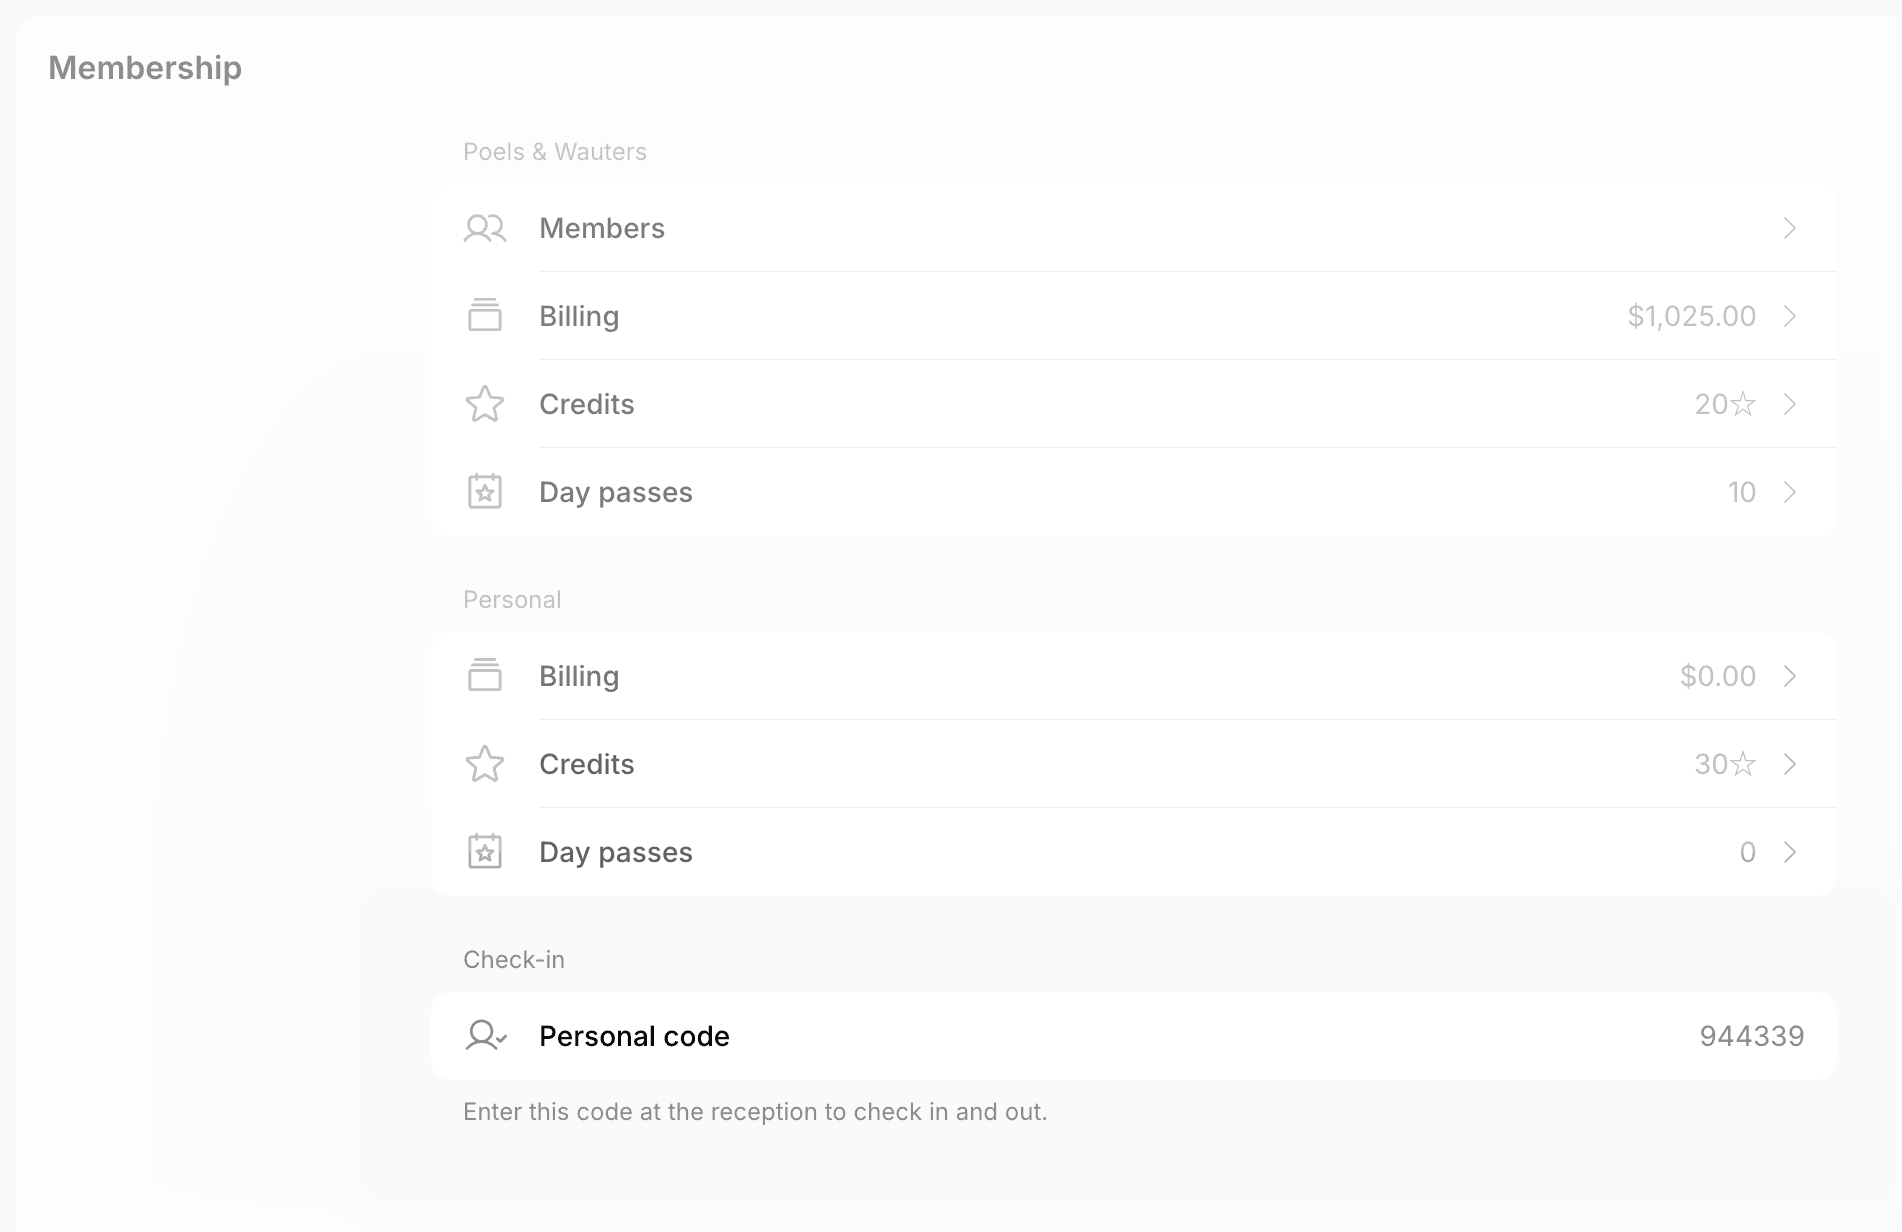
- Members find the code on the Membership page > Check-in > Personal code. They see it only while they or their company have an active subscription.
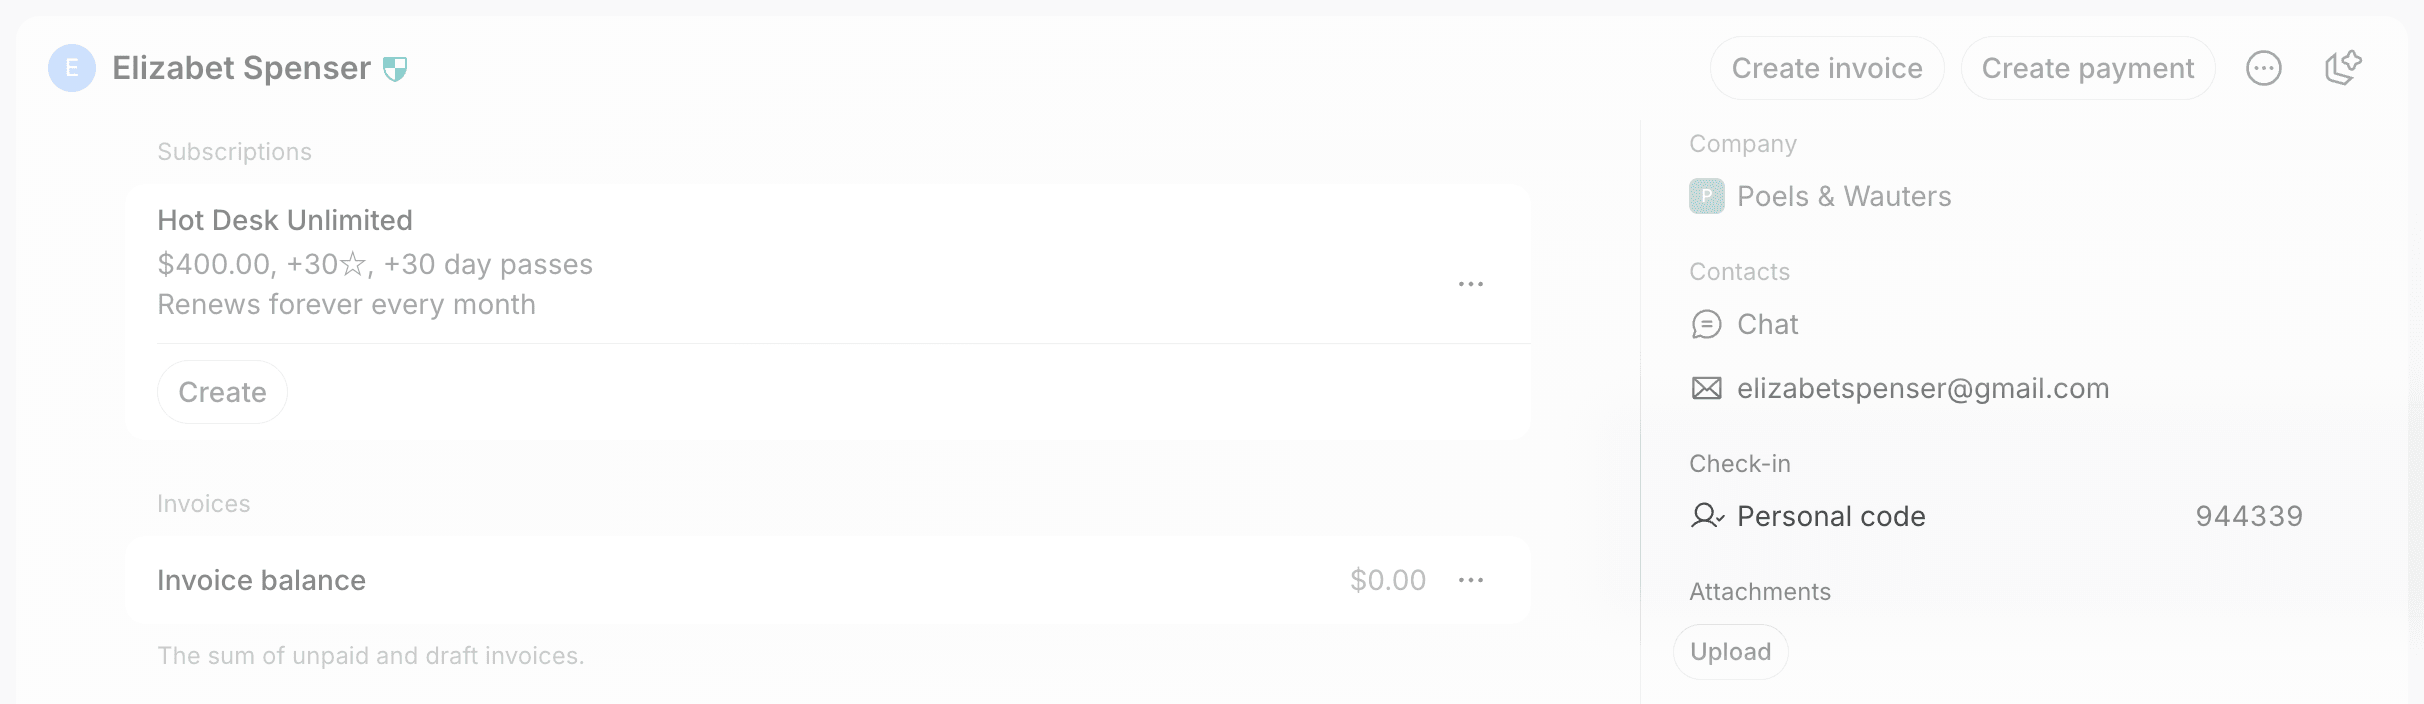
- Administrators find the code in the Check-in section of the member’s profile. They see it only while the member or their company has an active subscription.
- The code works at any time while the member or their company has an active subscription. There is no start or end time.
- A member who is deleted and invited again gets the same code back.
How users check in
Sign up for the Visitors add-on, which includes the Reception app, if you haven’t yet, and set the tablet up at your front desk. Event attendees, users with a room or desk booking, members with a subscription, and visitors check themselves in on the Reception tablet:- The user taps Check in on the tablet when they arrive and confirms that they have a code.
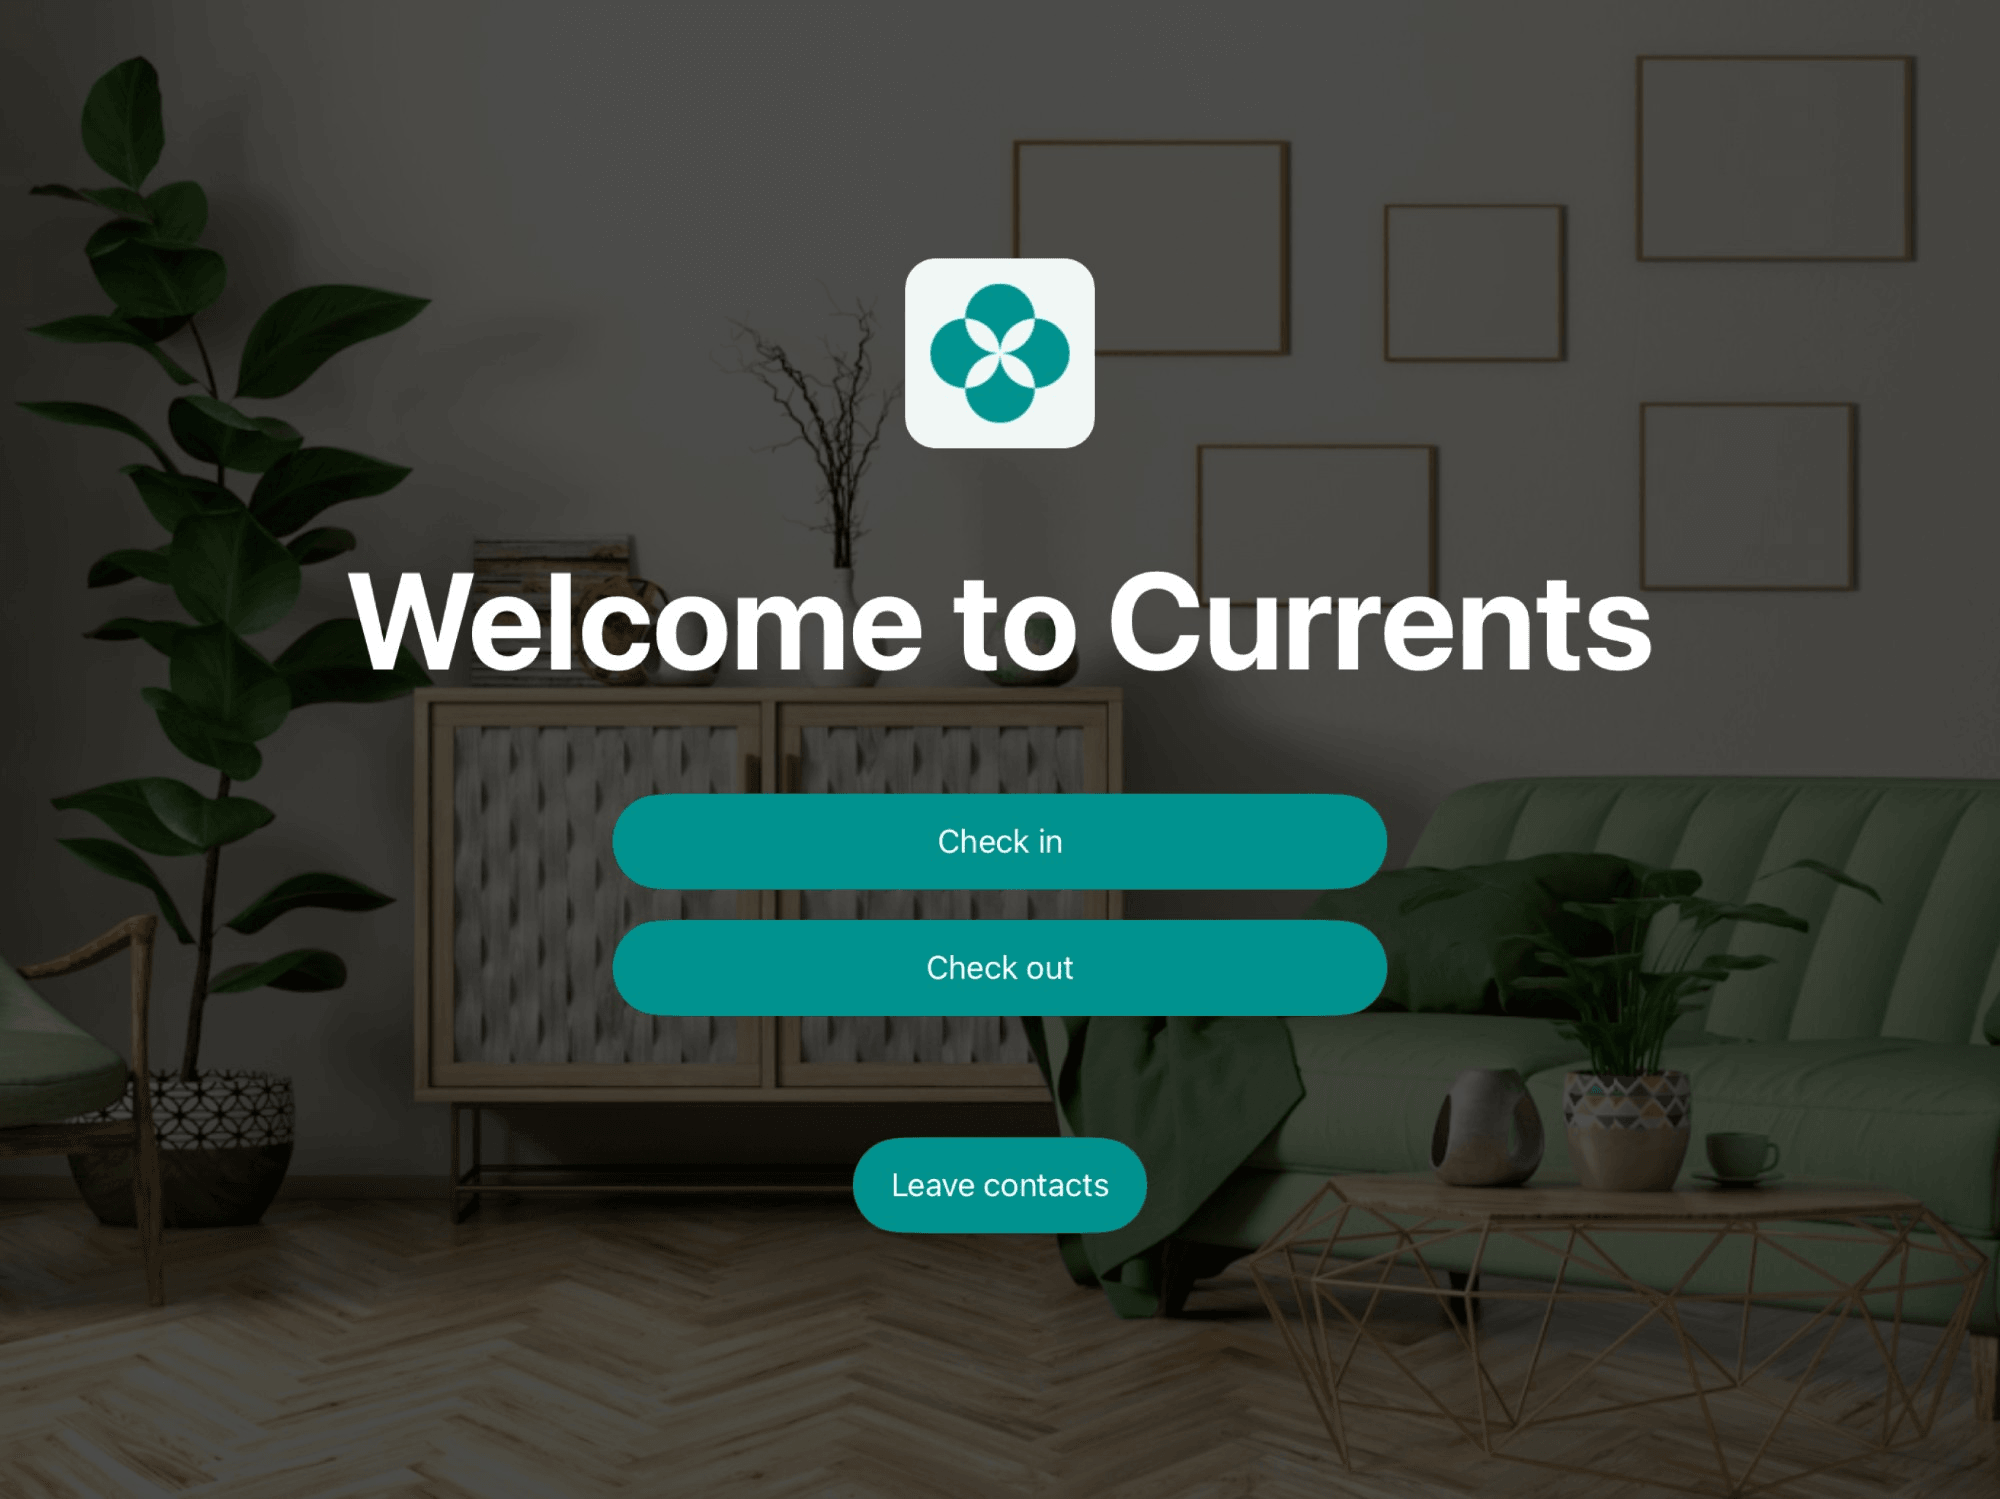
- They enter their six-digit code.
- Reception confirms the check-in. For a visit, it also notifies the host that their visitor has arrived.
While the code works, users can use it as many times as they need. For example, a member who leaves for lunch checks out and then checks in again with the same code. A user who is already checked in can’t check in again until they check out.
Nobody can check in with a booking, ticket, or visit code before it starts working or after it stops working. A member whose subscription hasn’t started, isn’t paid yet, or has ended can’t check in with their personal code. Bookings for an office, a parking lot, or equipment, and bookings imported from Google Calendar or Outlook Calendar can’t be checked in at all, because they never get a code.
How administrators check users in
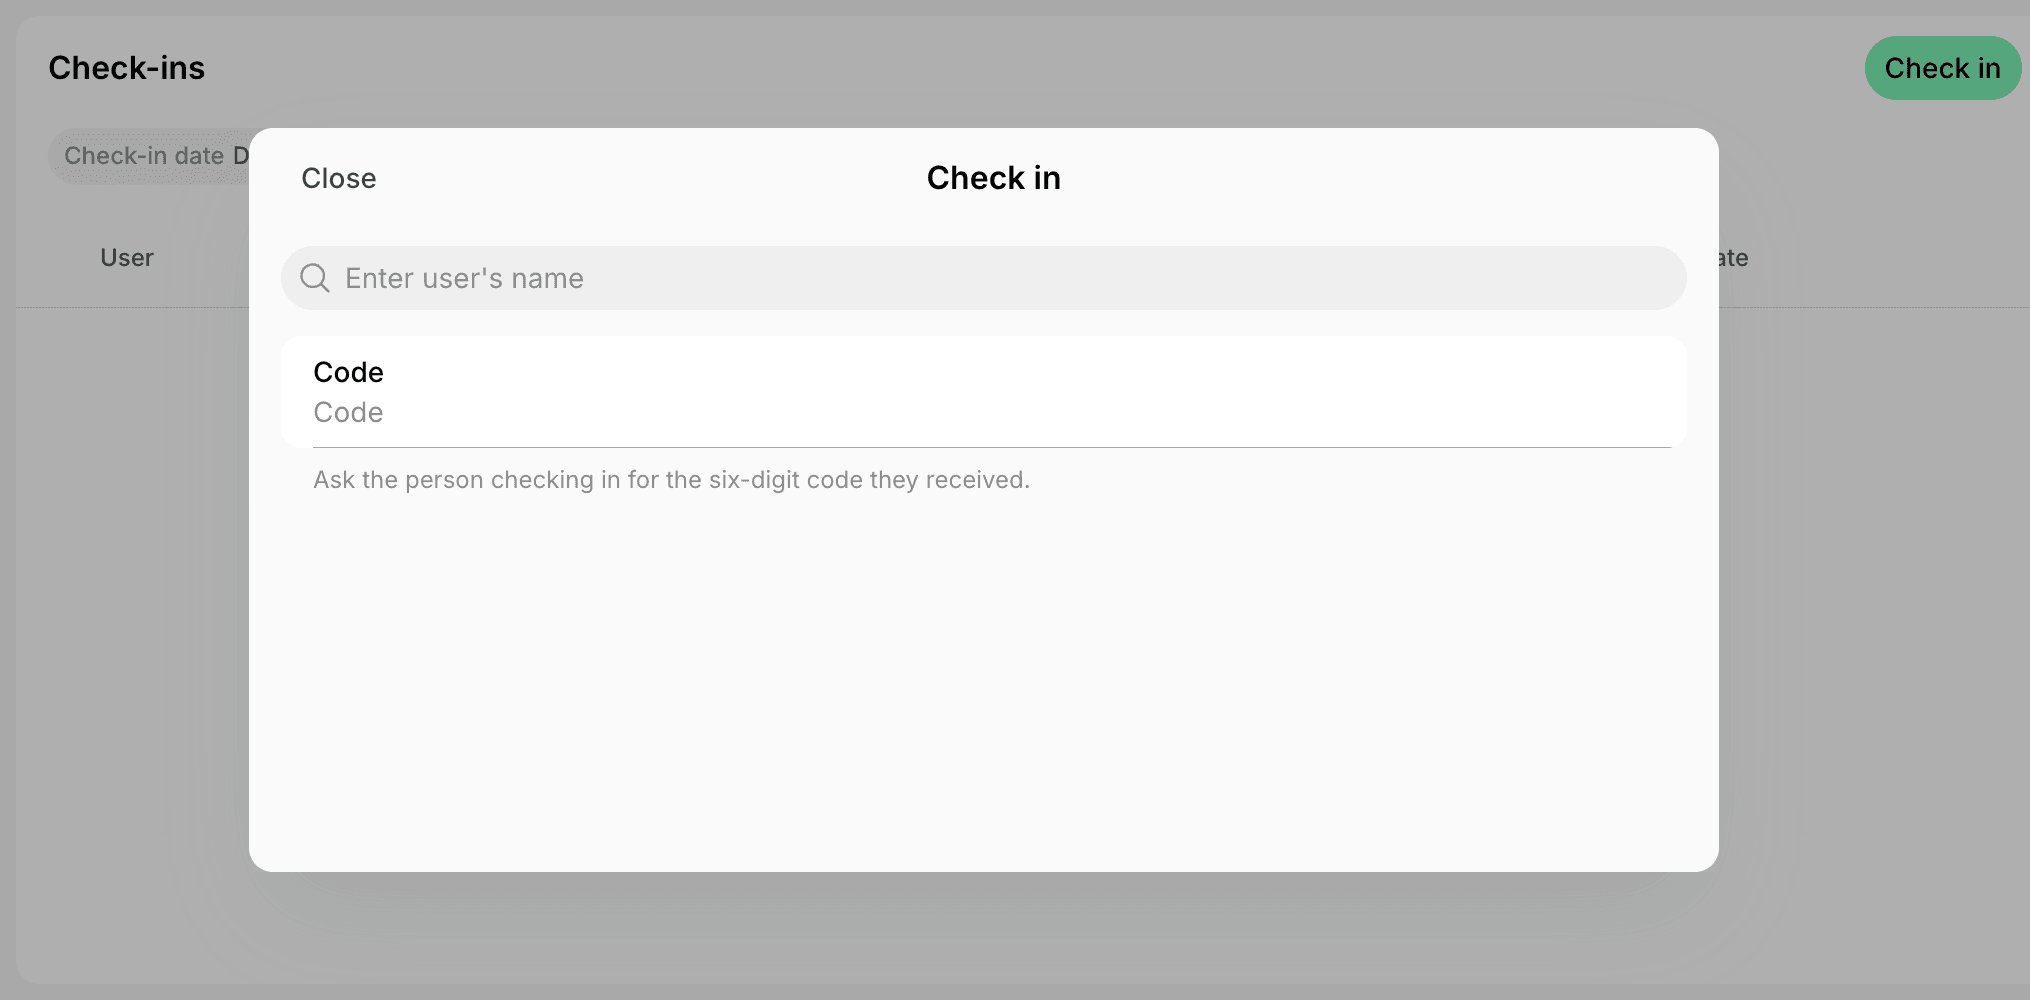
When your subscription has no Visitors add-on with the Reception app, or there is no tablet at the door, your team checks users in instead:- Go to the Front desk > Check-ins page.
- Click Check in top right.
- Enter the six-digit code the user shows you.
- You can also check in event attendees:
- By scanning their ticket in the admin mobile app.
- From the event page, without entering a code.
- You can also check in members with a subscription without entering a code:
- Type their name in the search field above Code and select them from the list.
- The list shows only members whose own or company subscription is active.
- You can also check in event attendees:
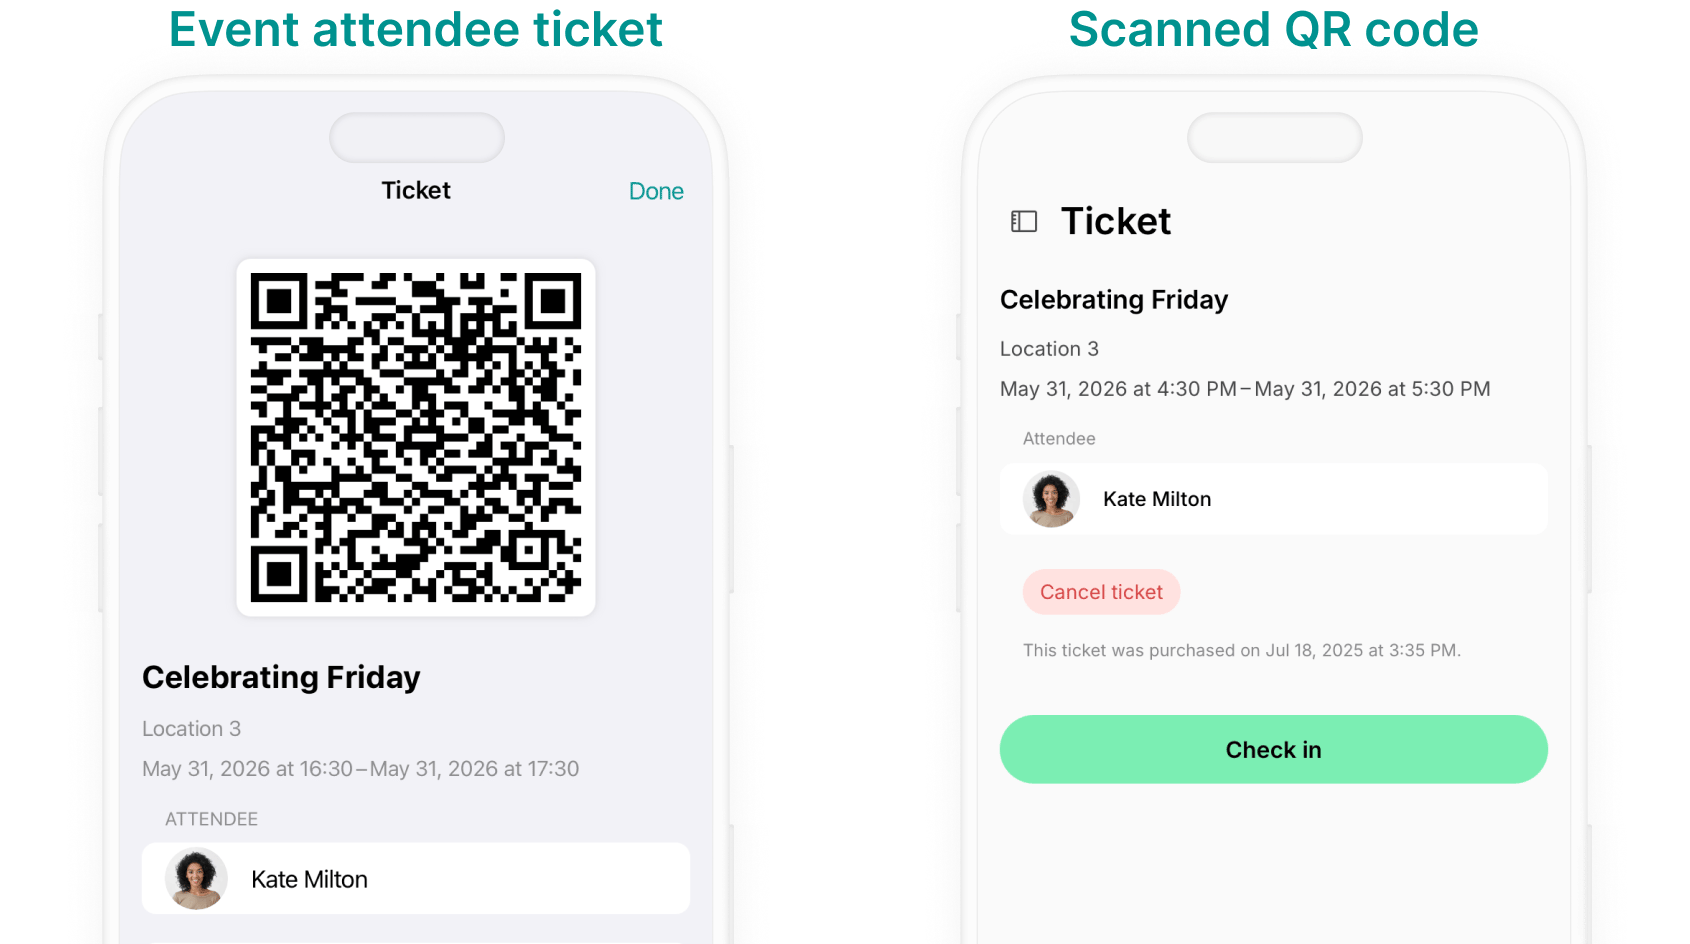
Check in attendees by scanning their ticket QR code
- In the admin mobile app, go to the Check-ins page and tap Check in.
- On Android, tap the floating check-in button at the bottom right.
- The first time, allow the app to use your camera.
- Ask the attendee to open their ticket on the Account > Tickets page.
- Scan the QR code on the ticket. The attendee’s ticket page opens.
- Scan from the Check in screen, not with the phone’s camera app, which only opens the event in the member portal.
- Tap Check in at the bottom of the ticket page. The button changes to Checked in.
- Close the ticket page to scan the next attendee.
Check in attendees from the event page
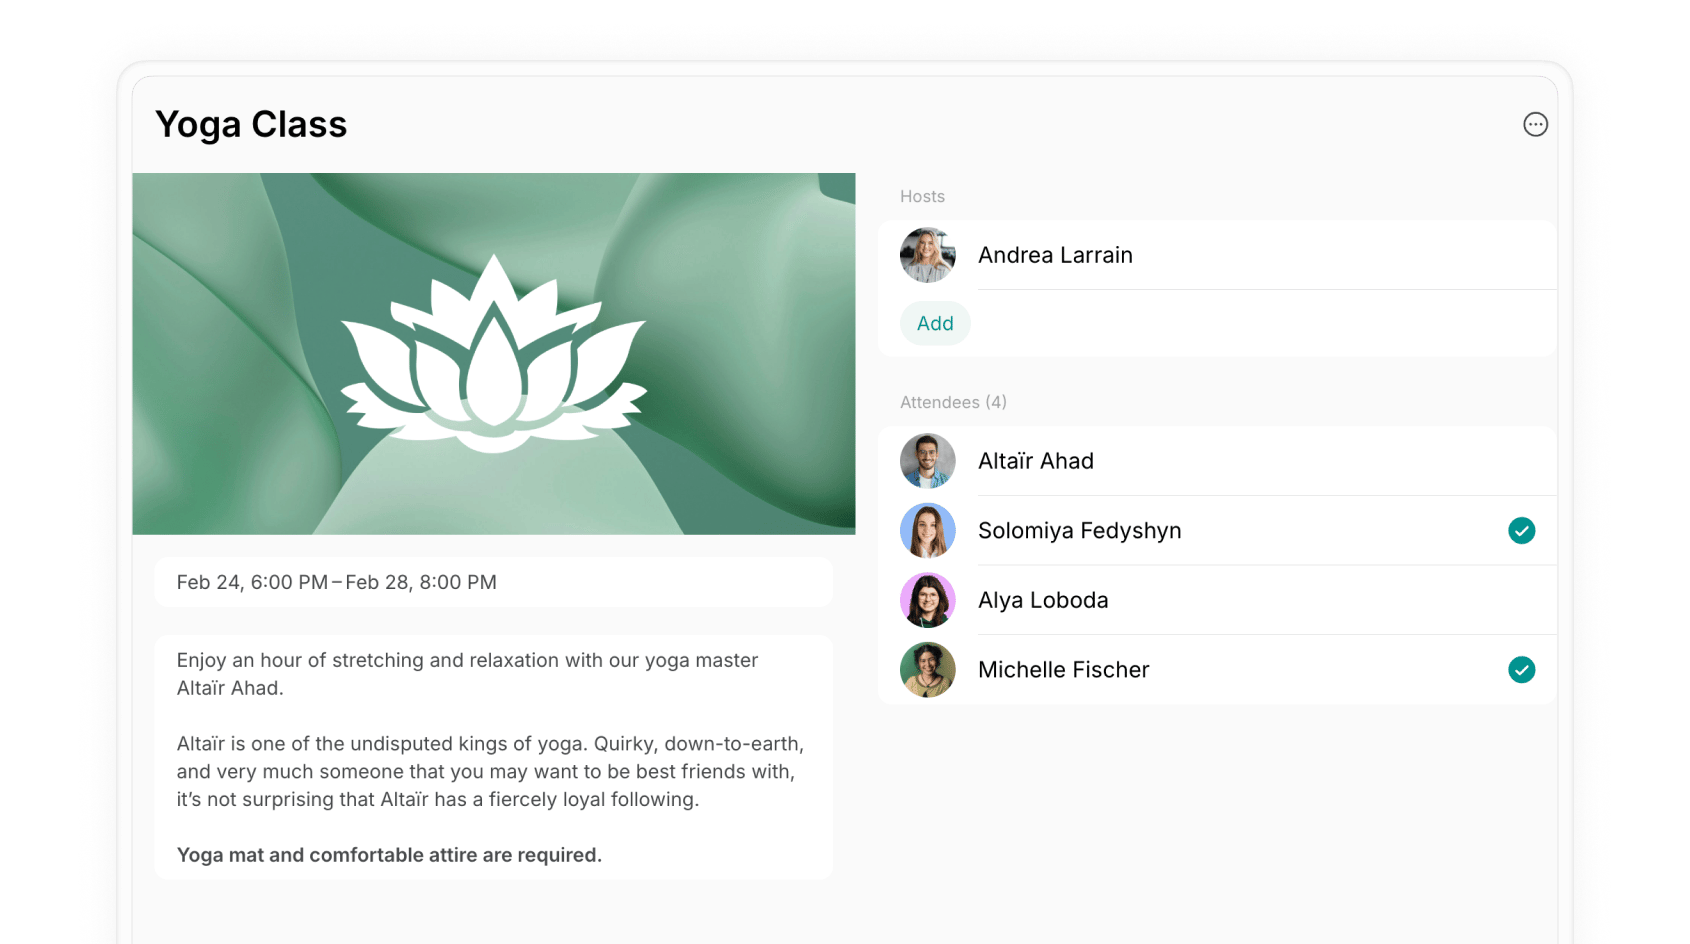
- Go to Engagement > Events and open the event.
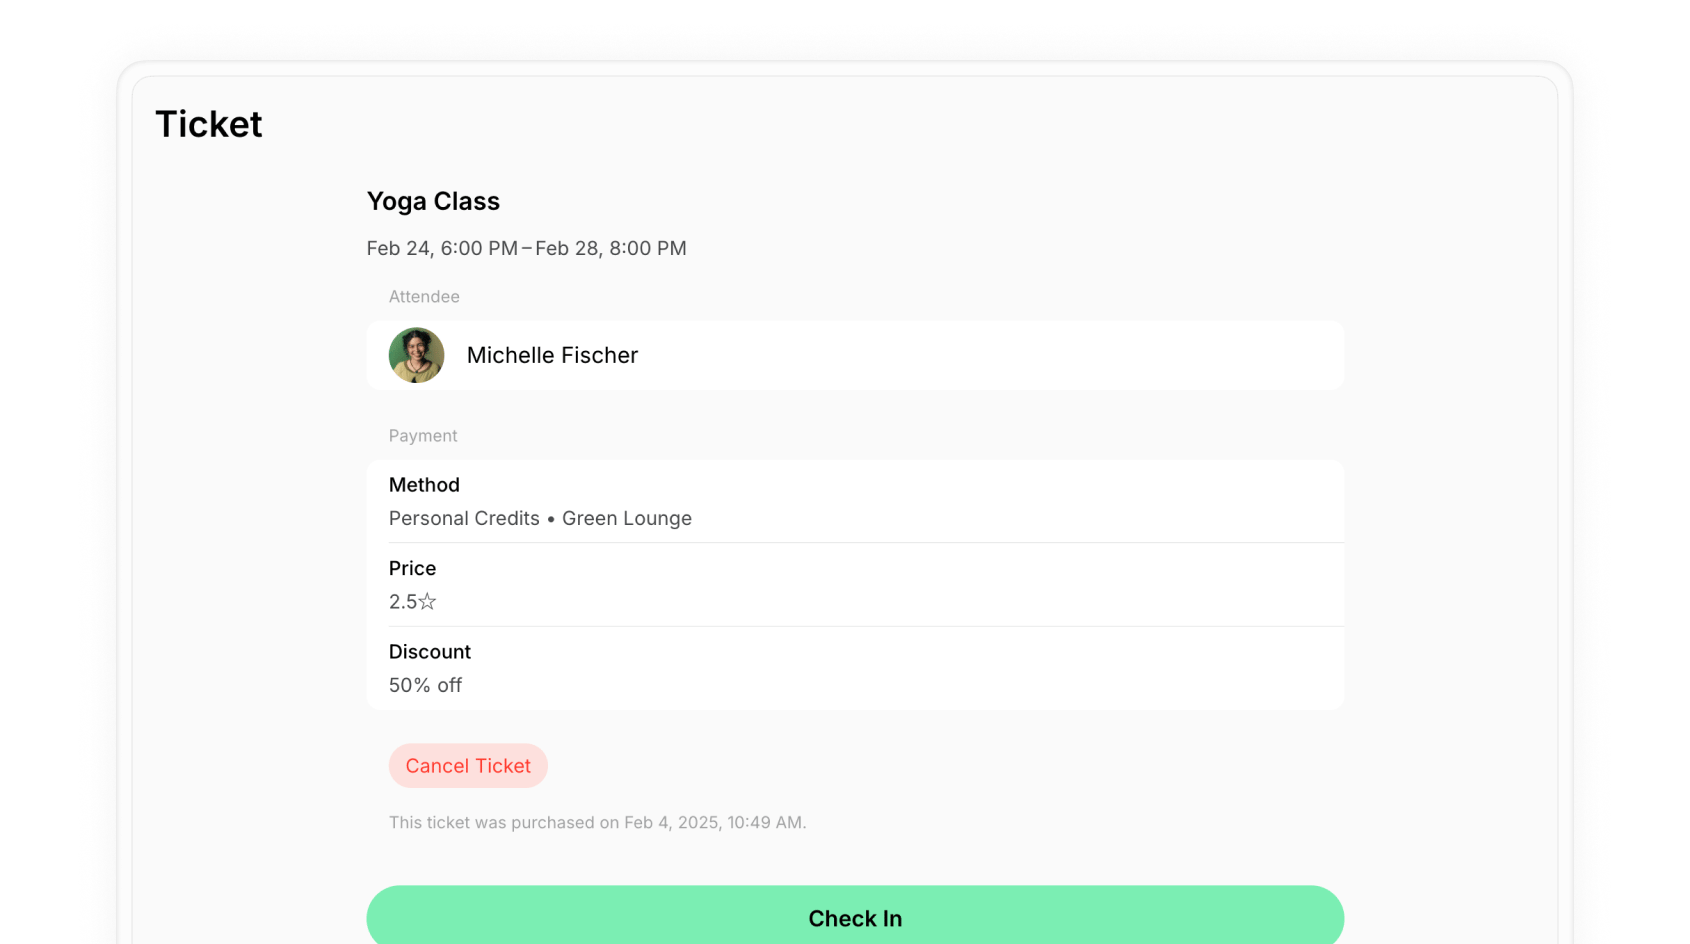
- Click the attendee to open their ticket.
- The ticket’s Check-in section shows the attendee’s code, if they need it.
- Click Check in at the bottom of the page.
Enable check-out
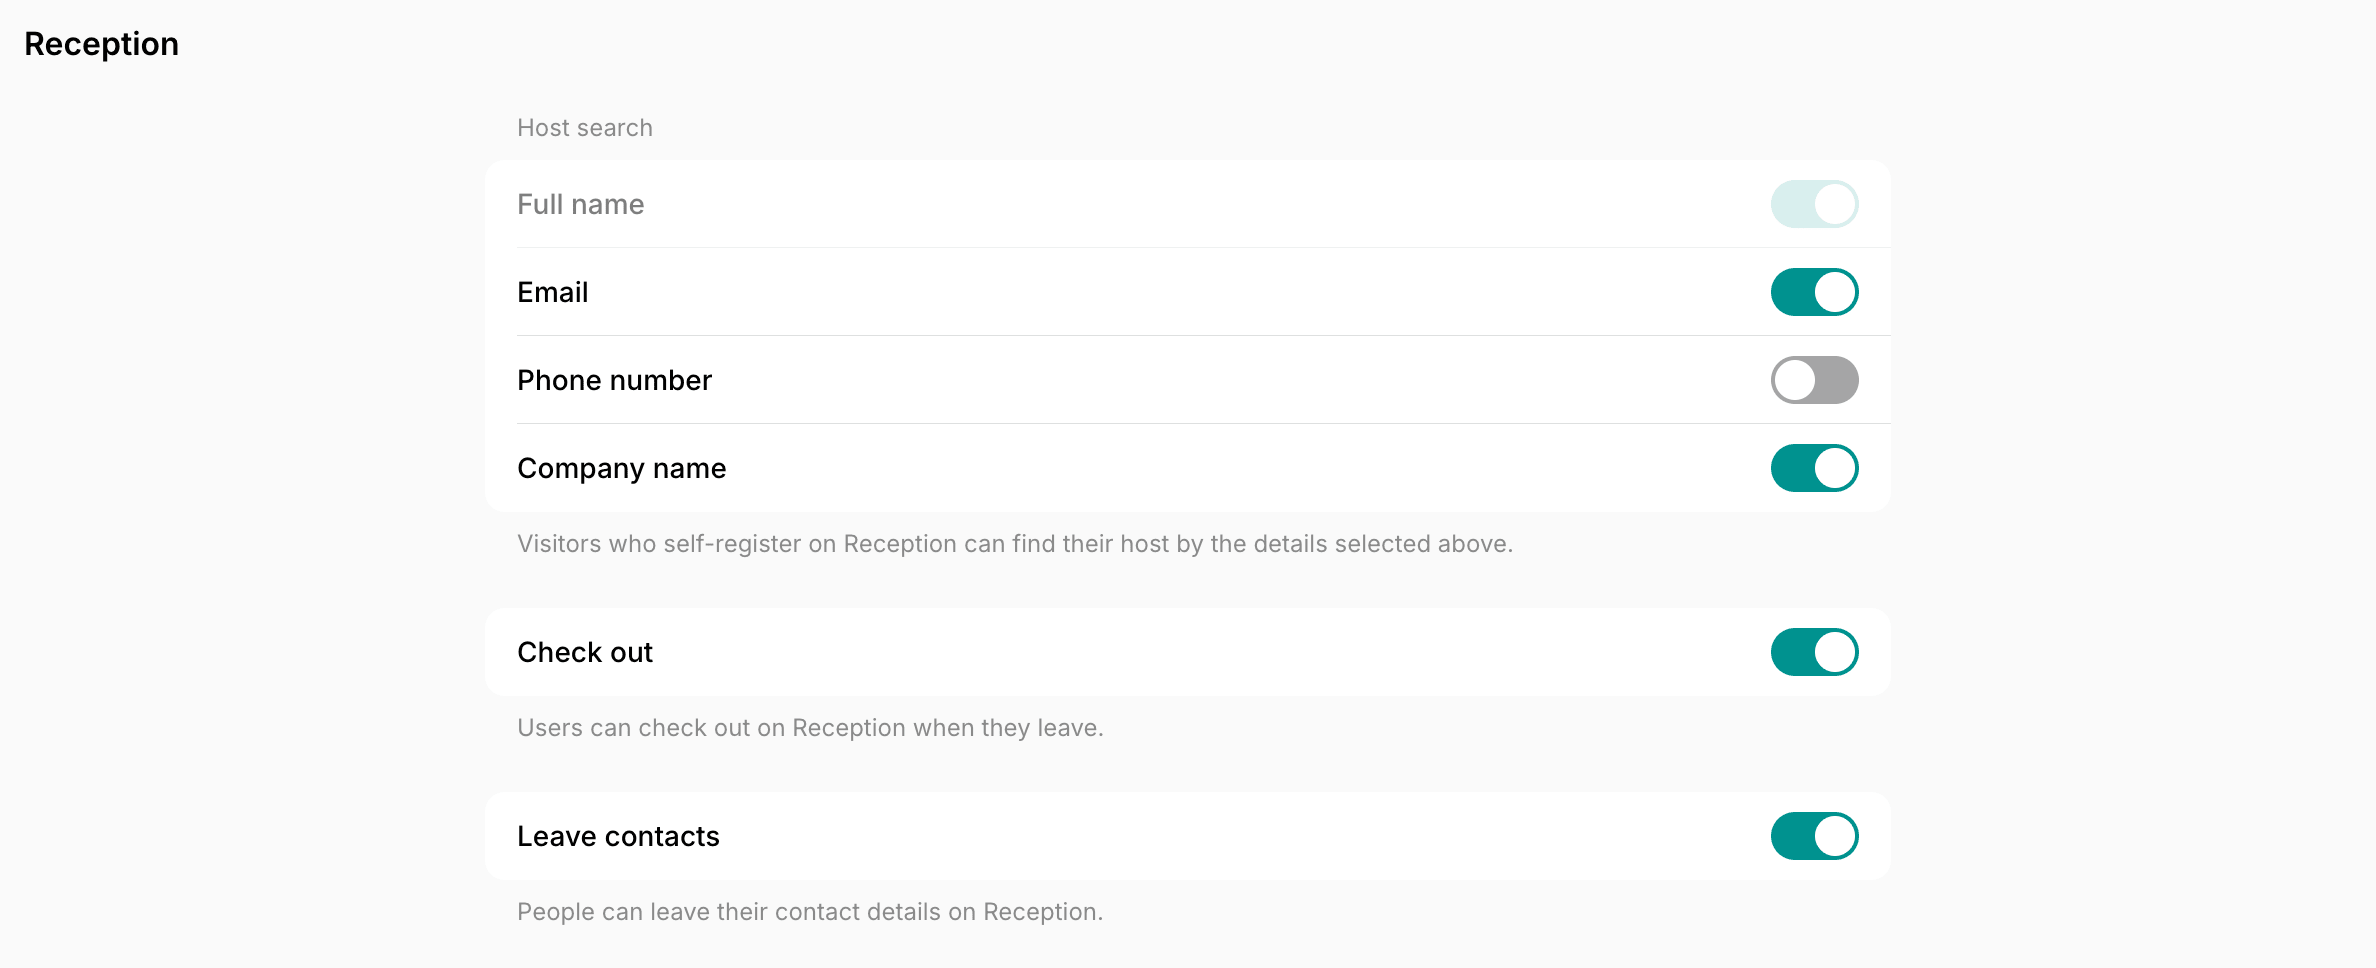
Sign up for the Visitors add-on, which includes the Reception app, if you haven’t yet.- Click the menu (…) next to your location name > Location settings > Front desk > Reception.
- Enable the Check out switch.
How users check out
Once the Check out switch is on, a Check out button appears on the Reception tablet. Event attendees, users with a room or desk booking, members with a subscription, and visitors check themselves out the same way:- The user taps Check out on the tablet when they leave.
- They enter the same six-digit code they checked in with.
- Users with a booking, an event ticket, or a visit find it on the widget on the location’s Home page in the member web portal and mobile app until they check out.
- Reception confirms the check-out and shows how long they stayed.
How administrators check users out
When your subscription has no Visitors add-on with the Reception app, the Check out switch is off, there is no tablet at the door, or someone can’t find their code, your team checks them out instead:- Go to the Front desk > Check-ins page, find the user’s row, and click (…) > Check out. The action appears only while the user is checked in.
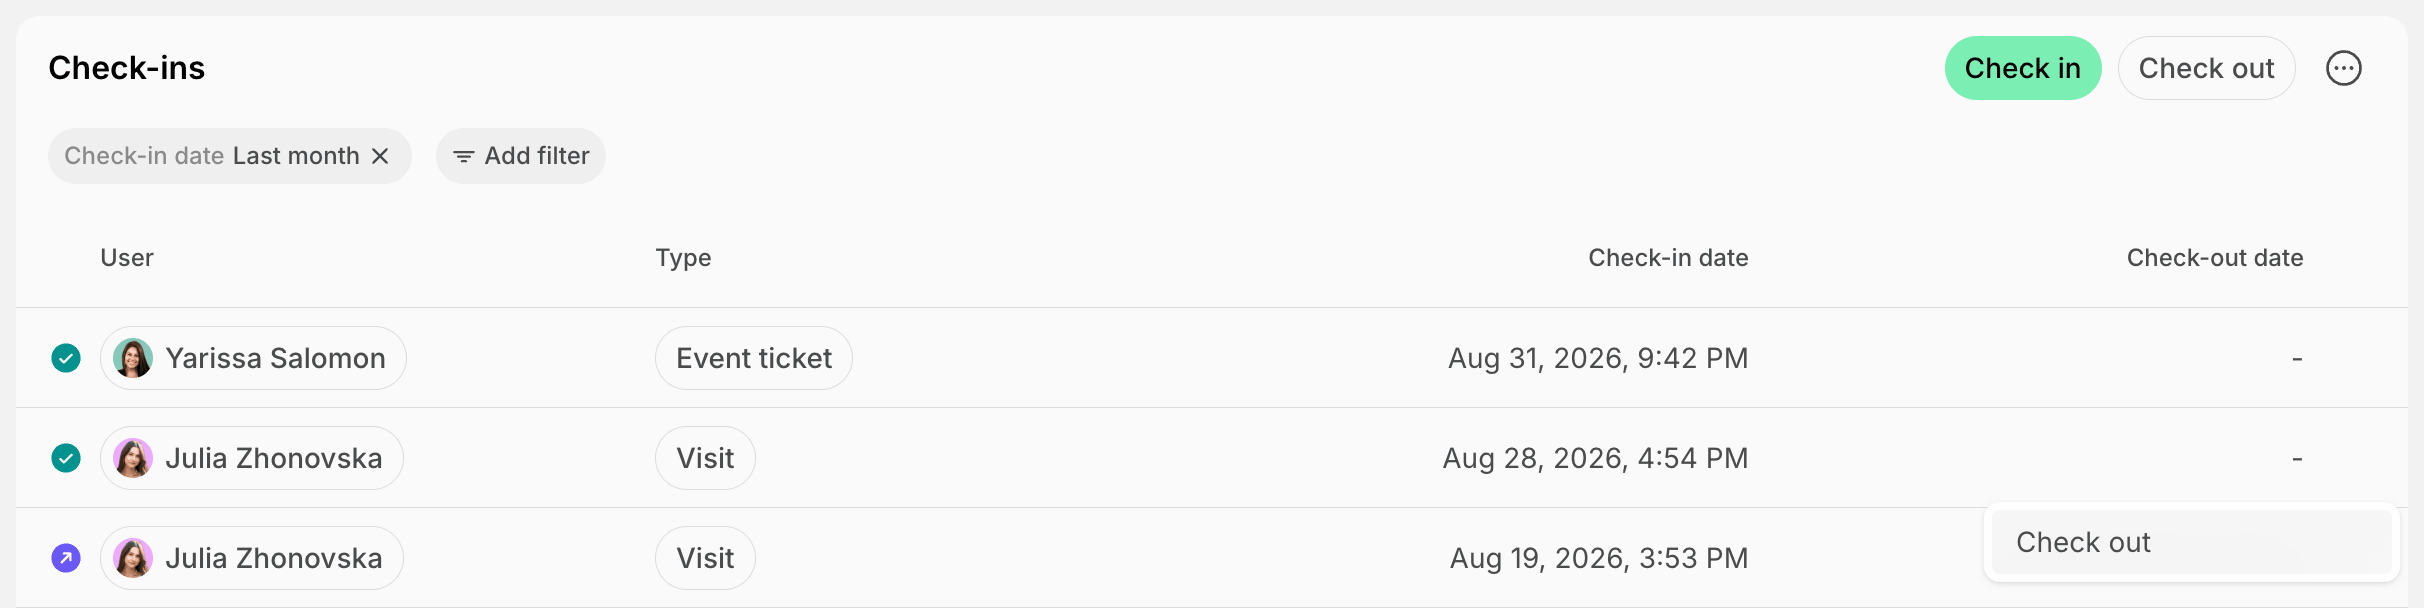
- To work from the code the user shows you, click Check out top right and enter the six-digit code.
Check users out automatically
Users often leave without checking out. To keep the Check-ins page accurate for the next day:- Click the menu (…) next to your location name > Location settings > Front desk > Check-ins.
- Enable the Automatic check-out switch. Users who are still checked in at midnight, in your location’s time zone, are checked out.
- When your location schedule stays open past midnight, for example until 2:00 AM, users are checked out at closing time instead.
- Users who checked in before you enabled it stay checked in until they check out.
- Users who checked in while it was on are still checked out automatically after you disable it.
Track check-ins
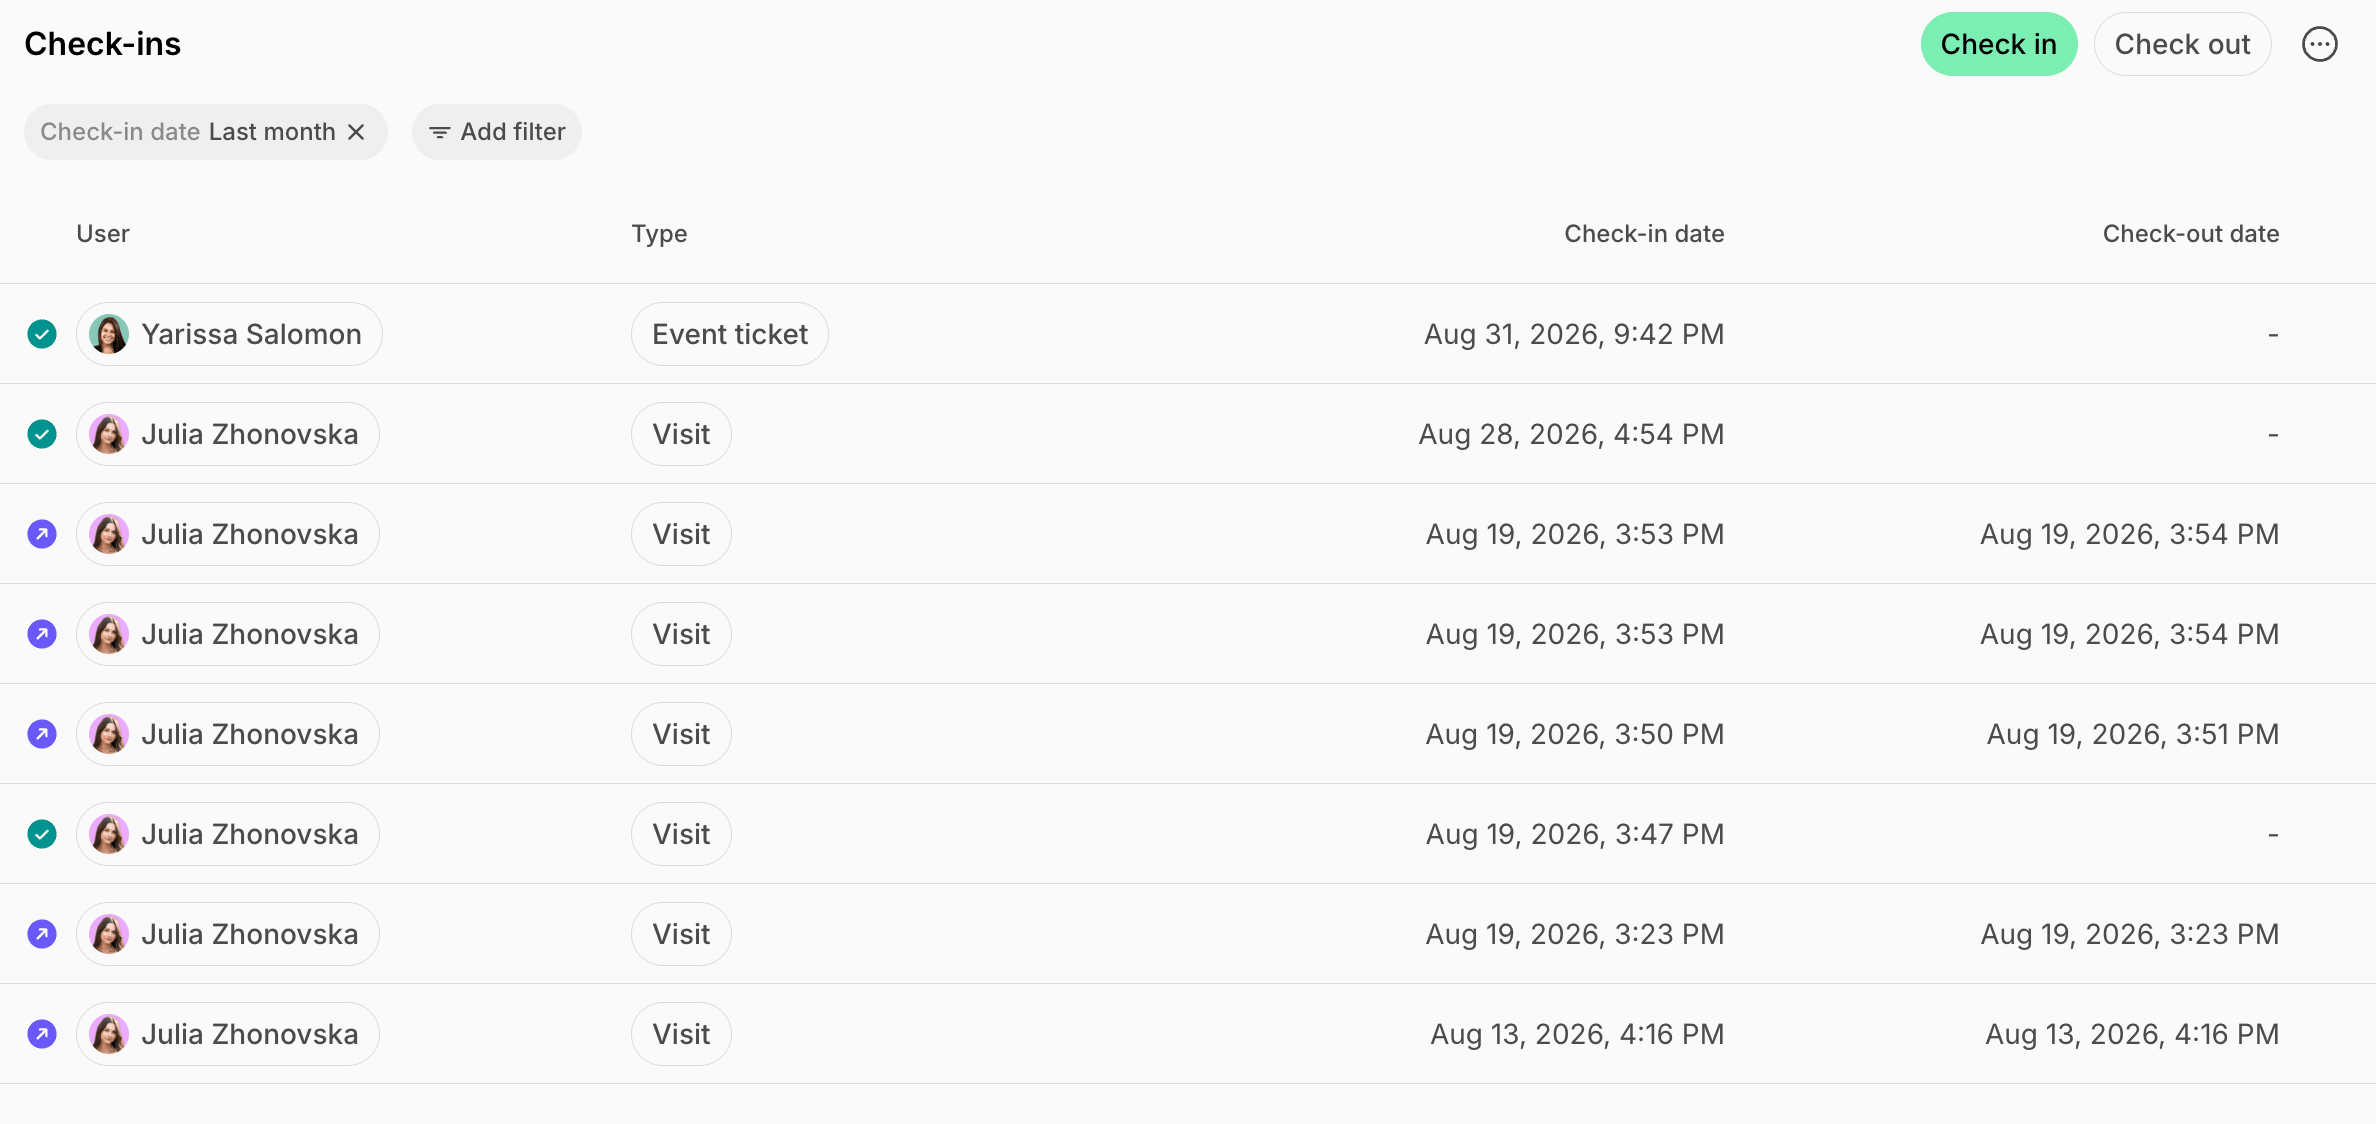
Each row on the Check-ins page is one time a user came to your location, with the time they checked in and the time they checked out. A user who checks in and out several times with the same code gets a row for each time.-
Go to the Front desk > Check-ins page. It opens on everyone who checked in today.
- The admin mobile app lists every check-in, newest first, without filters.
Users with a booking, an event ticket, a visit, or a subscription don’t appear on the page until they check in. To see who is expected, look at the bookings, event tickets, or visits for that day. -
Filter by Status:
- Checked in — in your location now.
- Checked out — has left.
- Filter by Check-in date to move from today to another day or period.
- Filter by Type to look at room bookings, desk bookings, event tickets, visits, or subscriptions on their own.
- Filter by User to see how often and when one user came to your location.
- Click a user’s name to open their profile, or click the type to open the booking, ticket, or visit behind it.
- Look for check-out times in red. They mark users who checked out after their code stopped working, for example, because they stayed longer than they booked.
Export a check-ins report
- Go to the Front desk > Check-ins page and apply the filters you need.
- Click (…) in the top right corner.
- Click Export check-ins > CSV or XLSX.
